
Wednesday, January 30, 2013
Spinach Pasta
I absolutely love this recipe, though I don't make it very often. I usually wait till I don't have much pasta left in the bottom of each box, not enough to make one dish for the whole family. So, I combine both boxes, in this instance you'll notice macaroni and farfalle in the pot. I also throw in whatever little veggie pieces I have left. In this one I happened to have half a bell pepper and I almost always have spinach left overs in the fridge. All you have to do is cut up what veggies you have, equaling about a cup to a cup and a half, I saute mine in a little butter for a minute to a minute and a half before adding 2 TBS butter to the mix and my cooked pasta. Then I add in a tsp and a half of Calvert's seasoning. They sell this at Walmart and it's a very versatile very tasty spice blend. Add a tsp. of salt and stir and you're done. It's healthy and tasty- the kids certainly love it as much as I do. The best part? Sneaking spinach into their diet :)

Make the Most Out of Your Tomatoes!
I read a discussion at GardenWeb about tomato plants recently that was very intriguing. Apparently, a tomato plant can last for years. With a little pruning and care you can keep one indoors. Now, keep in mind that a lot of tomato plants are actually vines and will continue to grow and produce, so they would need a lot of space. I think there's a possibility that it would be more work than it's worth. You'd have to watch out for the chlorine in tap water. Also, tomatoes are full sun plants- they love the sun- and indoors they'll start thinning themselves out to survive so a UV bulb close by would also be a good idea. The soil would also have to be taken into consideration, because you'd have to add fertilizer pretty regularly. What do you guys think? Would having fresh home grown tomatoes year round be worth the work?
Monday, January 28, 2013
Sweet and Salty Recipes
What two things go together better that sweet and salty? I love things that have that combination though I tend not to be a sweets fan at all. Unless it's salty too I'm probably not going to eat chocolate- I just don't like it. Gasp, yup, I never really have. I figured I'd share some sweet and salty recipes for those of you that love it too. Valentine's day is coming up, so why not? Some of these recipes are going to strike you as odd, but seriously, don't knock it till you try it.
Chocolate covered potato chips:

Makes 1 (15 ounce) bag
Ingredients:
1½ cups chocolate chips (milk, semi-sweet, dark is your choice)
1 (15.25 ounce bag) bag ridge-cut potato chips
Directions:
1. Place chocolate chips in a heat resistant bowl and place over a pot of simmering water. (make sure the water doesn’t touch the bottom of the bowl)
2. Completely melt chocolate until smooth and begin dipping the chips, about ½ way.
3. Shake off any excess chocolate and place chips onto a baking sheet lined with wax paper.
4. Allow chocolate covered chips to dry completely before serving.
5. Store in an airtight container for up to 1 week.
NOTE: You can decorate these however you'd like, designs with more chocolate on the top or vary between a white chocolate and milk chocolate (or dark) drizzle, sprinkles, colored (food coloring) or plain white chocolate, sparkly colored or white sugar- be creative.
Chocolate Dipped Pretzels:

NOTE: You can decorate these however you'd like, designs with more chocolate on the top or vary between a white chocolate and milk chocolate (or dark) drizzle, sprinkles, colored (food coloring) or plain white chocolate, sparkly colored or white sugar- be creative.
Chocolate Dipped Bacon:

It sounds unusual, but it’s really delicious.
6 pieces thick cut bacon
8 oz dark or semi-sweet chocolate
Sriracha hot sauce
Cook bacon until crisp. Cool on paper towel to absorb excess fat. Melt chocolate in microwave or double boiler. Dip cooled bacon into chocolate and place on parchment lined cookie sheet. Leave in a cool place until chocolate hardens. Serve with hot sauce.
Rolo Pretzels:

What You’ll Need::

Ingredients:
2 tablespoons light corn syrup
1/4 cup water
1/2 cup heavy cream
1 teaspoon Fleur de Sel
1/4 cup sour cream
1 teaspoon salt
2 tablespoons dark unsweetened cocoa powder
11 ounces quality dark chocolate (60 to 72%), coarsely chopped
1 cup unsalted butter, cut into 1-inch cubes
1 1/2 cups sugar
1/2 cup firmly packed light brown sugar
5 large eggs, at room temperature
2 teaspoons vanilla extract
2. Butter the sides and bottom of a glass or light colored metal 9 x 13 inch pan. Line the bottom with a sheet of parchment paper, and butter the parchment.
3. In a medium bowl, whisk together the flour, salt and cocoa powder.
4. Place the chocolate and butter in the bowl of the double boiler set over a pan of simmering water, and stir occasionally until the chocolate and butter are completely melted and combined. Turn off the heat, but keep the bowl over the water of the double boiler, and add both sugars. Whisk until completely combined and remove the bowl from the pan. The mixture should be at room temperature at this point.
5. Add three eggs to the chocolate mixture and whisk until just combined. Add the remaining two eggs and whisk until just combined. Add the vanilla and stir until combined. Do not overbeat the batter at this stage, or your brownies will be cakey.
6. Sprinkle the flour mixture over the chocolate. Using a spatula, fold the dry ingredients into the wet ingredients until there is a just a trace amount of the flour mixture visible.
7. To assemble the brownie, pour half of the brownie mixture into the pan and smooth the top with a spatula. Drizzle about 3/4 cup of the caramel sauce over the brownie layer in a zigzag pattern, taking care to make sure the caramel does not come in contact with the edges of the pan or it will burn. Use your offset spatula to spread the caramel evenly across the brownie layer. In heaping spoonfuls, scoop the rest of the brownie batter over the caramel layer. Smooth the brownie batter gently to cover the caramel layer.
8. Bake the brownies for 30 minutes, rotating the pan halfway through the baking time, and check to make sure the brownies are completely done by sticking a toothpick into the center of the pan. The brownies are done when the toothpick comes out with a few moist crumbs.
9. Remove the brownies from the oven and sprinkle with an extra 1 1/2 teaspoons Fleur de Sel and 1 teaspoon coarse sugar.
10. Cool the brownies completely before cutting and serving.
Sweet and Salty Caramel Snack Mix:

Sweet & Salty Caramel Snack MixRecipe adapted by Our Best Bites from Southern Living
6 cups graham cracker cereal (like Honey Grahams)
1 cup honey roasted peanuts
1 cup salted cashews or macadamia nuts
1/2 cup butter
1 cup firmly packed brown sugar
1/4 cup light Karo syrup
1 tsp. vanilla
3 cups Pretzel M&Ms (about 1 large bag)
Line a baking sheet with aluminum foil or wax paper and lightly spray with nonstick cooking spray. Set aside.
Toss together the cereal and the nuts in a large bowl and set aside.
In a medium saucepan, combine the butter, brown sugar, and Karo syrup and cook over medium heat, stirring frequently, until it begins to boil. Allow to boil for 2 minutes (3 if you’re at a high elevation) and then remove from heat. Add the vanilla and stir until combined. Drizzle the caramel mixture over the cereal/nut mixture and stir quickly to combine. Transfer to the prepared baking sheet. When the caramel mixture has cooled but isn’t solid yet (just a few minutes), add the Pretzel M&Ms and toss gently to combine. Allow to cool completely before serving.
Chocolate Dipped Peanut Butter Filled Bugels:


Chocolate covered potato chips:
Makes 1 (15 ounce) bag
Ingredients:
1½ cups chocolate chips (milk, semi-sweet, dark is your choice)
1 (15.25 ounce bag) bag ridge-cut potato chips
Directions:
1. Place chocolate chips in a heat resistant bowl and place over a pot of simmering water. (make sure the water doesn’t touch the bottom of the bowl)
2. Completely melt chocolate until smooth and begin dipping the chips, about ½ way.
3. Shake off any excess chocolate and place chips onto a baking sheet lined with wax paper.
4. Allow chocolate covered chips to dry completely before serving.
5. Store in an airtight container for up to 1 week.
NOTE: You can decorate these however you'd like, designs with more chocolate on the top or vary between a white chocolate and milk chocolate (or dark) drizzle, sprinkles, colored (food coloring) or plain white chocolate, sparkly colored or white sugar- be creative.
Chocolate Dipped Pretzels:
Ingredients
- 15 large salted pretzels
- 1 cup white chocolate chips
- Rainbow sprinkles
Directions
- Place the chocolate chips in a microwave safe bowl. Microwave for 30 seconds then stir. Microwave for another 30 seconds and stir again – at this point, the chips should be melted. Keep stirring until they are totally melted and smooth.
- Lay out a piece of wax paper on the kitchen counter. Pour your sprinkles into a small shallow bowl for easy dipping. Dip half of each pretzel in the white chocolate then into the sprinkles. Lay flat on the wax paper to dry. Repeat with remaining pretzels.
Chocolate Dipped Bacon:

It sounds unusual, but it’s really delicious.
6 pieces thick cut bacon
8 oz dark or semi-sweet chocolate
Sriracha hot sauce
Cook bacon until crisp. Cool on paper towel to absorb excess fat. Melt chocolate in microwave or double boiler. Dip cooled bacon into chocolate and place on parchment lined cookie sheet. Leave in a cool place until chocolate hardens. Serve with hot sauce.
Rolo Pretzels:
What You’ll Need::
- 1 bag of rolos
- 1 bag of buttersnap pretzels. You know, the ones that look like little window panes
- Preheat oven to 300 degrees
- Place aluminum foil on a cookie sheet, or grease and flour if you’re out of foil
- Cover cookie sheet in a single layer of pretzels
- Place one rolo on each pretzel
- Place in oven for approx 3-5 min. You just want to warm the candy, and you’ll know they’re ready to come out when the chocolate starts to sweat a bit
- Place one more pretzel on top of each rolo and smoosh it down, so that the two pretzels are stuck together with the rolo
- Allow the candied goodness to cool before serving
- Enjoy!!
Ingredients:
For the caramel filling
1 cup sugar2 tablespoons light corn syrup
1/4 cup water
1/2 cup heavy cream
1 teaspoon Fleur de Sel
1/4 cup sour cream
For the brownie
1 1/4 cups all-purpose flour1 teaspoon salt
2 tablespoons dark unsweetened cocoa powder
11 ounces quality dark chocolate (60 to 72%), coarsely chopped
1 cup unsalted butter, cut into 1-inch cubes
1 1/2 cups sugar
1/2 cup firmly packed light brown sugar
5 large eggs, at room temperature
2 teaspoons vanilla extract
Directions:
For the caramel filling
1. Combine the sugar and corn syrup with 1/4 cup of water in a medium saucepan, stirring carefully so as not to splash the sides of the pan. Cook over high heat until an instant-read thermometer reads 350F or until the mixture is dark amber in color, 6 to 8 minutes. Remove from the heat, and slowly add the cream, and then the Fleur de Sel. Whisk in the sour cream and set aside to cool.For the brownie
1. Preheat the oven to 350 degrees Fahrenheit.2. Butter the sides and bottom of a glass or light colored metal 9 x 13 inch pan. Line the bottom with a sheet of parchment paper, and butter the parchment.
3. In a medium bowl, whisk together the flour, salt and cocoa powder.
4. Place the chocolate and butter in the bowl of the double boiler set over a pan of simmering water, and stir occasionally until the chocolate and butter are completely melted and combined. Turn off the heat, but keep the bowl over the water of the double boiler, and add both sugars. Whisk until completely combined and remove the bowl from the pan. The mixture should be at room temperature at this point.
5. Add three eggs to the chocolate mixture and whisk until just combined. Add the remaining two eggs and whisk until just combined. Add the vanilla and stir until combined. Do not overbeat the batter at this stage, or your brownies will be cakey.
6. Sprinkle the flour mixture over the chocolate. Using a spatula, fold the dry ingredients into the wet ingredients until there is a just a trace amount of the flour mixture visible.
7. To assemble the brownie, pour half of the brownie mixture into the pan and smooth the top with a spatula. Drizzle about 3/4 cup of the caramel sauce over the brownie layer in a zigzag pattern, taking care to make sure the caramel does not come in contact with the edges of the pan or it will burn. Use your offset spatula to spread the caramel evenly across the brownie layer. In heaping spoonfuls, scoop the rest of the brownie batter over the caramel layer. Smooth the brownie batter gently to cover the caramel layer.
8. Bake the brownies for 30 minutes, rotating the pan halfway through the baking time, and check to make sure the brownies are completely done by sticking a toothpick into the center of the pan. The brownies are done when the toothpick comes out with a few moist crumbs.
9. Remove the brownies from the oven and sprinkle with an extra 1 1/2 teaspoons Fleur de Sel and 1 teaspoon coarse sugar.
10. Cool the brownies completely before cutting and serving.
Sweet and Salty Caramel Snack Mix:
Sweet & Salty Caramel Snack MixRecipe adapted by Our Best Bites from Southern Living
6 cups graham cracker cereal (like Honey Grahams)
1 cup honey roasted peanuts
1 cup salted cashews or macadamia nuts
1/2 cup butter
1 cup firmly packed brown sugar
1/4 cup light Karo syrup
1 tsp. vanilla
3 cups Pretzel M&Ms (about 1 large bag)
Line a baking sheet with aluminum foil or wax paper and lightly spray with nonstick cooking spray. Set aside.
Toss together the cereal and the nuts in a large bowl and set aside.
In a medium saucepan, combine the butter, brown sugar, and Karo syrup and cook over medium heat, stirring frequently, until it begins to boil. Allow to boil for 2 minutes (3 if you’re at a high elevation) and then remove from heat. Add the vanilla and stir until combined. Drizzle the caramel mixture over the cereal/nut mixture and stir quickly to combine. Transfer to the prepared baking sheet. When the caramel mixture has cooled but isn’t solid yet (just a few minutes), add the Pretzel M&Ms and toss gently to combine. Allow to cool completely before serving.
Chocolate Dipped Peanut Butter Filled Bugels:
Ingredients
- 1 (7.5 oz) bag of Bugles
- 2 (9.5 oz) bags of Dove Milk Chocolates..use whatever chocolate you most prefer
- 1 cup creamy peanut butter
- 1 cup powdered sugar
- 2+ Tbsp of milk
How to Make
- In a large bowl combine your peanut butter and powdered sugar. Add milk 1 Tbsp at a time until it's smooth. (I used 2 Tbsp)
- Beat until smooth.
- Using a piping bag or a Ziploc with the edge snipped off pipe the peanut butter into the Bugle.
- Melt your chocolate in the microwave for 1 minute on 50% power, stir and repeat for 15 seconds until melted.
- Dip the peanut butter end of the Bugle into the melted chocolate and set on a wax paper lined baking sheet.
- When all are dipped put in freezer until set and ready to eat.
Sweet and Salty Popcorn: AKA: Kettle Corn
4 Tbsp. coconut oil
2 Tbsp. white sugar
2/3 cup popcorn kernels
salt, to taste
Put everything in a tall pot and begin cooking over medium-high heat. Once it starts to bubble, place the lid on it and swirl it around as the kernels begin to pop. You kind of want this part to go fast so the last kernels to pop don't get burned. Quickly pour the popcorn out into a very large mixing bowl and immediately sprinkle with salt and stir until evenly coated.
Chocolate Covered Peanut Butter Ritz Sandwiches
Makes 16
Makes 16
Ingredients:
2 cups milk chocolate chips
½ cup creamy peanut butter
¼ cup powdered sugar, sifted
32 Ritz crackers
2 cups milk chocolate chips
½ cup creamy peanut butter
¼ cup powdered sugar, sifted
32 Ritz crackers
1. Place chocolate chips over a double boiler and melt.
2. Place peanut butter and sugar into a mixing bowl and whisk until smooth.
3. Spread a small amount of the peanut butter mixture onto a cracker and sandwich together with another cracker.
4. Repeat until all the crackers and peanut butter filling have been used.
5. Place crackers onto a parchment line baking sheet and place in freezer for about 30 minutes.
6. Once the chocolate has melted, using a small pair of tongs, or tweezers, dip the chilled peanut butter sandwiches into the chocolate until completely covered.
7. Shake off any access chocolate and place back onto the parchment lined baking sheet.
8. Repeat with the remaining sandwiches and set aside to dry, about an hour.
9. Carefully peel from the parchment and serve.
I've got more, I just think this particular post has gone on too long already. But, other recipes you might consider would be maple bacon donuts, chocolate covered peanuts, bacon chocolate chip biscotti, beer caramel ice cream, salted caramel shortbread cups, salty caramel sauce, strawberry pretzel bars, as you can see the list goes on and on. As always, these are recipes I have saved for my use, but I didn't come up with them, the titles (like all my recipe titles) will take you back to the original recipe I found.
Sunday, January 27, 2013
The Special Spa Party
I'm not going to say why just yet but I've been thinking of a special party I'm going to throw. Again, I can't say why just yet. It will however be a spa themed party and won't take place until it's warm outside. It's going to be a special party thrown for just four girls, counting myself. I've been searching for a long, long time to find ideas for this party and I've noticed that Google has abandoned me. Well, the Internet community as a whole has anyway. There's really not much on spa themed parties for adults. So, as usual, I've mixed in every thing and thought I would share my ideas.That way it will at least be easier for my readers! Oh, and I'm going all out spa for this one so there will be every thing.
Setting the Scene:
I'm going to automatically make our breeze way into the spa area. It's already white and is basically a screened in porch with access to a small deck that would be perfect for laying out to tan. I'm going to move a few small tables out there to hold food and every thing else we're going to need and I'm going to set out several bouquets of fresh flowers in vases and lots of white candles. I'll probably use the "clean laundry" scent. I'll also have four folding lounge chairs out there with little tables of some kind between them for setting drinks and for more candles. In the center of the table I'm going to have one of those small electric water fountains for the sound. Several baskets will be placed in between the chairs to hold magazines of different types. I'm also considering draping white paper streamers from the light in the center of the room out to drape down the wall in a tent like fashion. Any breeze will blow them around and make a really relaxing swaying effect.
The Tables
Table 1. will hold all of our "essentials" for the spa day. There will be stacks and stacks of white towels, jars with cotton balls, lots and lots of nail polish colors, bowls with the pre made face masks in them- ready to slather on, nail polish remover, loofahs for the body scrubs and foot baths, hair remover, nail files, a bowl of cucumber slices soaking in aloe vera gel, a box of teeth whitening strips, Listerine, hair rollers, shower caps, lotions, fake nails, and hair dye (colors pre-chosen by my girls). At the back of this table I'm going to have three crock pots- one for the hair mask, one for stones (hot stone massages) and the last one with hot hand towels. More on those later.
Table 2. Will hold all of our snacks. I like the idea of cupcakes, which I'll order from GiGi's- they're an amazing place close to home, small tea sandwiches, fruit and veggie trays with varying dips, and -if I can find the fountain or fondue pot to borrow- chocolate fondue with cut up fruits and sponge cake for dipping. Drinks will be tea, lemonade, smoothies and bottled water.
The Attire
I'm going to have a white terry cloth robe and slippers or flip flops for each girl. The robes are 12$ at walmart. I'm also going to request that they have a nice outfit for afterwards but a bathing suit of some kind for the spa part and maybe swimming at the local water park before hand.
The Activities
1. As I hinted earlier we're going to do a hot stone massage. I can't afford for a masseuse to come to the house so I'm going to get some rounded smooth stones (these can be found in your yard, creek/stream bed, or craft store) and place them in a crock pot of water, placed on warm. The stones should be hot but not too hot to handle. If you have problems holding it, it's too hot. Once your stones are at the desired temperature, place them down the center of the persons back and cover with a towel. When they grow cold, repeat the process.
2. Facials. I'm still debating about this. I know I definitely want to do a mask. I just haven't decided what mask to do yet. I've also considered purchasing a chemical peel OTC to use before the masks. I can make my own mask or I can purchase some I saw at Walmart in little individual packets.
3. Hair masks and treatment. These can be made out of sooo much stuff it's crazy. The ones I've heard the most about are the avocado hair masks, mayonnaise hair masks, and just plain conditioner. I will include links to the avocado and mayo masks at the end of the post. Now, I really just can not find the link to the article I read about using hair conditioner. I'll probably end up using that one. You put the conditioner in your hair, massage it in and let it sit for ten minutes. Dry hair will soak it up so keep applying and waiting the ten minutes until you hair just isn't soaking it up any more. At that point put on a shower cap and let it sit for about thirty minutes. After the thirty minutes is up, use a blow dryer on a low setting to heat up your scalp gently while massaging. Then rinse. Just so you know, I'm using the crockpot (or blow dryer) to heat the hair masks because it opens up your pores and really gets into your scalp. Before- and I probably should have mentioned this first- you want to start with clean hair that has been rinsed with Listerine. The Listerine also needs to be rinsed with just plain water and the hair be dry before using the hair mask. Why Listerine? I'm not crazy, I promise, dermatologists really have recommended this. Listerine does not dry out your hair or make it sticky or give it split ends from doing this every once in a while. It's good for your scalp, removes build up from your hair (helping the mask work better), hits dandruff harder than most dandruff shampoos (some even call it a cure when done regularly), stimulates hair growth and kills lice. Yes it does, look it up. I've done it. It made my hair and scalp feel amazing. No it didn't make my hair smell either.
4. Mani/Pedi's. Manicures for sure, because everyone loves manicures. None of us have nails, except for maybe one (I'll have to look) so I'm going to be providing every thing including the fake nails, to have manicures. We can either do these ourselves or do them for each other. By the way, did you know you can get fake toe nails too? Yeah, sure can. I think it's neat because mine are ugly. I'm seriously considering those as well.
5. Hair removal. I'm still not sure if I'm doing this one or not. I am seriously considering it though and having something like veet hair removing cream there for our legs. Not sure yet though. If I do it would have to be done about the time we do the hair masks so that everyone can go rinse both at the same time.
6. Foot soak. At the end of each chair I'm going to have a small plastic tub. I'm not sure what they're exact name is really but they're like the small storage tubs you see on those racks for kids play rooms. They're just big enough for one person's feet and are really cheap. I'll include the recipe for the foot soak solution at the bottom as well. To add my own creative touch I'm going to personalize the tubs with each girl's name so they can use it to hold all their little left over and take home stuff.
7. Now this one is my favorite. I'm going to do hair cuts, dye and style with makeup. I have a friend who will come over to do these pretty cheaply and another friend who works in a salon where I could go really cheaply. I'll most likely end up doing them at home. That's partially why I'm going to have the foam curlers available and my straightener, that way they can get their hair done however they like.
8. Dinner and Shopping. Now, without being too obvious as to who is invited to this party (can't spoil the surprise) two of these girls have never had sushi. So we're going to go out to dinner at a local sushi restaurant and I'm going to get them to try it. I may have to hold one of them down lol. The shopping will be to purchase something very specific and I can't say what without giving away the reason why.
That's it for the party, it's really not as expensive as it sounds. It's going to be awesome though. What do you guys think? Comment and follow.
As promised, more helpful links:

Beautiful With Brains Foot Soak Recipes (I'm using the Softening Foot Soak for this party). There are three on that page.

Arctida's Creations DIY avocado hair mask recipe

How to apply a mayo hair mask at IKnowHair.

How to do an all out hot stone massage at livestrong.

DIY hot stone massages and where I got my ideas at, from tipnut.
Supplies list: These are just examples, you may find cheaper elsewhere or homemade recipes that do better.
Setting the Scene:
I'm going to automatically make our breeze way into the spa area. It's already white and is basically a screened in porch with access to a small deck that would be perfect for laying out to tan. I'm going to move a few small tables out there to hold food and every thing else we're going to need and I'm going to set out several bouquets of fresh flowers in vases and lots of white candles. I'll probably use the "clean laundry" scent. I'll also have four folding lounge chairs out there with little tables of some kind between them for setting drinks and for more candles. In the center of the table I'm going to have one of those small electric water fountains for the sound. Several baskets will be placed in between the chairs to hold magazines of different types. I'm also considering draping white paper streamers from the light in the center of the room out to drape down the wall in a tent like fashion. Any breeze will blow them around and make a really relaxing swaying effect.
The Tables
Table 1. will hold all of our "essentials" for the spa day. There will be stacks and stacks of white towels, jars with cotton balls, lots and lots of nail polish colors, bowls with the pre made face masks in them- ready to slather on, nail polish remover, loofahs for the body scrubs and foot baths, hair remover, nail files, a bowl of cucumber slices soaking in aloe vera gel, a box of teeth whitening strips, Listerine, hair rollers, shower caps, lotions, fake nails, and hair dye (colors pre-chosen by my girls). At the back of this table I'm going to have three crock pots- one for the hair mask, one for stones (hot stone massages) and the last one with hot hand towels. More on those later.
Table 2. Will hold all of our snacks. I like the idea of cupcakes, which I'll order from GiGi's- they're an amazing place close to home, small tea sandwiches, fruit and veggie trays with varying dips, and -if I can find the fountain or fondue pot to borrow- chocolate fondue with cut up fruits and sponge cake for dipping. Drinks will be tea, lemonade, smoothies and bottled water.
The Attire
I'm going to have a white terry cloth robe and slippers or flip flops for each girl. The robes are 12$ at walmart. I'm also going to request that they have a nice outfit for afterwards but a bathing suit of some kind for the spa part and maybe swimming at the local water park before hand.
The Activities
1. As I hinted earlier we're going to do a hot stone massage. I can't afford for a masseuse to come to the house so I'm going to get some rounded smooth stones (these can be found in your yard, creek/stream bed, or craft store) and place them in a crock pot of water, placed on warm. The stones should be hot but not too hot to handle. If you have problems holding it, it's too hot. Once your stones are at the desired temperature, place them down the center of the persons back and cover with a towel. When they grow cold, repeat the process.
2. Facials. I'm still debating about this. I know I definitely want to do a mask. I just haven't decided what mask to do yet. I've also considered purchasing a chemical peel OTC to use before the masks. I can make my own mask or I can purchase some I saw at Walmart in little individual packets.
3. Hair masks and treatment. These can be made out of sooo much stuff it's crazy. The ones I've heard the most about are the avocado hair masks, mayonnaise hair masks, and just plain conditioner. I will include links to the avocado and mayo masks at the end of the post. Now, I really just can not find the link to the article I read about using hair conditioner. I'll probably end up using that one. You put the conditioner in your hair, massage it in and let it sit for ten minutes. Dry hair will soak it up so keep applying and waiting the ten minutes until you hair just isn't soaking it up any more. At that point put on a shower cap and let it sit for about thirty minutes. After the thirty minutes is up, use a blow dryer on a low setting to heat up your scalp gently while massaging. Then rinse. Just so you know, I'm using the crockpot (or blow dryer) to heat the hair masks because it opens up your pores and really gets into your scalp. Before- and I probably should have mentioned this first- you want to start with clean hair that has been rinsed with Listerine. The Listerine also needs to be rinsed with just plain water and the hair be dry before using the hair mask. Why Listerine? I'm not crazy, I promise, dermatologists really have recommended this. Listerine does not dry out your hair or make it sticky or give it split ends from doing this every once in a while. It's good for your scalp, removes build up from your hair (helping the mask work better), hits dandruff harder than most dandruff shampoos (some even call it a cure when done regularly), stimulates hair growth and kills lice. Yes it does, look it up. I've done it. It made my hair and scalp feel amazing. No it didn't make my hair smell either.
4. Mani/Pedi's. Manicures for sure, because everyone loves manicures. None of us have nails, except for maybe one (I'll have to look) so I'm going to be providing every thing including the fake nails, to have manicures. We can either do these ourselves or do them for each other. By the way, did you know you can get fake toe nails too? Yeah, sure can. I think it's neat because mine are ugly. I'm seriously considering those as well.
5. Hair removal. I'm still not sure if I'm doing this one or not. I am seriously considering it though and having something like veet hair removing cream there for our legs. Not sure yet though. If I do it would have to be done about the time we do the hair masks so that everyone can go rinse both at the same time.
6. Foot soak. At the end of each chair I'm going to have a small plastic tub. I'm not sure what they're exact name is really but they're like the small storage tubs you see on those racks for kids play rooms. They're just big enough for one person's feet and are really cheap. I'll include the recipe for the foot soak solution at the bottom as well. To add my own creative touch I'm going to personalize the tubs with each girl's name so they can use it to hold all their little left over and take home stuff.
7. Now this one is my favorite. I'm going to do hair cuts, dye and style with makeup. I have a friend who will come over to do these pretty cheaply and another friend who works in a salon where I could go really cheaply. I'll most likely end up doing them at home. That's partially why I'm going to have the foam curlers available and my straightener, that way they can get their hair done however they like.
8. Dinner and Shopping. Now, without being too obvious as to who is invited to this party (can't spoil the surprise) two of these girls have never had sushi. So we're going to go out to dinner at a local sushi restaurant and I'm going to get them to try it. I may have to hold one of them down lol. The shopping will be to purchase something very specific and I can't say what without giving away the reason why.
That's it for the party, it's really not as expensive as it sounds. It's going to be awesome though. What do you guys think? Comment and follow.
As promised, more helpful links:
Beautiful With Brains Foot Soak Recipes (I'm using the Softening Foot Soak for this party). There are three on that page.
Arctida's Creations DIY avocado hair mask recipe
How to apply a mayo hair mask at IKnowHair.
How to do an all out hot stone massage at livestrong.
DIY hot stone massages and where I got my ideas at, from tipnut.
Supplies list: These are just examples, you may find cheaper elsewhere or homemade recipes that do better.
- 3/4 sleeve terry bath robe, $12 at Walmart
- acrylic toenails at walgreens for 5.49
- lumbar massager for 7.50 at walmart
- 96 unscented votives at walmart for 29.97
- Kiss brand fake nails at walmart for 5.97
- 500 ft of white streamers from oriental trading for 4.50
- TRESemme Nourishing Rituals Rejuvenating Mud Masque for 4.48 at Walmart
- Olay Microabrasion Peel kit for 22.44 at Walmart
Saturday, January 26, 2013
Changes
Sorry I haven't posted lately, things have been super hectic. I still haven't heard back about the promotion from work, as I missed my scheduled meeting to find out whether or not I got the job Friday (huge ugly ice storm). They won't be back in to let me know until Monday. I also can't get my paycheck till Monday. Let me tell you, this sucks. I have a really busy to do list including getting my taxes filed, day care (finally) taken care of completely, big furniture moving, and more garden planning as well. I have lots of meetings and paper work that needs to be filed at the office and lots that needs to be done at the house- as usual. However, I did manage to do every single piece of laundry Brandon and I own as well as getting it all hung on hangers and put where it goes in the closet. I think I'll file my taxes online tonight sometime, as well as the FAFSA.
That's right, the FAFSA. I'm seriously considering going back to school and I'm going to see if I can't get Brandon to go too. I'm going to check and see if I can get school covered through an accredited online program (through a state university of course) and I'm considering Penn State- with a simple associates degree. It all depends on how much the FAFSA will help me out with ha ha. I've also decided to completely get back in shape and quit smoking. I didn't have a Mountain Dew all day yesterday and only one today. Considering that I normally drink six in a 24 hour period I think I'm doing pretty well. I've already lost five pounds just from laying off the snacks. That's really not enough for me though. I feel the need to get thinner and I think I'd feel so much better and so well rested more than I do. As for the smoking... I'm not sure how I'm going to accomplish that.
I've also been talking to a debt consultant to help me with my credit score. It's 378 right now by the way. For those of you that don't know what that means, I'll explain. If I were to be on fire the bank would not loan me the water to put me out. It's that bad. Once I was told, while speaking with a loan officer, that if I were to apply for a five dollar loan with my mother's house as collateral that I would still be denied. That's bad. That's really bad. So now you guys see why I use the word poor a lot. Because I am. I'm working on it with these people though. Normally I wouldn't go for a place like this because I consider most things like this too good to be true and a hoax. However, a good friend (and coworker) of mine has used them and he just raves about how awesome they were for him. Another coworker used them and almost doubled her score which was as bad as mine. You can't ever beat reviews from people you know! I'll definitely keep you guys updated on that. I'm also going to work on paying off other debts and such. Oh and the weight loss, I'll definitely keep you updated on that as well... 2013 is going to be a good year. Because I said so.
Tuesday, January 22, 2013
Part of My Garden Plans
Spring is coming up fast and I'm getting really excited. It's almost time to start the veggie garden and that makes me so happy. I feel like, somehow, my father figured out how to brainwash me in my younger years. My brother and I got up early almost every single morning to work on our own large vegetable garden at home. We had several acres of fruits and veggies and it was a long time consuming task that I hated with a firey passion. Now that I'm an adult and dad is gone I still feel the need every year to get out and do something. I can't help it, it's like an uncontrollable itch. Brainwashed.
We sold our vegetables back then, that's why we had so much to do. I don't intend on selling mine though I will do some canning and a little giving away of what I grow. I just don't have the time or manpower to go quite that big. I am going big though. Go big or go home ha ha. I've been looking all over at seed varieties and prices and studying up on the new plants I want to grow. I'm going to do something a little different this year and include artichokes, asparagus and okra in my garden. Mainly because these are things we enjoy here that are kind of expensive. Artichokes are about three dollars a piece at my local grocery store and I feel that that is outrageous. I'd much rather grow them and can the hearts for use during the colder months- canning only what I don't steam and eat with a cup of melted butter (yum!).
As for my other plants I've decided to go strictly heirloom. For those of you that don't know the heirloom varieties of fruits and veggies are the oldest seeds/plants that haven't been changed genetically for mass production. This means that an heirloom plant or seed is not a hybrid. That means that you can take the seeds from the heirloom plants and save them for next year and still get the exact same species, you won't get that from the grocery store. Heirloom varieties are often much more flavorful as well. I love the idea of only having to buy seeds once. Let's think about this for a second. The average ear of corn has roughly 700 kernels on it. The average stalk of corn can produce between 2-4 ears (this varies by species and care). One kernel (or seed) of corn can grow one corn stalk. It's not garunteed that every kernel will grow but your chances are good. I'll let you do the math. FYI: Seeds store best in a bag (plastic or paper) and ideally in your refridgerator. They can last up to three years. Using this method you can give seeds away as gifts!
Here's my list:
okra (clemson spineless or dwarf long pod)
asparagus (mary washington)
artichokes (green globe)
green beans (KY wonder)
bush beans (red kidney)
lettuce (loose leaf haven't decided on type yet)
tomatoes (early girl, beefsteak, and brandywine)
yellow squash (early summer crookneck)
zucchini (black beauty)
carrots (danvers are my personal fave)
broccoli (atlantic)
cabbage (all season)
cauliflower (snowball)
celery (tendercrisp)
cucumber (straight 8)
onions (unsure probably vidalia)
peas (progress no.9 and sugar snap)
Bell Peppers (california wonder and sunbright yellow)
Hot peppers (cayenne jalapeno and habanero)
Spinach (noble giant)
Herbs:
Basil (italian large leaf)
chives
Dill (boquet)
oregano (italian)
Parsley (flat green leaf italian)
summer savory
thyme
We have a huge back yard for being as close to the city as we are, and it's fenced it. I'm going to utilize that fence to the best of my ability, of coursse. I'll use part of it as a trellis for the pole beans. Kentucky Wonder beans are fast growing and very heavy. They will definitely need the fence for support. I'm also going to grow corn and okra along the fence. I considered growing the beans with the corn but then decided I didn't want my beans to drag down my corn. My sun sensitive plants like my lettuce and leafy greens, artichokes,and cauliflower closer to the taller plants and the more the plant loves the sun the further into the yard it will go, most likely with the peppers at the end. Some will also be in containers on our porch. I'll map it out and let everyone see later.
Monday, January 21, 2013
Gardening 101 Plants and Soil
| Want beautiful soil like that? compost! |
I love to grow things. I've never been sure if I have a green thumb or if I have only been good at it because of what my late father taught me. Dad came from a different style of living where gardening was a way of not only survival but life. It's just what they did. If I were to add it up I would say that my dad grew about five acres or more each year of different crops. We grew tomatoes of all kinds, silver queen, hickory king, peaches and cream, and several other types of corn. Along with that Dad grew sweet potatoes, red (new) potatoes, Kentucky runner green beans (they are very hardy), bell peppers, yellow squash, cucumbers, watermelon, cantaloupe, honeydew, and the list goes on but those were the regulars. Oh, and the strawberries. The strawberries were great. There's just something unappealing and tasteless about the grocery store strawberries. It's just too far from being the same thing.
If you're wanting to start your own garden my biggest piece of advice would be to study up on the specific plants you want to grow. For example, early girl tomatoes and Roma tomatoes are not the same kind and are often used for different purposes. We grew both and I've found that people just really preferred to can with romas. Early girls are amazing on sandwiches. The type of cages you would use are completely different as well. We grew a certain kind of tomato for a long time. I'm not sure of the exact breeds but we called them all German tomatoes. They were heirloom, of that much I'm sure. Most were a dark blush pink, some were purple, and some were yellow with pink stripes coming out. I believe these were called Mr. Stripey. These tomatoes are awesome. They're big, the flavor can't be beat and they produce more meat than flesh, being good for just about anything except maybe juicing. These German tomatoes however, were completely different from romas or early girls. They. Were. Huge. You know those little wire tee pee style tomato cages you can get at any hardware store? Yeah, forget those. These tomatoes will outgrow those wimpy little cages fast and snap them into pieces or bend them over completely. We tried every thing, but they were just too heavy. One day dad got fed up with them and went to the local hardware store and bought some square fencing. We spent all day rolling and cutting the fence into souped up tomato cages. We never had to buy another again. However if you have limited room this is not the solution for you, these cages are large and need a lot of storage space.
I suppose if you were wanting to start your own garden I could give you a few basic ideas. The first thing you would need are tools and good soil. The seeds or plants are no good if the soil is no good. You can order a soil test kit online or you could do it the old fashioned way. Dig up some dirt and put it in a mason jar (a little less than half full), fill with water and shake it up. Shake it really well. Then walk away and let it settle for a while. You want your dirt to be in three pretty close to even layers when it settles. The three different layers are sand, clay, and the topsoil which is a lot like compost. You can test to see if your soil is acidic or alkaline using this method:
- Scoop some soil into a container. Then, add a half-cup of vinegar. If the soil bubbles or fizzes, it's alkaline.
- If there's no reaction, scoop a fresh soil sample into a second container. Add a half-cup of water and mix. Then, add a half-cup of baking soda. If the soil bubbles or fizzes the soil is highly acidic.
- Amend your soil with wood ash or lime, if it's acidic. Amend your soil with sulfur or pine needles, if it's alkaline.
Other Useful Links:
 Fine Gardening- A post about using wood ash to improve the quality of your soil.
 Traditional Fools- steps on building your soil to improve gardening success.
 Scout's Stitches- stretching garden soil.
 Plant Care Today- How to improve garden soil.
Garden Tools
Garden Tools
Having your own vegetable garden can save you a lot of money. The veggies are of higher quality, better taste and you know how they were grown. Not to mention if you're a "prepper" like me, you'll have plenty of produce to can and stock up for food stockpiling. If you're planning on starting your own garden you're going to need tools to prepare your soil. I've already went over testing your soil, and compost. Now we're going to talk about tools. Tools are very important to gardening and what you tools you'll need depend on what type of garden you're going to have.
For flat bed gardens (just a turned over piece of soil) I highly reccomend investing in a small tiller. However, you're going to want to keep costs as low as possible. After the initial investment with the first garden you'll probably break even financially. However, you will have the satisfaction of knowing exactly what was used in growing your food and the taste can't be beat. I'm personally spoiled on home grown and I feel that the majority of fresh fruits and veggies you get at the grocery store have little to no flavor compared to home grown. If you only buy organic and you grow your garden organically you will, most likely, save money.
Choosing what tools you'll need will be, in my opinion, your biggest expense. You can knock down that cost by putting more work into what you're doing. On the other side of that coin you can make things a little easier by purchasing better tools. It's the difference, price wise, in a tiller and a cultivator.

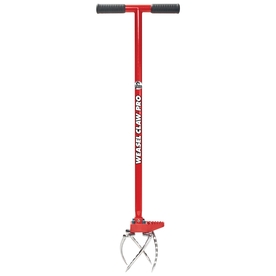
3. The tiller. Ok, so this could go in so many directions. This beauty is the Garden Weasel brand sold at Lowes. I've never tried this one before. I can't say which one I tried because I had to modify it and I don't want to give any negative reviews. Let's just say that if you purchase one that has a pin holding the head onto the handle- replace that pin with a small bolt and nut- it will break. This tiller is hand held and will cost you around 25$ but you can buy the much more expensive motorized tiller at varied prices. The handheld version will do the job though. If you have one you may not want to purchase the mattock at all, though I still would to make it easier on whichever tiller you purchase. A tiller basically chews up soil, turning it fine and nice, and wonderful. However, if you don't prepare the soil by at least breaking it up before hand and just stick the tiller down into compact soil it's tiller abuse. It's hard on it and not a good way to treat your investment.
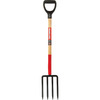 4. The hay fork, or compost fork. You will need this tool to turn your compost- helping it decompose faster.
Any other tools you would need are simple at this point, a small trowel (hand shovel) for transplanting, a water bucket for watering and maybe a water hose. There's also of course a hat for protection from the sun, and gloves. With these tools and a little hard work you should have no problem getting your garden ready for planting. If you need any thing else you'll learn as you go. There are no set rules to gardening tools, it all depends on the gardener, the plants, and the soil. For instance if your soil is rocky you'll need a rake, if it's not, you won't ever use it much. I really can't stress enough how much this is tailored to you, what you're growing and what you are capable of.
So get out there and grow your own vegetables, you'll love the feeling of accomplishment you get, the money you save and the very best part the taste!
So get out there and grow your own vegetables, you'll love the feeling of accomplishment you get, the money you save and the very best part the taste!
Sunday, January 20, 2013
Just an Update on Me
I haven't been feeling well lately. I think I've had the flu. I probably still have it but I'm feeling better a little bit at a time. It sucks, but I'll live. I haven't been posting any thing new, all my recent posts have been drafts that I had saved back for an occasion just like getting sick. I hate being sick- but it doesn't happen often.
I've been trying to rehabilitate our bathroom... but it doesn't seem to be working too well. I can't knock down any walls or afford to change the tub sink or toilet (which are blue by the way) so there's not a lot I really can do. All I know is that my saving efforts are failing and I feel like it's time to just put the whole thing out of it's misery. Not to mention I've seen closets bigger than this bathroom! Seriously, we have a black rug for the toilet and a squarish one for the floor, they don't both fit without overlapping. I painted the ugly plastic and MDF vanity (just imagine that...) black. I obviously can't sand and stain and I don't like brown paint. I don 't like anything that pretends to be wood ha ha. I also managed to take out the shower door rails. The previous renters had taken out the shower doors but the rails they had been on were still there... the doors had frosted swans on them so I'm so glad they're gone). Let me just say that if you have shower doors you should take them out. I'll be sure to post pictures later when I'm closer to finishing this business. The side bars came out easily, with no damage or anything, the bottom bar that the door sat on was a little harder but when I got it up I was shocked. It was revolting how much nasty stuff was under these shower doors. It's not like I don't clean them- they looked fine from the outside- and they seemed well caulked. Somehow though, water had gotten trapped beneath them (the caulk was helping hold it in too!?) and had all kinds of nastiness. Yes, I'll be posting pictures of that too! I'll never have shower doors again.
I'm also excited about spring coming up. I can't wait to get my garden beds made. Since this is a new place I'm not sure what I'm going to make them out of either. Normally when I plant things I either use planters or just straight in the ground. I've never done raised beds but I'm really considering one this year for the veggies so I can incorporate my beautiful compost easily.
I'm determined that this year is going to be a good year. I've been thinking about making a lot of changes in my life recently. There's going to be another post on that later. It's not just a New Years resolution kind of thing or a birthday kind of thing (was the 14th). I just am so tired of how my life has been going. There are a lot of things that really need to change for me to get what I want done. I'm just sick of it. I'm not angry, I'm just tired. I guess that's the only way to put it. I'll have to do some more thinking first on what I want to change. I don't like saying I'm going to do something and not do it. So, when I've decided what needs to change I'll let everyone else know. Also, keep checking back for a big secret announcement soon. OH! Also, Monday (tomorrow) I'll finally find out whether or not I got the management type position for the company I work for! I'm so excited. I hope I get it but you never know, a lot of people applied.
Saturday, January 19, 2013
More Fun Kid Science
I really do love doing science projects with my kids, we keep it simple so that they can fully understand the process. They're always amazed with the things we do. I don't just do science projects with the kids either, though they are my favorite because to them, it's like magic. Really from a psychological point of view, Bubba tends to enjoy the science projects and chemical reactions a bit more than the girls do. To me, that's evidence in itself as to why boys do tend to do better than girls in Science class. It's just more understandable to them I suppose. Maybe it's just that they're more into blowing stuff up and making messes. Snakes and snails and puppy dog tails and all that. Several of my friends have really liked the other kid science projects I've posted and linked to so I thought I would do another one, here it is.
Bouncy Balls:
Acid Based Reaction to Blow Up a Balloon:

Density Project:
Hot/Cold Balloon:
For this project you're learning how the air around us will expand and contract when exposed to hot and cold conditions. You could even use the balloons you blow up from the project above. Your tires do the same thing by the way, that's why it's important to know how to air up your tires.
First you'll need to measure your balloon at room temperature. A fabric measuring tape works best for this, which you can find in your sewing/fabric aisles- that's what they're normally used for. Mark down your measurements throughout the project.
Expose your balloon to heat first, a hair dryer will work perfectly for this, just point the blow dryer at the balloon for a few minutes, allowing it to heat up. Be careful with this, it may pop with the expansion. Quickly measure the balloon and mark down the measurement- it should have gotten larger.
Then, using the same balloon, pop it in the freezer for let's say 15 minutes. Take it out and quickly measure it again, it should be smaller. Then allow it to sit at room temperature for 30 minutes to an hour to make sure it's completely back to it's original temperature and measure again. Is it the same size as your first measurement? Discuss your findings with your child.
Bouncy Balls:
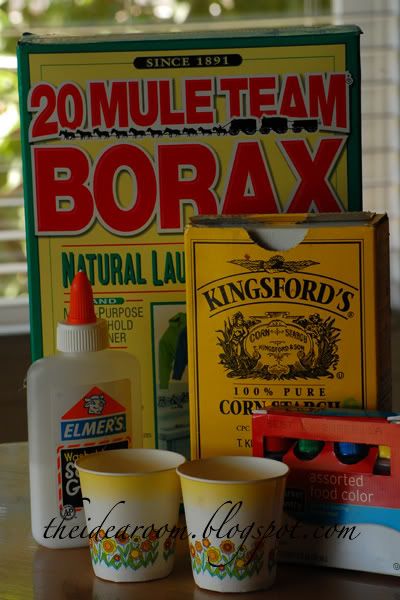
- 1/2 tsp Borax (found in laundry section) You may have some left over if you made the laundry detergent.
- 2 TBS warm water
- 1 TBS corn starch
- 1TBS glue (clear glue makes a see transparent ball and white glue makes an opaque ball)
- 2 small mixing bowls or cups
- a stirring stick (plastic spoon)
- food coloring (optional)
Acid Based Reaction to Blow Up a Balloon:
- baking soda
- vinegar
- small funnels
- empty bottle like a soda or water bottle

Density Project:
- 1/4 c. dish washing liquid
- 1/4 c. vegetable oil
- 1/4 c. vinegar
- 1/4 c. karo syrup
- 1/4 c. honey
- 1/4 c. rubbing alcohol
Hot/Cold Balloon:
For this project you're learning how the air around us will expand and contract when exposed to hot and cold conditions. You could even use the balloons you blow up from the project above. Your tires do the same thing by the way, that's why it's important to know how to air up your tires.
First you'll need to measure your balloon at room temperature. A fabric measuring tape works best for this, which you can find in your sewing/fabric aisles- that's what they're normally used for. Mark down your measurements throughout the project.
Expose your balloon to heat first, a hair dryer will work perfectly for this, just point the blow dryer at the balloon for a few minutes, allowing it to heat up. Be careful with this, it may pop with the expansion. Quickly measure the balloon and mark down the measurement- it should have gotten larger.
Then, using the same balloon, pop it in the freezer for let's say 15 minutes. Take it out and quickly measure it again, it should be smaller. Then allow it to sit at room temperature for 30 minutes to an hour to make sure it's completely back to it's original temperature and measure again. Is it the same size as your first measurement? Discuss your findings with your child.
New Kitchen Storage
We have one of those kitchens that has a lot cabinets...or appears to, but there's no real storage. This irritates me, I feel like storage is the most important part of a kitchen. Not to mention the big empty wall on one side... it just feels like it's staring at me. I have to do something with it, and because we've turned the formal dining room into a "hang out" area for the adults I don't have anywhere to put a table- if I had one.
I also feel like there's a real importance to eating as a family, together. I did and every reasonably sane person that I know did. There are studies showing that children who share meals with their family tend to also do better in school and life in general. So obviously, there is something behind the idea of eating together- even if it is "old fashioned". It's also a great way to build communication in the family because everyone is together at once.
This is what I started out with, it's a workbench style table that has served us well for many purposes but has been sitting in the garage collecting dust for quite some time. As you can see, it's not in the best of shape though it is very sturdy.

The first thing I did was use a plastic paint scraper and quickly scraped all of the dirt and loose paint off of the top. That took quite some time but was definitely worth it. Then, I found some black satin paint and repainted the top. Right as I was getting close to the opposite end with the paint I felt like it needed an extra something and remembered the chalkboard spray paint I had in the closet, so I broke it out and finished the last one and a half feet with the chalkboard paint.


So what do you guys think? It only took about two hours to complete, and it's almost doubled the storage we have. I'm so in love with it!
I also feel like there's a real importance to eating as a family, together. I did and every reasonably sane person that I know did. There are studies showing that children who share meals with their family tend to also do better in school and life in general. So obviously, there is something behind the idea of eating together- even if it is "old fashioned". It's also a great way to build communication in the family because everyone is together at once.
This is what I started out with, it's a workbench style table that has served us well for many purposes but has been sitting in the garage collecting dust for quite some time. As you can see, it's not in the best of shape though it is very sturdy.
The first thing I did was use a plastic paint scraper and quickly scraped all of the dirt and loose paint off of the top. That took quite some time but was definitely worth it. Then, I found some black satin paint and repainted the top. Right as I was getting close to the opposite end with the paint I felt like it needed an extra something and remembered the chalkboard spray paint I had in the closet, so I broke it out and finished the last one and a half feet with the chalkboard paint.
You can see in the above picture where the black paint ends and the chalkboard begins. It's a good sized message board for the house. The bottom half was still ugly though and I didn't have the tools nor the supplies to make doors. Soooo, I got an old shower curtain that was hiding in the back of the closet and started cutting it up. Luckily the shower curtain was exactly double the length of the table so I was able to cut in half and then into several panels. I just used hot glue around the edges to attach the curtain. But, again, it still looked like it needed something. That's when I saw the left over molding hanging from the rafters in the garage. I quickly cut it down to size with my trusty hacksaw and attached the pieces, again, with hot glue. I still hadn't cut out my corner piece in the above picture, so you'll have to excuse that. It looks nice though, doesn't it? Of course, I still felt like it was missing something so I got out my itty bitty paint brush and painted "messages" at the top of the chalkboard.
Friday, January 18, 2013
Date Night In
I am a firm believer in having a date night or some form of spending time with your significant other. It helps the relationship grow, especially when you have children. Brandon and I rarely get any time together alone and I really feel like that's important- not just for us but for every couple. Time alone without the kids that is. It's just not the same thing with them.
So I managed to get a free night together tonight even though I don't get off of work until 11 and he doesn't get off till 11:30, we're still going to spend time together. Of course, as always, our budget is too tight to be going out anywhere so we're going to stay home and do a date night in. I'm planning on a dinner, a movie, and probably a game of chess (it's actually really competitive game between the two of us :))
Here's the Menu:
Stuffed pork chops
garlic bacon wrapped asparagus
hassleback potatoes
chocolate dipped potato chips
We love food and cooking together. I had to adapt some of these recipes from others and some I just kind of winged it on to be honest, I don't always use recipes on a simple project. For example, chocolate dipped potato chips- I kind of figured that one out on sight as I know how to melt chocolate haha.
The Stuffed Pork Chops

I adapted my recipe from this one, though I think hers is probably prettier than mine. I always use thick cut pork chops when making this, the thin ones are dry when cooked and annoy me greatly. You can also substitute chicken for this- I've done that before as well. Just wrap it in bacon if you use chicken- trust me. Also, either use boneless or de-bone what you have. Then you take a very sharp knife and slice into the thickness of the chop, creating a pocket in the middle. Per chop I use about 3-4 slices off of a small block of mozzarella, about an 1/8 of a cup of cooked spinach, roasted red bell pepper pieces and just a bit of garlic to stuff it. I then sprinkled my chops with salt and pepper to taste and begin cooking them, like a sear, on the stove top- finishing in the oven.
Hassleback Potatoes

For these I use whatever cheese I have available, but first, after slicing them and baking them till brown I broil them, to get the extra crispiness, remove and add cheese and then broil again to melt the cheese. I'll be using mozzarella for these tonight.
Bacon Wrapped Asparagus

These are simply asparagus spears (trimmed and cleaned) wrapped in bacon and cooked in a skillet till the bacon is crisp with a little garlic and oil. I love these still crunchy, but can't stand them soft, they are really delicious and not something we do often at all.
Chocolate Dipped Potato Chips

These are going to be our dessert. I love these, they're the perfect amount of sweet and salty. Again, they're potato chips (ridges!) dipped in chocolate, it's simple. Unless you're not good at melting chocolate down. I use the microwave a few seconds at a time and stirring between until smooth.
This should be awesome. What do you guys think about the menu? I think it appears to be a lot of work and seems elegant but it's really quite easy and a quick meal. It also includes all the things we love. Believe me I had to think for a long time on what to serve before I settled on pork... we eat a lot of sea food and I considered using tilapia in place of the pork but opted for the cheaper of the two.
So I managed to get a free night together tonight even though I don't get off of work until 11 and he doesn't get off till 11:30, we're still going to spend time together. Of course, as always, our budget is too tight to be going out anywhere so we're going to stay home and do a date night in. I'm planning on a dinner, a movie, and probably a game of chess (it's actually really competitive game between the two of us :))
Here's the Menu:
Stuffed pork chops
garlic bacon wrapped asparagus
hassleback potatoes
chocolate dipped potato chips
We love food and cooking together. I had to adapt some of these recipes from others and some I just kind of winged it on to be honest, I don't always use recipes on a simple project. For example, chocolate dipped potato chips- I kind of figured that one out on sight as I know how to melt chocolate haha.
The Stuffed Pork Chops
I adapted my recipe from this one, though I think hers is probably prettier than mine. I always use thick cut pork chops when making this, the thin ones are dry when cooked and annoy me greatly. You can also substitute chicken for this- I've done that before as well. Just wrap it in bacon if you use chicken- trust me. Also, either use boneless or de-bone what you have. Then you take a very sharp knife and slice into the thickness of the chop, creating a pocket in the middle. Per chop I use about 3-4 slices off of a small block of mozzarella, about an 1/8 of a cup of cooked spinach, roasted red bell pepper pieces and just a bit of garlic to stuff it. I then sprinkled my chops with salt and pepper to taste and begin cooking them, like a sear, on the stove top- finishing in the oven.
Hassleback Potatoes
For these I use whatever cheese I have available, but first, after slicing them and baking them till brown I broil them, to get the extra crispiness, remove and add cheese and then broil again to melt the cheese. I'll be using mozzarella for these tonight.
Bacon Wrapped Asparagus
These are simply asparagus spears (trimmed and cleaned) wrapped in bacon and cooked in a skillet till the bacon is crisp with a little garlic and oil. I love these still crunchy, but can't stand them soft, they are really delicious and not something we do often at all.
Chocolate Dipped Potato Chips
These are going to be our dessert. I love these, they're the perfect amount of sweet and salty. Again, they're potato chips (ridges!) dipped in chocolate, it's simple. Unless you're not good at melting chocolate down. I use the microwave a few seconds at a time and stirring between until smooth.
This should be awesome. What do you guys think about the menu? I think it appears to be a lot of work and seems elegant but it's really quite easy and a quick meal. It also includes all the things we love. Believe me I had to think for a long time on what to serve before I settled on pork... we eat a lot of sea food and I considered using tilapia in place of the pork but opted for the cheaper of the two.
Valentine's Day
Like my mother, I decorate for everything. I don't know why I do it, I just do. This includes Valentine's Day. I normally don't get into Valentine's Day but this year I'm going to make some decorations for it, might as well. I don't have any any more- therefore, I need some. This is the way I feel about holiday decorations.
Yarn Wrapped Letters:

I love yarn wrapped letters, and these letters from My Sister's Suitcase are really cute and perfect for Valentine's Day! However, I'm all about saving money and I would change this slightly by using cardboard letters. To get the thickness with cardboard all you need to do is cut out the same shape repeatedly, stack them together, and glue. No one is going to be able to tell, the cardboard will be covered in yarn. If you really want to be sure the cardboard is completely covered, paint it in a corresponding color. At My Sister's Suitcase she also used cardboard, but she used 3D cardboard letters. I don't know that our craft store here sells these, but I'd much rather make mine, I'm too much of a penny pincher. There's also another trick she used that I'd definitely have to agree with. On the ends of the letters that you're unable to wrap you're probably going to have to glue the yarn down. In any case you might want to do that every couple of inches on the flat sides as well to ensure stability in your project. The link will take you straight to her project if you need more of a visual.


I love these I love you blocks from I Candy Handmade, they're easily handmade and go well with other V-Day decorations. The sign behind them says "I love us". I'm definitely going to do these as well. They're also pretty durable and will last a long time, making them perfect for my V-Day Deco box. Wood blocks are pretty easily found/ made and I've definitely got the skills and paint to make them!

These felt arrows from Carolyn's Homework can be made with cheap felt and twigs even with very little crafting skill. If you're going to use hot glue with felt, be careful. Depending on the thickness of the felt it may or may not do one of two things (or sometimes both). It will seep through the felt and burn your fingers and/or leave a flat kind of ugly spot on the outside so be careful with these!

This envelope from The Crafting Chicks, was love at first sight for me. I love it so much. However, I don't currently have stairs to hang it on and I am bent on the little heart door hangers above. So, my solution for what to do with this envelope, once made, is to hang it in the middle of my Valentine's Door Wreath featured below. With just a little tweaking on the colors it will be perfect and so cute. I love this. Again, click the link for a full tutorial. I love these guys. Did I mention how cheap felt is and how easy it is to work with? I think it's going to add the perfect "kick" to my wreath.

Wow, I love argyle and this wreath from Mine for the Making is definitely for me. I'm going to have to make this, without a doubt. I still like a little more fullness to my wreaths, if that makes any sense and that's why I'm going to add the felt envelope from above. Again, when using yarn to wrap something, stop and add a little glue every couple inches, or rows, to add stability. I don't know how the boys in the house are going to feel about all these hearts! :)
Tissue Paper Candle Holders:

I'm not sure who to give credit to for the tissue paper candle holders, but it's basically just tissue paper and mod podge (the link will take you to the recipe) over a glass jar with a votive inside. I suggest using battery operated tea lights to minimize fire hazard :)

I really do like this board from Infarrantly Creative, the numbers are actually Hershey's kisses. However, this board is actually a bit harder to make than the previous projects, by far. We currently don't have an electric drill so I'm going to have to find another way to do this, I'm just not sure how yet. I'm sure I'll be able to do it though, no problem. I'll definitely let you guys know when I'm done and the entire project is completed- I'll include a step by step guide as well for everyone.
I've also seen some adorable garland's and I like them all but I haven't seen one yet that I felt was really my style so I'm going to put a hold on that one and wait to see what I can come up with on my own. I'll most likely be using paint chips and pom pom's but I'll let you guys know what I decide on!
UPDATE: All I've managed to complete so far on this is the painted bottles, will be posting pictures soon!
Yarn Wrapped Letters:
I love yarn wrapped letters, and these letters from My Sister's Suitcase are really cute and perfect for Valentine's Day! However, I'm all about saving money and I would change this slightly by using cardboard letters. To get the thickness with cardboard all you need to do is cut out the same shape repeatedly, stack them together, and glue. No one is going to be able to tell, the cardboard will be covered in yarn. If you really want to be sure the cardboard is completely covered, paint it in a corresponding color. At My Sister's Suitcase she also used cardboard, but she used 3D cardboard letters. I don't know that our craft store here sells these, but I'd much rather make mine, I'm too much of a penny pincher. There's also another trick she used that I'd definitely have to agree with. On the ends of the letters that you're unable to wrap you're probably going to have to glue the yarn down. In any case you might want to do that every couple of inches on the flat sides as well to ensure stability in your project. The link will take you straight to her project if you need more of a visual.

Aren't these cute little heart ornaments from The Creative Place adorable?! I am absolutely in love with these. The link will again take you to a full tutorial. I love these as door hangers and will probably hang them on every door in my house. I'm also seriously considering putting a few drops of essential oil inside, probably lavender.
These decorative bottles are actually left over sparkling cider bottles from G*Rated. All they did was take a hot glue gun and "write" the words on the bottles, then paint them. The tops are wrapped with twine. These are fun, easy, and cheap which everyone knows I love. I'll definitely be adding these to my Valentine's Deco box.
I love these I love you blocks from I Candy Handmade, they're easily handmade and go well with other V-Day decorations. The sign behind them says "I love us". I'm definitely going to do these as well. They're also pretty durable and will last a long time, making them perfect for my V-Day Deco box. Wood blocks are pretty easily found/ made and I've definitely got the skills and paint to make them!
These felt arrows from Carolyn's Homework can be made with cheap felt and twigs even with very little crafting skill. If you're going to use hot glue with felt, be careful. Depending on the thickness of the felt it may or may not do one of two things (or sometimes both). It will seep through the felt and burn your fingers and/or leave a flat kind of ugly spot on the outside so be careful with these!
This envelope from The Crafting Chicks, was love at first sight for me. I love it so much. However, I don't currently have stairs to hang it on and I am bent on the little heart door hangers above. So, my solution for what to do with this envelope, once made, is to hang it in the middle of my Valentine's Door Wreath featured below. With just a little tweaking on the colors it will be perfect and so cute. I love this. Again, click the link for a full tutorial. I love these guys. Did I mention how cheap felt is and how easy it is to work with? I think it's going to add the perfect "kick" to my wreath.

Wow, I love argyle and this wreath from Mine for the Making is definitely for me. I'm going to have to make this, without a doubt. I still like a little more fullness to my wreaths, if that makes any sense and that's why I'm going to add the felt envelope from above. Again, when using yarn to wrap something, stop and add a little glue every couple inches, or rows, to add stability. I don't know how the boys in the house are going to feel about all these hearts! :)
Tissue Paper Candle Holders:
I'm not sure who to give credit to for the tissue paper candle holders, but it's basically just tissue paper and mod podge (the link will take you to the recipe) over a glass jar with a votive inside. I suggest using battery operated tea lights to minimize fire hazard :)
I really do like this board from Infarrantly Creative, the numbers are actually Hershey's kisses. However, this board is actually a bit harder to make than the previous projects, by far. We currently don't have an electric drill so I'm going to have to find another way to do this, I'm just not sure how yet. I'm sure I'll be able to do it though, no problem. I'll definitely let you guys know when I'm done and the entire project is completed- I'll include a step by step guide as well for everyone.
I've also seen some adorable garland's and I like them all but I haven't seen one yet that I felt was really my style so I'm going to put a hold on that one and wait to see what I can come up with on my own. I'll most likely be using paint chips and pom pom's but I'll let you guys know what I decide on!
UPDATE: All I've managed to complete so far on this is the painted bottles, will be posting pictures soon!
Drinking Glasses
We've all seen the pins and the videos illustrating how to turn wine bottles or any other type of glass bottle into drinking glasses, or storage. I decided to try it myself. Let me start off by saying that it was easy, but not as easy as the people in the videos made it look! I destroyed several bottles during this process. No, I do not drink this much. Please keep in mind that the ridiculous amount of liquor bottles you'll see me use in crafts did not come from me. The house was a bachelor pad by definition before I moved in with college age guys living here. There's quite a stash of liquor bottles ha ha ha. I couldn't help but try to make these.
Here are the basics of the project, you wrap yarn around your bottle, tie it tight and then slip it back off to soak in acetone. I used nail polish remover, which is acetone if you didn't know, it's just not pure. The table top they're sitting on, if you're wondering, is one I transformed the same night, it will be the start in another post. Anyway, after the yarn is soaked in acetone you slip it back onto the bottle and light it on fire. Slowly turn the bottle until the flame starts to die down and then submerge it in ice cold water. This causes stress on the bottle therefore causing it to crack along the line of yarn. I shouldn't have to tell you this but this project could go awry very easily and I am not responsible for any damage to self, home, or anything else if you mess it up.

I also recommend that if you have a bottle you're just absolutely bent on using, try this several times on other bottles first till you get the hang of it. There are several in my trash can from failed attempts. The breaks aren't always clean either as you can see they're sometimes slightly jagged. Although, I must say that for some reason in my pictures they look way more jagged than they are. I also pretty well destroyed the labels on all four.

Something else you should take note of is that the thickness of the bottle counts. The thicker the bottle the harder it is to snap. I had a grey goose bottle that didn't snap at all but shattered (going to try those again later now that I have a better feel for the project). The Jameson bottles above had to have the process done to them several times. Yet the Skyy bottle (the blue one) was the easiest with the cleanest break. I think it's also the prettiest.

Here are the basics of the project, you wrap yarn around your bottle, tie it tight and then slip it back off to soak in acetone. I used nail polish remover, which is acetone if you didn't know, it's just not pure. The table top they're sitting on, if you're wondering, is one I transformed the same night, it will be the start in another post. Anyway, after the yarn is soaked in acetone you slip it back onto the bottle and light it on fire. Slowly turn the bottle until the flame starts to die down and then submerge it in ice cold water. This causes stress on the bottle therefore causing it to crack along the line of yarn. I shouldn't have to tell you this but this project could go awry very easily and I am not responsible for any damage to self, home, or anything else if you mess it up.
I also recommend that if you have a bottle you're just absolutely bent on using, try this several times on other bottles first till you get the hang of it. There are several in my trash can from failed attempts. The breaks aren't always clean either as you can see they're sometimes slightly jagged. Although, I must say that for some reason in my pictures they look way more jagged than they are. I also pretty well destroyed the labels on all four.
Something else you should take note of is that the thickness of the bottle counts. The thicker the bottle the harder it is to snap. I had a grey goose bottle that didn't snap at all but shattered (going to try those again later now that I have a better feel for the project). The Jameson bottles above had to have the process done to them several times. Yet the Skyy bottle (the blue one) was the easiest with the cleanest break. I think it's also the prettiest.
Now, I'll also have to take some sand paper and sand down the squared parts of the glasses but they're really not that sharp, and I'll have to remove the labels obviously. I had hoped to keep the labels on but it just didn't work out that way. Another interesting side note would be that the Jameson bottles also cracked clearly on both sides of my yarn. No other bottle did that quite like the Jameson. It was unusual though I have no idea why- what do you guys think? Comment and follow!
Tuesday, January 15, 2013
Update on the Girls' Bedroom
I've done some more to Livvy and Tobi's bedroom since the last post and I figured I'd stop by and show you guys. The trolls were bought at Goodwill, I paid four dollars total for all of them and all but one had on their original outfits. I couldn't resist them, they take me back to my childhood. I also spent five bucks on the cute princess poster at Walmart, I couldn't resist it because I got Bubba one too and it's only fair you know. The cursive "love" wall decal looks like it was made of metal but it's really just cardboard that I cut out and painted black and then painted over with a silver glaze. The shelf belonged to their Aunt Megan, Brandon's sister- she left it at the house when she and her husband moved out.


I felt like the yarn initials I showed off in another post weren't quite done, I felt like they were missing something and for a few bucks I got a baggie of little plastic rhinestones from Walmart that I glued on to "pretty them up"- the girls love when things sparkle!


So, what do you guys think? Got any other ideas for me? I think I'm gonna be finished till I can get more firniture moved in. Comment and follow!


I felt like the yarn initials I showed off in another post weren't quite done, I felt like they were missing something and for a few bucks I got a baggie of little plastic rhinestones from Walmart that I glued on to "pretty them up"- the girls love when things sparkle!

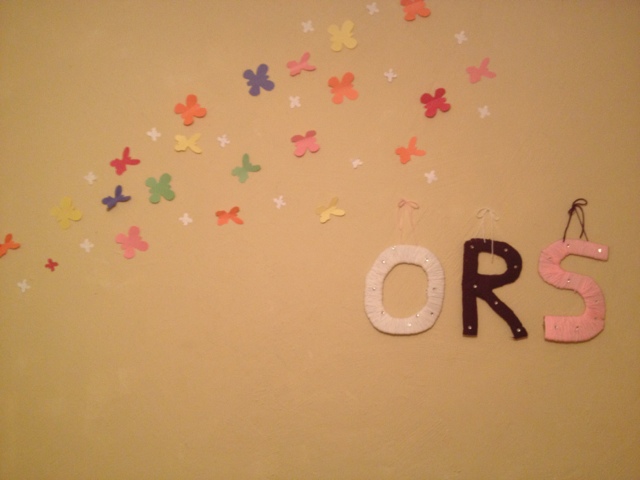
So, what do you guys think? Got any other ideas for me? I think I'm gonna be finished till I can get more firniture moved in. Comment and follow!
Subscribe to:
Posts (Atom)