Showing posts with label kids. Show all posts

Saturday, January 19, 2013

More Fun Kid Science

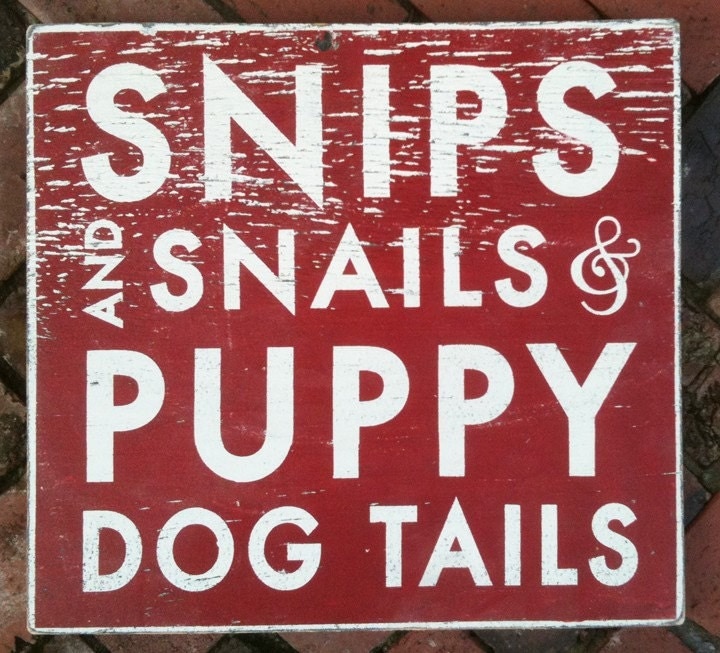
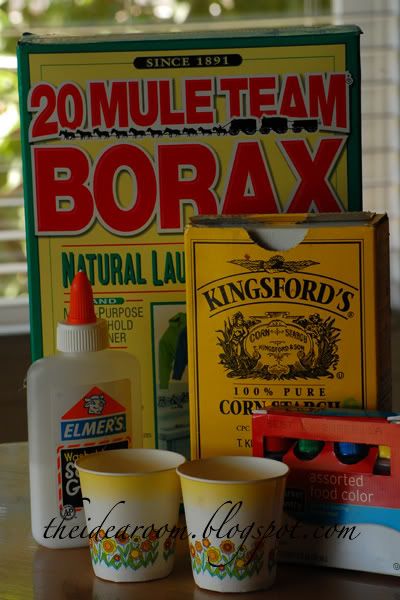
I really do love doing science projects with my kids, we keep it simple so that they can fully understand the process. They're always amazed with the things we do. I don't just do science projects with the kids either, though they are my favorite because to them, it's like magic. Really from a psychological point of view, Bubba tends to enjoy the science projects and chemical reactions a bit more than the girls do. To me, that's evidence in itself as to why boys do tend to do better than girls in Science class. It's just more understandable to them I suppose. Maybe it's just that they're more into blowing stuff up and making messes. Snakes and snails and puppy dog tails and all that. Several of my friends have really liked the other kid science projects I've posted and linked to so I thought I would do another one, here it is.


Bouncy Balls:
  • 1/2 tsp Borax (found in laundry section) You may have some left over if you made the laundry detergent.
  • 2 TBS warm water
  • 1 TBS corn starch
  • 1TBS glue (clear glue makes a see transparent ball and white glue makes an opaque ball)
  • 2 small mixing bowls or cups
  • a stirring stick (plastic spoon)
  • food coloring (optional)
mix together the warm water and borax till the borax dissolves. In your other mixing bowl/cup add the glue, 1 tsp of the borax/water solution you just made and the cornstarch. Wait 10-15 seconds before stirring. Rolls around in your hands once mixed until it forms a not so sticky ball. This will dry out after a couple of days but it's a fun project. You can add the food coloring with the borax/water mixture for a solid bouncy ball or wait till the last second after you've mixed everything to create a swirly effect like the ones you buy- just don't over stir the food coloring or it will completely blend and become solid.


Acid Based Reaction to Blow Up a Balloon:
  • baking soda
  • vinegar
  • small funnels
  • empty bottle like a soda or water bottle
Fill empty bottle(s) about 1/3 of the way full with vinegar. Use your funnel to fill your balloon about half way full with baking soda. Attach the lip of the balloon to the top of your bottle- be careful not to spill your baking soda yet. Have your child hold the balloon to the bottle and then, when you're ready, have your child lift up the balloon- dropping the baking soda into the vinegar. This creates an acid based reaction that creates carbon dioxide to fill the balloon. It's not helium and it's pretty much the same thing as blowing them up yourself.


Density Project:
  • 1/4 c. dish washing liquid
  • 1/4 c. vegetable oil
  • 1/4 c. vinegar
  • 1/4 c. karo syrup
  • 1/4 c. honey
  • 1/4 c. rubbing alcohol
Carefully pour these one at a time into a bottle, using a funnel. You want these to try to hit dead center without touching the sides. Each of these things will layer together. Seal your bottle with an air tight lid and shake it. Watch and see how long it takes each to separate, if they do.


Hot/Cold Balloon:

For this project you're learning how the air around us will expand and contract when exposed to hot and cold conditions. You could even use the balloons you blow up from the project above. Your tires do the same thing by the way, that's why it's important to know how to air up your tires.

First you'll need to measure your balloon at room temperature. A fabric measuring tape works best for this, which you can find in your sewing/fabric aisles- that's what they're normally used for. Mark down your measurements throughout the project.

Expose your balloon to heat first, a hair dryer will work perfectly for this, just point the blow dryer at the balloon for a few minutes, allowing it to heat up. Be careful with this, it may pop with the expansion. Quickly measure the balloon and mark down the measurement- it should have gotten larger.

Then, using the same balloon, pop it in the freezer for let's say 15 minutes. Take it out and quickly measure it again, it should be smaller. Then allow it to sit at room temperature for 30 minutes to an hour to make sure it's completely back to it's original temperature and measure again. Is it the same size as your first measurement? Discuss your findings with your child.

Tuesday, January 15, 2013

Update on the Girls' Bedroom

I've done some more to Livvy and Tobi's bedroom since the last post and I figured I'd stop by and show you guys. The trolls were bought at Goodwill, I paid four dollars total for all of them and all but one had on their original outfits. I couldn't resist them, they take me back to my childhood. I also spent five bucks on the cute princess poster at Walmart, I couldn't resist it because I got Bubba one too and it's only fair you know. The cursive "love" wall decal looks like it was made of metal but it's really just cardboard that I cut out and painted black and then painted over with a silver glaze. The shelf belonged to their Aunt Megan, Brandon's sister- she left it at the house when she and her husband moved out.


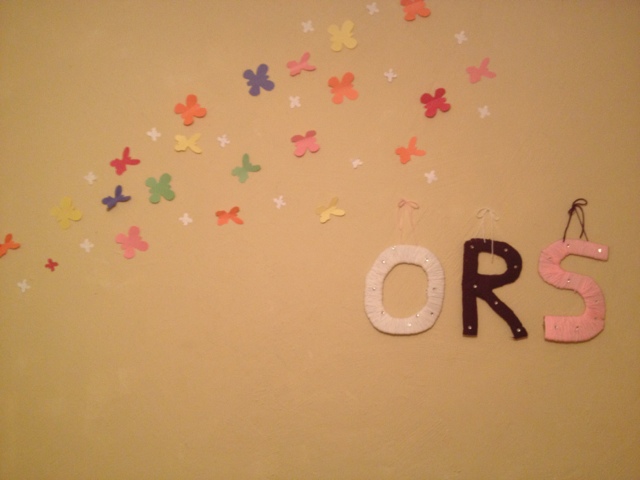
I felt like the yarn initials I showed off in another post weren't quite done, I felt like they were missing something and for a few bucks I got a baggie of little plastic rhinestones from Walmart that I glued on to "pretty them up"- the girls love when things sparkle!


So, what do you guys think? Got any other ideas for me? I think I'm gonna be finished till I can get more firniture moved in. Comment and follow!

More on Bubba's Room

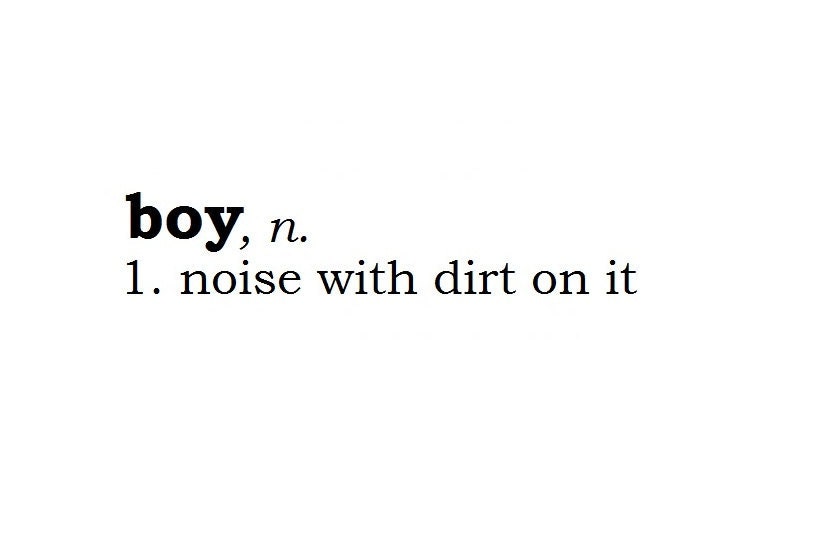
Just an update for that mean little boy and how I'm doing decorating his room on my slim budget! I framed the wall art I showed you in the previous post, doesn't it look so much better? The definitions are a little crooked but oh well.


I also bought him a 5$ poster from Walmart that has all the Marvel comic book characters on it, his favorite are The Incredible Hulk, Spiderman, and Iron Man. He hasn't been introduce to the Thing yet but I think he'll flip out over him too. I'm still loving the shark kite- I think it really rocks the room out.


I took some buttons and made a sign that said "Bubba" to hang above his dresser. Bubba's very colorful and eclectic so I made sure to make the sign just like him. All I did was take a light colored marker, write what I wanted, and then hot glued the buttons down.


This one (below) is proof that I just don't pin on Pinterest because I like the way it looks, I really do use the pins for inspiration or just to copy. I told everyone when I pinned the paper airplane picture that I was going to make it and I did! I love it and think it's adorable, I have it hanging over his bed. The boards I used for this and for the Bubba sign above are around 4$ a pack at Walmart, in the craft section. I've used them before and they're really sturdy. They'll be with the stretched canvases, which is kind of what they are, just not as thick- they're kind of thin actually.


This is a close up of the really long valance I got at Goodwill for a dollar or two. I was able to cut in half to perfectly fit over both windows. I like the sports theme and I have some more sports stuff put away somewhere... I think. I know I'm definitely going to get a nightstand and paint it up like a baseball which I mentioned, here. I also can't wait to make one of the lamps that was in the same post. Let me know what you guys think! Comment and follow.

Sunday, January 13, 2013

Bubba's Room


I've been working hard to get the rooms together and make them look nice. So far I've done a little on the playroom, Bubba's room, and Livvy and Tobi's room. This post will be for what I've done for Bubba's room so far. This first picture is of some drawings I did for him, I will eventually frame them and they'll definitely look better. The words that make up the baseball are "Let the field be joyful and all that's in it, which I got from Pinterest of course. It came from here (etsy). The next one says "Snips & snails and puppy dog tails, that's what little boys are made of"- which is very true of my Bubba. The third picture I found here (Trading Phrases- a place you can buy phrases and sayings like this in vinyl decals for your wall). The last picture is obviously the batman symbol. Behind the symbol is the names of so many characters from Batman it's ridiculous. There were characters on the list I'd found that I'd never even heard of.


I seriously scored at Goodwill the other day. I spent quite a bit in all honesty but I came home with some great stuff. One of the things I found was a really long valance, pictured below. When I found it at Goodwill I wasn't sure that it would work, it was only one valance then, but for a dollar it was hard to pass up and I was seriously hoping it was long enough to cut down the center and fit over one window. As you can see, it was the perfect size. I also found the Spongebob blanket while I was there. The shark in the corner is actually a kite hanging from the ceiling, it was in the back of Brandon's closet- still no idea where it came from but it's pretty large and fits there well. I originally wanted to get a dragon kite to do this with, but a shark will do just as well. I told Bubba that there weren't any monsters in his room when we had that discussion. I showed him the monster repellent that I mentioned here and I also told him that monsters were afraid of sharks. That turned out to be quite a funny conversation mainly because he couldn't understand why monsters would think that the shark was real. Oh, the irony was hilarious. I'll definitely post more as I go, I just wanted to show off what I've done so far :)


UPDATE: I finished the majority of what I'm going to do for Bubba's room for now and you can see the finished projects here on a newer blog post, go check them out!


My Inspiration (and some for you!)


Tobi and Livvy's Room-


The first thing I did to the girl's room was to cut out a bunch of paper butterflies from construction paper. To make my template so that they would be even all I did was fold a piece of construction paper in half and then, from the creased corner and out I drew one half of the butterfly so that when I cut it out (still folded) and opened it it would be symmetrical. I used three styles all together, I don't know if you can tell. The tiny white butterflies are all the same and the colors differ between two styles- a thin elegant looking butterfly and a big full butterfly. Then, all I did was use tape to attach them to the wall.


My girls both have the same initials. I did not do this on purpose but it's turned out to be pretty convenient for me. I decided I wanted to hang some yarn wrapped letters in those initials ORS. I also decided to use cardboard. Because it's free. The yarn was left over from other projects and I used the three colors that the girls loved the best; a very light pink, purple (which you'll recognize from the throw I made for Brandon), and white. First I grabbed an empty diaper box and broke it down, making it a flat piece of cardboard, then I cut out my letters- freehand, like so:

That's little Olivia's hand trying to grab the S
Then, after the kids went to bed, I set to wrapping the yarn around the letters, which took a lot longer than I originally thought- I won't be doing that again in the near future. When I created the bows to hang them from I tried to alternate the colors so that the hangers weren't the same color as the letter they were attached to. So what do you guys think? Follow and comment please!

Snickers trying to get in on the action!
UPDATE- I've done more to the girls' bedroom, if you want to see it, it can be found in a newer post here

My Inspiration, and some for you!


Saturday, January 12, 2013

Playroom School House/ Play House

Well, I did manage to get a lot done during my "weekend" I decided I wanted to make a playhouse for the kids to put in their play room. Now, their playroom is the laundry room as well. I want to get some magnets to stick to the washer and dryer as I'm not sure I want to move both of those appliances into the kitchen yet. This is just part of what I'm going to do, as these are the supplies I had available. Before I start, if you're curious as to what the front of the house is made of, it's drywall. Yeah, we had a ceiling problem that got fixed eventually and it was left over. Seeing it started the idea process because it's sturdy. I then remembered the particle board desk we had in the garage, and the kids did need an entertainment center for the TV.


I started out by tracing the holes I wanted, as you can tell they're not perfect, and I didn't want them to be. Then I cut the holes with a steak knife. Why? Because a serrated blade is best for drywall and I didn't have the special knife so I improvised. Yes, my hand was sore afterwards but it wasn't as hard as you'd think. I didn't take pictures of that part of the process. Sorry, I forgot. But then, I found some red paint in the garage and began painting (with an old towel I was going to throw away anyway. Why? No paint brush. Stop asking stupid questions). Then I decided to trim the door and window with white (also found in garage). It reminded me of an old school house, so I went with it.


I really felt that it was still missing something, so I went ahead and painted a picket fence across the bottom. I wanted to add grass and flowers too but guess what? No other colors were suitable in the garage so I moved on.


Here's a picture of the kids in the playroom next to the desk. If you'll notice in the cabinet of the desk are VHS tapes. I like these best because it seems that no matter what I do all the DVD's I buy for them get destroyed. I love the little closet behind Bubba, it's got shelving like that on both sides and is perfect for their toys and games and such.


Here's the almost finished project, after attaching the school front. I did this with tub caulk/sealer. It's easy to remove if I have to but it's not going to fall off either. I have no idea where that sock came from, I'd swear it wasn't there when I took the picture.


The finished...well, almost finished project! After some minor argument with Brandon I got him to bring in the TV for me (it's so heavy) and put it on top. I'd really love to add a "roof" still, with some broken down boxes and black construction paper,but I haven't decided yet. Also, I have a mailbox in the making for the front, as well as some curtains and a door. I'm going to try to locate a set of Christmas lights to string inside for light.


Here's a picture of mine and Brandon's entertainment center. We're never going to use it again as it's purpose because all the televisions we now own are way too big to fit in it. The boxes are a "sneak peak" at one of my next project for the playroom. I love this thing because it has two drawers at the bottom to hold their mega blocks that they love so much. I'm also currently collecting old clothes to crochet a rug out of for the floor, boxes to put up like a chalkboard (BECAUSE CARDBOARD IS FREE), and a tension rod style payhouse/ puppet theater for the closet door. Oh and the reading nook is going to be a huge surprise for the kiddos. My inspiration for this project came from all the entertainment center turned kitchens pictures floating around, which I still wanna do for the girls in their room. Kind of like this one, it's my favorite so far.

Pinned Image


These are the solutions that I've come up with for my small space. Money is always tight at my house so I do my best to make every thing that I can and utilize what we already have. I'd be interested in seeing what other people have done with their kids to save money if you'd like to leave it in a comment! Or just click the follow button to get updates on all my posts!


Organization for Kids


OK, so the organization posts I did before seemed to get more views than any other posts. So, I'm going to do another one. This one will be organization for kids. Keeping kids organized makes things easier on everyone involved. I've compiled just a few ideas here, these are solutions to problem areas that we have. So I'm assuming I'm not the only one!

Magnetic cups are genius. I had never considered this before but it's so easy and so cheap. All you need are small magnets you can find at any craft store and some cheap plastic cups that are just right for your child. Attach the magnets to one side of each cup and tell your child that when the cup is empty to take it to the fridge and stick it to it. Remember though, magnets do not stick to real stainless steel. This way there's no lost cups and you can easily grab them to give them a quick rinse or wash for more later.

Bath tub toy organization? I usually get the giggles when this topic comes up as it really is an annoying thing to take care of. Stores sell several solutions for this and most of them have small suction cups to stick to your bath tub wall. These products have never worked for me because they've never been strong enough to hold all the kids toys. I have found two different solutions to this problem. You can use a hanging fruit basket to store the toys, just hang it from your curtain rod. Or, if you don't have a curtain rod (like in the case of glass shower doors) then you can go buy a curtain rod. Seriously, go get one! They're really cheap and can be found at almost any store. Just hang a few baskets from this rod, stretched across the back wall of your tub and voila!

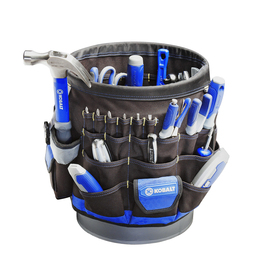
Kobalt 61-Pocket Bucket Tool OrganizerArt supplies are scattered all over my house, in different drawers and folders and on different surfaces. The kids and I do a lot of arts and crafts. Just recently I saw an idea where you can purchase a product called a bucket boss. This product basically fits perfectly in a five gallon bucket and is normally used for tools. However, I think it would really be perfect for art supplies. This type of product goes usually for somewhere between 15-25 dollars. I found the one in the picture here at Lowe's  for 14.98. I love Lowe's I really do. Basically you can fit all of your smaller things like pencils, markers, scissors, glues, etc in all the little pockets and your larger things like papers, books, long rulers, etc in the middle.


What about displaying your little one's art? I really like this idea. Basically you just get several small strips of wood (Lowe's) and some basic office clips from any office supply store. Attach the clips with either hot glue or screws to the board and attach the board to the wall. You could also put a cute quote above this like "Masterpieces" "Future Artists" or just "Artwork" in a cute font. The boards could also be painted and stained in so many options!

Another idea that I'm just in love with is using metal rain gutters (10 ft. for 7.49) to organize children's books! Gutters can be bought cheaply at Lowe's and attached to the wall studs horizontally, open side up and books placed inside. You can use gutter hangers to hold them if you'd like. Paint the gutters however you'd like, or just leave them plain. Use a level to make sure each gutter is level and don't forget end caps. The ends of gutters can sometimes be sharp so always cap the ends to protect little fingers!

That's all I've got for now guys, I hope you've enjoyed it. I'm sure I'll come up withsme o more. I can't do it all in one post you know!

Friday, January 11, 2013

Toddler Chores and "Chore Sticks"


I've finally came to a conclusion on the chores subject with my kids. I was unsure at first about issuing chores to them, and worried that they were too young to do much. I debated with myself over this for a while but then I decided that they didn't have to do much, but they should have to do something. I've even decided on getting them each a piggy bank so they can have an "allowance". With an allowance I'll be better able to teach them about money and how to use it properly. Here's what I've come up with so far for a list of chores that they can split up.

Chores:
  • picking up their own toys
  • collecting dirty clothes and putting them in the hamper
  • dusting with socks on their hands to make it fun  (though this may require spot check)
  • window washing (mom had me doing this early, it's fun even though it needs spot checking!)
  • collecting dirt dishes and putting them in the sink
  • throwing away trash
  • "spot" vacuuming... they're trying to learn this one and doing pretty well
  • washing or dusting base boards (just the right height for this!)
  • wiping down the lower cabinets
  • help add to the compost pile
  • weed
  • water plants (they love doing this)
  • "making" their own beds
  • emptying the small trash bins (like bathroom)
  • unloading some of the groceries
  • sorting laundry (dark and light)
  • fold small laundry items, like washcloths
  • "mopping"
  • feeding snickers
  • rinse the unbreakable dishes
I think that's really enough for the three of them, they're just not big enough for much else yet. The trick to getting them do these things is praising them and not adding too much on them at once. I'm going to come up with a more detailed schedule for this and of course divide the chores up appropriately. Livvy can't do every thing the other two can and Bubba tends to be better at one thing where as Tobi is better at another. Some may think that this list is too extensive considering Tobi is 4 Bubba is 3 and Livvy is 20 months, but believe me, between the three of them they've already learned to do and are fully capable of completing every thing on that list. This is just a way to get it organized.

I really like the idea of chore sticks. Basically you get a bunch of popsicle sticks and keep them in a little container like a vase or mason jar and on each stick is a chore. To keep them seperated I'm going to dip each of the sticks in four different colors. Each of my little ones will be assigned a color and there won't be any issue getting it done! The fourth color will be a chore that any of them can accomplish. The chore sticks will look something like this:

Pinned Image

I'll do what I can to keep everyone updated on how well this works for us! I'm still not sure how we're going to start our learning about money. Basically we've got a few of the coins and dollars memorized and we know that we need money to buy stuff. Tobi is grasping some small basic addition and subtraction but that's it. We will press onward though, I only teach my children at their pace. Each child learn differently.

I'm a huge believer in having structure for children, and I'm striving to get us into a good healthy schedule. Rules are important. I'm not huge on rules at all, but they are important. I've seen people my age that were never made to follow rules or never taught how the world works and it never turns out well for them. I don't want that to happen to my kids- trust me, it's kinda scary. If any one else has any ideas of what other chores could be added, feel free to add a comment!

Bubbles?! BUBBLES!


bubbles
What kid seriously doesn't love bubbles? My kids love them that's for sure and it's such a fun and easy way to keep them occupied while mommy does mommy things! I love bubbles too. When I was a kid my Nanna would make bubbles for my cousins and me. We thought it was the most amazing thing. It wasn't until I got older and had kids of my own that I realized how easily bored we were and how hard it must have been to cope with hellions like us. Bubbles (and homemade ninja turtle masks) were Nanna's go to recipe for peace on earth! I now use the same things to distract my kids and get a little quiet time. Much like the pillow/blanket fort, however, bubbles have evolved again. You can get bubbles that are colored, bubbles that glow, regular bubbles, bubbles that are hard to pop and even bubbles with flavor. I just want to pause here and let you all know that I don't think I would ever even try flavored bubbles. I stopped trying flavored stuff that wasn't supposed to be flavored after the edible paper. That's gross by the way. Ok, back on track- as you know I try not to pay for anything that I can make at home so at one point last summer I looked up all of these recipes and now I'm going to share them with you!

Regular Bubbles
8 T dish soap
1 Quart water

Bouncing or Un-poppable Bubbles
1 cup water
2 tablespoons light karo syrup or 2 tablespoons glycerin
4 tablespoons dishwashing liquid Mix together and have fun!
The glycerin and kayro help to make a thick solution that works better than just soap and water.

Glow in the dark Bubbles
1 cup water
2 tablespoons light karo syrup or 2 tablespoons glycerin
4 tablespoons dishwashing liquid 1glow stick
snap or cut the glow stick and add the contents to the basic bubble solution. This will last only as long as the night stick holds it's glow.

Colored Bubbles
3 cups dish detergent
3 cups water
2 cups glycerin
several drops of food coloring or washable paint
just mix
As far the flavored bubbles go, I can't find a good recipe so I'm going to make one myself. Keep reading and after I figure it out you guys will be the first to know!
1. If bubbles pop easily or solution does not work well, add more water.
2. Dawn and Joy seem to be the best choices for bubbles. It is the antigrease agent.
3. Bubbles work best on an over cast day.
4. Bubbles love moisture so right after a rain also works well.
5. To catch a bubble just get your hand wet.
6. Glycerin or Kayro is added to the mix to make the bubbles more durable. The more you add, the stronger they'll be!
As far as bubble storage I saw a ridiculously cute idea on Pinterest. You just store your bubble solution in a drink container with spout for easy access! That would be great for storage while in use by the kiddos but for long term storage I would use empy plastic containers like milk jugs and juice containers.
Pinned Image


And have you seen the different ways to blow bubbles?! Jeez, the old school bubble wand has gone to the dogs!

The Bubble Pool:
Just fill a kiddy pool with bubble solution, have someone stand in the middle and have others lifta  hula hoop from the bottom over the person!


The Bubble Snake:
The way I understand this is that it's bubbles in a bottle with the end cut off and a sock secured to the end. Here is a link for the full project.


The Classic Bubble Wand:
Here is a link to a project where you can make your own. Here is a project where you can make super bubble wands for gigantic bubbles. Bubble wands and accessories come in all shapes, designs, colors and sizes. I've seen bubble pipes shaped like old tobacco pipes, tubes, something that I think was supposed to be a kazoo. If you can remember to do it, go to your local Walmart or dollar stores right about the time summer is going and fall is coming in and you'll find masses of bubble wands in all different shapes and sizes, even bubble guns, on sale for 50-75% off. Always shop for next season!

Tuesday, January 8, 2013

Edible Kid Science

I decided to do another post on science projects for kids, but this time I wanted to do something really fun. How about science projects and experiments that you can eat? Food is a great way for kids of all ages to learn. They love it. So, I did some research and came up with a couple of edible science project to do with my kiddos and decided to share them with you!
How to make rock candy:
  • 2 cups water
  • 4 cups granulated sugar
  • 1/2-1 tsp flavoring extract or oil (optional)
  • food coloring (optional)
  • glass jar
  • skewer or thread (see below)

  • wet your skewer or thread and roll it in granulated sugar, set it to the side
    bring water to a boil over medium heat in a medium sized sauce pan and start adding sugar one cup at a time, stirring to dissolve. Continue this till all the sugar is dissolved. When the syrup is smooth you remove it from the heat. If you're going to add food coloring or flavor now is the time to do it. Allow the mixture to cool for around ten minutes before carefully adding to a large mouth jar. Place your skewer in the center of the jar, held up using clothespins. Like so:

    rock candy

    The skewer must be as close to the center as possible and not on the bottom or this will not work. If you don't see a change within 24 hours boil again and add another cup of sugar. If you do see crystals starting to form then you're doing good. Allow the rock candy to grow until it's reached the size you want. Be aware that this could take up to a week.

    A great topic of conversation for the rock candy project is to discuss how stalactites and stalagmites are made in caves as it is a very similar process, just not as tasty!

    Invisible Ink:
    Write a message on a piece of  paper with lemon juice, using a paintbrush or stick. Allow paper to dry. Take your hidden message and hold it close to a light bulb to warm it up. The chemicals in the lemon juice will turn brown when heated, making your message appear. It's pretty awesome, we did this as kids a lot.

    A great topic of discussion for this project is to discuss with your child how different chemicals and different materials change color and composition (think melting) with heat.

    Make Butter:
    This is a great project and very tasty. You don't need much to make your own butter at all, it's a very simple project. I think that most people have not tried this because the idea of it is daunting. It's really not hard at all though!
    Here's what you'll need:
    heavy whipping cream (not ultra pasteurized)
    regular salt (not iodized)
    cinnamon and honey (optional)
    a way to mix it!

    If you shop near me, or are here from my facebook and know me, Walmart sells the type of cream you need. It's in a smaller container that's purple and gold sold near the other creams and the weird notmilks beside the milk. Get that.
    There are lots of ways to mix the cream into butter, a hand mixer works but a stand mixer is best as it could take a while.

    Now, if you don't feel comfortable letting your kid even think about using a mixer (and I don't) then all you need is a Tupperware container big enough to hold all the cream, by half. So if you pour all the cream in it, it would only be half full. Then, place a marble or two in the cream and put on an air tight lid. Hand over to your kid and have them start shaking.

    The process of making butter will look the same no matter how you do it. First, the cream will foam up and thicken becoming thicker and thicker. This thick fluffy mass would be whipped cream if you added sugar at this point. However, we're not making whipped cream this time, we're making butter.

    The fun starts now, the whipped cream will start to break down, becoming watery at this point. It will eventually start too look kind of like watery buttermilk. At the "buttermilk" stage it's time to stop the mixing. There will be little white chunks floating in the whitish water, that's your butter. Go ahead and either run some ice cold water in the sink or have a large bowl of ice cold water nearby. Scoop up as many as the little chunks as you can find, using your hands or a small hole strainer (like mesh). These little curds will stick together and, in your cold water massage the ball (it will feel like butter) over and over.

    Why you have to massage the butter, you'll notice, is to get all the water out. If need be empty the bowl and refill it with more cold water, continuing to do this until the water is clear or no more milky water comes out of the butter. If you leave it there it won't taste as good and will cause the butter to spoil quickly.

    That's it, you're done! You now have butter. Add your salt (just a pinch no more than a 1/4 tsp) and if you'd like add cinnamon and honey to taste. I promise you'll love it.

    What science topic I would cover in this is what materials turn to what with what process like how cream turns to butter, sugar to candy etc. I would even cover how dirt turns to mud. My kids love mud so we would have to discuss this and this project can really take the other two discussions to another level.

    Want a easy bread recipe to eat your butter on? Here ya go!

    7-Up Rolls:

    Ingredients:
    1. 2 c. Bisquick
    2. 1/2 c. sour cream
    3. 1/2 c. 7-Up
    4. 1/4 c. melted butter
    Directions:
    Preheat oven to 450. Mix the first three ingredients together, form balls and put onto baking sheet. Don't over mix. Brush the tops with melted butter and bake until browned.

    That's all I've got for this post, I don't want to keep making them super long, but I'll be sure to update when I come across more ideas for you guys, if you try them please come back and comment, let me know how they worked for you!
    Monday, January 7, 2013

    Keeping the Kids Busy

    The house we're moving into has a fenced in back yard that's actually pretty large. It will still be too cold for a while though to go outside. I like finding different activities we can do inside; the kind you can do when it's too cold, or raining. It keeps the kids busy and allows me to do whatever it is I need to get done. With the new move it's gonna take a lot of work to get every thing in the shape I want it in, with the bedrooms mainly. We still haven't been able to get in touch with the landlord about the toilet in the first bathroom or the kitchen sink being stopped up. These are things I'm going to have to fix completely myself if I can't reach him. I won't sit and wait and we'll talk about paying me back or taking it off the rent afterwards. Anyway, these type of activities are going to come in handy BIG TIME while I'm trying to accomplish all this. They're also cheap- which you guys know I love.

    Smashing Balls:

    1 C. water
    1 C. Flour
    food coloring

    mix together, the mixture should be kind of thick and add whatever colors you'd like. Cover the cotton balls and bake at 300 degrees for around 45 minutes. They may have some annoying flat edges, if you don't like these you can snip them off with some scissors. TIP: line your baking sheet with aluminum foil for an easy clean up. When they're done and kind of hard hand them over to the kiddos with a kid hammer or rubber mallet and let them go to town. They can also stomp them to bits. Some people say there's no real educational value here but I can find it. It's scientific, explaining how the chemical composition of the gooey mixture changes with heat and becomes hard. There's also the question of density which is why the cotton balls aren't always colored all the way through with this mixture where they would be with water and food coloring. There's also the subject of fine motor skills here, let them use tweezers to pull the cotton balls out of a bowl.These are ALSO great therapy for aggression issues. Seriously though, it's a game. It's just fun. Get over yourself. I used to throw rocks at the side of a barn. Mom didn't question the educational purpose behind that and I can assure you that I turned out just fine. Oh, and go follow the blog I linked in the title, she's awesome.


    Masking Tape Race Track:

    Basically for this activity you just need a floor and some masking tape. Which, if I'm not mistaken can be bought in lots of different colors. Painters tape is also a good option and, in all honesty, is pretty much the same thing. Here's the pin I saw this on originally:


    I can't seem to figure out who to give credit to for this so if you know, please let me know. It's a wonderful idea, it really is, masking tape is cheap, it pulls up easily and can provide hours of fun, not to mention a different track each time. Upon googling this I found even more similar ideas (yet never the original) that really were awesome.

    Here  (at Maddycakes Muse) is a picture I found that was about a race car/ race track themed birthday party. This is made out of black plastic table cloth and masking tape:
    I have a friend who's son is race car crazy and she's gonna love this

    Isn't that great? Go show her some love too, she did this party for a wonderful reason and there are several other ideas on that particular post. She seems to be a very good hearted person.

    This (from Motherly Loving) is also a great idea, using the same concept and is also for a little boys birthday. Being from Corvette City, I loved the car in the driveway :)


    Honestly, I went crazy with ideas with masking tape after seeing all this. Other things you could do would be hopscotch, tic tac toe and any game you could play using chalk on the sidewalk or driveway. It's really more versatile than I realized until today.

    Discovery Bottles:

    Discovery bottles are geared specifically toward learning. The way I look at it, the more you jump start your child's mind into thinking the more they learn, it's just like reading really. These really focus on sight, sound and smell. They make your child turn and twist or shake the bottle, making a different reaction each time and jump starting their little minds. Here's my favorite but this blogger has so many on her site, I believe I'll create every single one.

    It's just some pipe cleaners in a glass jar with a magnet to make them move. It's simple but it takes me back to the little magnet shaving faces where you could add hair to the blank face on a board- does anyone else remember these? I loved them. Seriously though, click that link- go show her some love too, these are amazing. Magnets can be bought here, horseshoe 6.25/12 and will be useful for other projects as well.

    Balloon Ping Pong:
    Bouncing a small ball around the house can always turn into trouble. I don't know about your kids but mine would most certainly break something. So, the solution is, turning the ball into a balloon. It's hard to break much with a simple balloon. Tobers, Bubba and Livvy are all obsessed with balloons. They're a big deal at my house. They're also really cheap. If you're kids are as in love with them as mine are go check out Oriental Trading where you can get them (and so much more stuff) cheaply. The ones I linked to are 144 for 5$. Basically balloon ping pong is your basic ping pong game using popsicle sticks (500 large ones for 7.25 at OT) glued or stapled to paper plates as the paddles and the balloon as the ball. Lots of fun for the kiddos.


    More Great Links:
    SavingStar- 10 activities for kids I absolutely love this, and it's got 10 more links to 10 more places for great ideas, check out the ocean in a bottle. That makes me so happy and wouldn't that be a great idea to use keepsakes from a beach trip?
    Oriental Trading they have just so much stuff for really cheap, go check it out. I can't say enough about this website. They have stuff for everything from decorations for any party to soap and candle making to paints, crayons, and markers to costumes to anything. It's really great. It's also a great place to get soap dye for those homemade bathtub crayons

    Sunday, January 6, 2013

    Bath Time, Fun Time


    Bath time is a big deal at my house, the kids are definitely in love with water. When Tobers was still little I found some little tablets that changed the water different colors without staining our tub at walmart. I also bought them some bath crayons. Those didn't work out too well because of their age at the time. They spent more time eating the crayons than coloring on the wall. However, to make them even more comfortable with the move, I've decided to go back to that type of thing and I've begun looking up recipes for the same type of stuff I used back then. I'm thinking that the more fun they have the more comfortable they'll be and we actually have space to move around now. So here are some of the recipes I'm going to try if you'd like to try them with me!

    Homemade Bubble Bath:
    • 750ml/3 cups of liquid Castille soap
    • 15g/2 tbsp fine sugar ( confectioners or caster)
    • 20g/ 4 tbsp glycerin (vegetable)
    • optional: 1 level tsp of beet powder to make it pink, turmeric to make it yellow, or woad to make it purple
    • essential oils for sent (optional)
    • glass, ceramic or metal mixing bowl
    • large bottle
    • a funnel
    Stir together all the ingredients above (except the essential oils) and add the optional coloring if you want it to have a color. Once the sugar has completely dissolved,  place the bowl in a cool, dry place for approximately 24 to 30 hours. Once the mixture has been allowed to cure, add the essential oil fragrance combo of your choice. You'll only need a few drops. You may either add them now, or you can add the essential oils separately to each bath- it’s up to you.

    Jelly Bubble Bath -NOT EDIBLE:

    • Packet unflavored Gelatin
    • 3/4 Cup water
    • 1/2 Cup clear liquid soap or bubble bath
    • Fragrance oils (optional)
    • Food Coloring of your choice
    • Plastic jar with lid (you can use a cleaned out empty peanut butter jar)
    • Mixing Bowl

    Empty the packet of gelatin into a mixing bowl. Set aside.
    Warm water until it begins to boil. Immediately remove water from heat source. Carefully pour the hot water into mixing bowl and gently mix with gelatin powder. Allow gelatin to completely dissolve. Be patient! This may take a few minutes.
    Very SLOWLY and gently stir in the liquid soap to the gelatin mixture. Add a drop of food coloring and 5-8 drops of fragrance oil. (Be careful not to beat mixture, bath jelly will become foamy if you do.)
    Pour your bath jelly into a clean, clear container.
    Refrigerate Bubble Jelly until set (about 4 hours).
    To use, scoop a small amount of jelly into your hand and hold under warm running water for a bubbly bath-time treat!

    Body Glitter:

    Tobi loves this stuff. Just mix aloe vera gel and glitter, rub on with fingers.

    Bathtub Crayons:
    • Clear glycerin soap base cut into cubes
    • 3 or more soap color dyes (or food color dyes)
    • Essential oils in your favorite smells (optional)
    • Glass measuring cup for melting soap
    • Spoons for mixing colors and fragrances
    • Ice cube trays or round crayon molds
    Separate the soap base cubes; one pile for each soap color dye.
    Have the children place the soap cube for the first color in a glass measuring cup and melt in microwave in short bursts.
    Once melted, have the children add soap color a drop at a time, mixing well after each drop until you get the color right.
    Then, add a couple of drops of essential oils and mix well.
    Next, have the children carefully pour the color soap into ice cube trays.
    If you see any air bubbles on the surface of the soap, spray it with rubbing alcohol.
    Have the children repeat the same soap crayon making process with the rest of the colors.
    After that, allow the soap to set until it is firm. This could take anywhere from 30 minutes to a few hours.  When the soap is close to firm, feel free to place the soap in the freezer to speed up the hardening process.
    When ready, have the children pop the soap crayons out of the trays.

    Bathtub Paints:
    • 1/3 cup mild clear Joy dishwashing soap or baby shampoo
    • 1 tablespoon cornstarch
    • food coloring

    Mix cornstarch and liquid soap in bowl.
    Pour into ice cube tray, filling about 1/2 full.
    Put 4-8 drops of different food coloring colors into each section and mix till blended.
    I usually use toothpicks to mix when in the ice cube tray.
    Give to the kids and let them at it!
    This washes your child, and will wash off the walls too!


    I picked these recipes specifically because of the science behind them. I've found that the bubble bath recipes without glycerin don't really bubble up as well. They're usually just shampoo mixed with water. I was also particular about hunting down recipes that had no indication of staining as I just got that bathtub perfect, I don't know what I'd do if it was suddenly rainbow colored. Be sure to comment and let me know how you liked the recipes, I know my kids are going to love them.

    Bath time themed books (we sometimes read while in the tub, I'm big on reading ask my mom :)):

    1. Bath Time By Sandra Boynton


    Pinned Image

    Scary Monster Spray

    So, moving day is getting closer and closer. It's starting to make me a little nervous, I feel like I'm not fully prepared for all of this yet. I'm working on it though. One of my main concerns with the kids, besides getting their rooms together, is monsters. My kids sometimes think that there are monsters in the dark. Gamma (my mother) got them glow pillows for Christmas to kind of help with that but I'm still worried they're going to have problems. They don't do this often but when they do it they are usually under stress, like moving into a new place or spending the night in a strange place. Before, when they've spent the night there I convinced them that Brandon's roommate's dog, Tigger, ate monsters. However, that same roommate is moving out and taking Tigger- and therefore our protection against monsters- with him.

    Then I remembered an awesome pin I saw on Pinterest. Monster Spray. Here are the pins:

    Monster Spray  :)                                                                 Haha..... when my kids were little, I did something similar on my own... it was a spray bottle filled with water and we called it Monster spray away.... I would squirt it a few times at bedtime and the kids went to bed with piece of mind!!  :)  @April Hamilton...maybe this would work for you??? Monster Vanishing Spray Printable

    I love this idea, especially if I can convince them that it works. Basically you just spray it around the room and voila! it scares the monsters away. It basically is monster repellent, like bug repellent. I've also seen where someone decorated an air freshener bottle for the same purpose. Empty spray bottles can be purchased really cheaply through your local grocery store, I got mine at Rose's for a dollar. I think they're roughly a dollar at Walmart as well. You could also reuse old spray bottles from cleaners, just wash them out thoroughly. I'm currently using all of mine for cleaners and I really wanted mine to be clear so I went and bought one. To remove the printed labels on plastic bottles just pick up a bottle of pure acetone (located near the nail polish remover) and soak a rag in it, wrap the rag around the bottle and in just a few minutes the label should completely come off. I'll post on this later with pictures of how it worked for me. I'm pretty sure nail polish remover would work as well, it is acetone I just think it's diluted. Not sure on that. So it would take a little more rubbing to get it off but it would work. Make sure to wear gloves when you do this and be in a well ventilated area.

    As far as what goes in the bottle, water will work, so will febreeze. In my Monster Spray I put a mixture of febreeze and water. When I get a chance to get some more glitter I'm considering putting a small amount of that in there as well.

    My Monster Spray

    I haven't tried it out on the kids yet but they know how bug repellent works so I'm pretty sure this will work. Do you like my artwork? I think my monster is more cute than scary but oh well, it's still a monster. We're going to work on "good monsters" too. I saw a book once on good monsters and what they do- that they're our friends. I don't remember the name or title but I'm sure I'll be able to find it. Monsters Inc. will help as well because who could really be afraid of Mike and Sully?

    Friday, January 4, 2013

    Tobi and Livvy Share a Room


    I smile because you're my sister... I laugh because there's nothing you can do about it!


    For the girl's room I was obviously, again, on a tight budget. Livvy and Tobi like a lot of different things- like Bubba, but they tend to focus on the basic princess flower type of genre instead of being all over the place like their male counterpart. Again, I'm going to have to be generic. Character stuff is just way too expensive these days just because it's from a kid's movie or show. The girls, being that generally focused, were a lot easier to come up with ideas for. I've decided to go with an outside kind of theme. Sort of a field full of flowers type of idea.

    As far as their ceiling goes I'm still undecided. I like the idea of draping fabrics a lot like what's in the picture below. I feel like it would add a lot of much needed color. However, I'm really really in love with the idea of doing just your regular sky. The cloud mobile type hangings would be perfect for the field of flowers theme. The ceilings are kind of low in this house because it's older so the draping of the fabric may also make the room appear very small to us adults. Another reason I seriously want the clouds is that I can completely cover their ceiling with glow in the dark stars. Walmart also sells a remote control moon. A moon you guys, and it's only around 20$. It's basically a night light, but guess what else it does? Go on, guess! Not only does this moon double as a night light and operate easily by remote but it goes through all the moon cycles too! Is that not the coolest thing ever?! Yeah, gotta have one of those for each of the kids rooms.

    awesome ceiling:))                                                                  Paper Cloud Mobile


    As for the wall decorations I would really like to do butterflies "flocking" and paper flowers. Both very cheap and inexpensive. I really like the idea of slowly collecting butterflies to put on a random wall kind of like Bubba's eclectic wall. I see butterflies of all kinds at thrift stores and dollar store around Spring. There are the old plastic ones that used to be in style and brass ones and of course the cheap metal ones meant for gardens. I really do love the butterfly stakes you see that are made out of a stocking type material. I want all different styles and sizes of butterflies for that wall. The flowers I'll make myself.
    giant paper flowers for the classroom!                                                                  wall butterlies


    I'm also going to put up cute canvases in their room, like Bubba's. Just more girl oriented.
    Glowing, DIY art. Better than a nightlight!! I love it!!  (~TA firefly inspiration!)                                                                So cute!


    Over the girl's beds I'm going to put mosquito net type hangings made out of tulle and hula hoops. Both my girls share the same initials so over the center of their night stand I'm going to put up yarn wrapped pink, purple, and yellow letters. I'd like to pin strings of little paper or felt butterflies to the mosquito nets too.

    DIY hoola hoop fort. Could be a reading tent, or a secret hideaway, or a sleeping nook                                                            simple DIY felt butterfly mobile


    So what do you guys think? Do you think my girls will absolutely love it? Won't it be cute?