Showing posts with label recipes. Show all posts

Monday, February 4, 2013

Mardi Gras Party!


Not many people celebrate Mardi Gras, also known as Fat Tuesday, or know much about it but I thought I'd stop and make a post on it for the holiday. I love Mardi Gras because the festival happens in New Orleans (and other places around the world) and is Louisiana is steeped in the French languages and traditions. I'm a big fan of France and all its traditions, the language and the food.  Fat Tuesday falls on the day before Ash Wednesday, the first day of Lent. During the 46-day Lent period, many Christians forego the eating of meat, either completely or on Fridays.
The traditional Mardi Gras colors are purple, green and gold. Purple is meant to stand for justice, green for faith, and gold for power. The bead throwing started in 1900's with plastic beads and now you never know what you'll get, beads are pretty traditional at Mardi Gras though you don't have to flash anyone to wear them! Masks are also very traditional at Mardi Gras, originally meant to hide the faces of the "krewes" who made the floats in secrecy. Doubloons are also a Mardi Gras tradition, handed out to the revelers by the "krewes" who made the fantastic floats.
I love food and dressing up so this is really a great holiday for me. Lots of foods that are Creole, Cajun, or French can be considered traditional to Mardi Gras. King cake is common at Mardi Gras and traditionally has a token (usually a small plastic baby to represent Christ as a child) that, when found, gives the finder good luck for the upcoming year.
Recipe for King Cake

1 cup milk
1/4 cup butter
2 (.25 ounce) packages active dry yeast
2/3 cup warm water (110 degrees F/45 degrees C)
1/2 cup white sugar
2 eggs


1 cup packed brown sugar

1 tablespoon ground cinnamon

2/3 cup chopped pecans

1/2 cup all-purpose flour
1/2 cup melted butter


  1. Scald milk, remove from heat and stir in 1/4 cup of butter. Allow mixture to cool to room temperature. In a large bowl, dissolve yeast in the warm water with 1 tablespoon of the white sugar. Let stand until creamy, about 10 minutes.
  2. When yeast mixture is bubbling, add the cooled milk mixture. Whisk in the eggs. Stir in the remaining white sugar, salt and nutmeg. Beat the flour into the milk/egg mixture 1 cup at a time. When the dough has pulled together, turn it out onto a lightly floured surface and knead until smooth and elastic, about 8 to 10 minutes.
  3. Lightly oil a large bowl, place the dough in the bowl and turn to coat with oil. Cover with a damp cloth or plastic wrap and let rise in a warm place until doubled in volume, about 2 hours. When risen, punch down and divide dough in half.
  4. Preheat oven to 375 degrees F (190 degrees C). Grease 2 cookie sheets or line with parchment paper.
  5. To Make Filling: Combine the brown sugar, ground cinnamon, chopped pecans, 1/2 cup flour and 1/2 cup raisins. Pour 1/2 cup melted butter over the cinnamon mixture and mix until crumbly.
  6. Roll dough halves out into large rectangles (approximately 10x16 inches or so). Sprinkle the filling evenly over the dough and roll up each half tightly like a jelly roll, beginning at the wide side. Bring the ends of each roll together to form 2 oval shaped rings. Place each ring on a prepared cookie sheet. With scissors make cuts 1/3 of the way through the rings at 1 inch intervals. Let rise in a warm spot until doubled in size, about 45 minutes.
  7. Bake in preheated oven for 30 minutes. Push the doll into the bottom of the cake. Frost while warm with the confectioners' sugar blended with 1 to 2 tablespoons of water.


Fried Oysters

2 eggs, lightly beaten


  1. Heat deep fryer to 375 degrees F (190 degrees C).
  2. Combine flour, salt and black pepper. Dredge oysters in flour mixture, dip in egg and roll in bread crumbs.
  3. Carefully slide oysters into hot oil. Cook five at a time until golden brown, about 2 minutes. Drain briefly on paper towels. Serve hot.
Easy Jambalaya

1 tablespoon olive oil
1 pound large shrimp, peeled and deveined


  1. Heat oil in large deep skillet or 5-quart Dutch oven on medium heat. Add onion and bell peppers; cook and stir 7 minutes or until vegetables begin to soften.
  2. Stir in tomatoes, water and Jambalaya Mix. Bring to boil. Reduce heat to medium-low; cover and simmer 15 minutes.
  3. Stir in shrimp and sausage. Cover and cook 10 minutes longer or just until shrimp turn pink and rice and vegetables are tender, stirring occasionally. Remove from heat. Let stand 5 minutes. Sprinkle with parsley, if desired.

As far as decorations for a Mardi Gras party, stay simple. Scatter beads, masks, gold coins and stick to the colors purple, gold, and green. Streamers and balloons with noisemakers would be more than sufficient. Don't forget to have some upbeat jazz music in the background too!


Here is a link where you can get 144 Mardi Gras colored necklaces for $10.50
Here is a link to some feathered Mardi Gras masks 15$ for 12
Here is a link on the same site to all their CHEAP Mardi Gras decorations
Here is a link to fake doubloons for Mardi Gras festivities 5$/144
Here is a link to chocolate doubloons 10.50$/60
Useful Links:
The History of Mardis Gras
Mardi Gras Around the World
30 Classic Mardi Gras Recipes from Southern Living!

Wednesday, January 30, 2013

Spinach Pasta

I absolutely love this recipe, though I don't make it very often. I usually wait till I don't have much pasta left in the bottom of each box, not enough to make one dish for the whole family. So, I combine both boxes, in this instance you'll notice macaroni and farfalle in the pot. I also throw in whatever little veggie pieces I have left. In this one I happened to have half a bell pepper and I almost always have spinach left overs in the fridge. All you have to do is cut up what veggies you have, equaling about a cup to a cup and a half, I saute mine in a little butter for a minute to a minute and a half before adding 2 TBS butter to the mix and my cooked pasta. Then I add in a tsp and a half of Calvert's seasoning. They sell this at Walmart and it's a very versatile very tasty spice blend. Add a tsp. of salt and stir and you're done. It's healthy and tasty- the kids certainly love it as much as I do. The best part? Sneaking spinach into their diet :)


Friday, January 18, 2013

Date Night In

I am a firm believer in having a date night or some form of spending time with your significant other. It helps the relationship grow, especially when you have children. Brandon and I rarely get any time together alone and I really feel like that's important- not just for us but for every couple. Time alone without the kids that is. It's just not the same thing with them.

So I managed to get a free night together tonight even though I don't get off of work until 11 and he doesn't get off till 11:30, we're still going to spend time together. Of course, as always, our budget is too tight to be going out anywhere so we're going to stay home and do a date night in. I'm planning on a dinner, a movie, and probably a game of chess (it's actually really competitive game between the two of us :))

Here's the Menu:

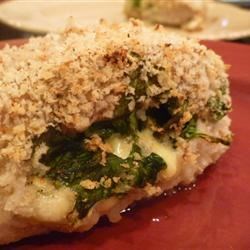
Stuffed pork chops
garlic bacon wrapped asparagus
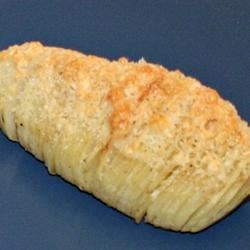
hassleback potatoes
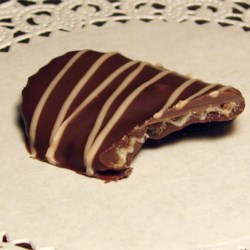
chocolate dipped potato chips

We love food and cooking together. I had to adapt some of these recipes from others and some I just kind of winged it on to be honest, I don't always use recipes on a simple project. For example, chocolate dipped potato chips- I kind of figured that one out on sight as I know how to melt chocolate haha.

The Stuffed Pork Chops

Gouda and Spinach Stuffed Pork Chops Recipe

I adapted my recipe from this one, though I think hers is probably prettier than mine. I always use thick cut pork chops when making this, the thin ones are dry when cooked and annoy me greatly. You can also substitute chicken for this- I've done that before as well. Just wrap it in bacon if you use chicken- trust me. Also, either use boneless or de-bone what you have. Then you take a very sharp knife and slice into the thickness of the chop, creating a pocket in the middle. Per chop I use about 3-4 slices off of a small block of mozzarella, about an 1/8 of a cup of cooked spinach, roasted red bell pepper pieces and just a bit of garlic to stuff it. I then sprinkled my chops with salt and pepper to taste and begin cooking them, like a sear, on the stove top- finishing in the oven.

Hassleback Potatoes

Hasselback Potatoes Recipe

For these I use whatever cheese I have available, but first, after slicing them and baking them till brown I broil them, to get the extra crispiness, remove and add cheese and then broil again to melt the cheese. I'll be using mozzarella for these tonight.

Bacon Wrapped Asparagus


These are simply asparagus spears (trimmed and cleaned) wrapped in bacon and cooked in a skillet till the bacon is crisp with a little garlic and oil. I love these still crunchy, but can't stand them soft, they are really delicious and not something we do often at all.

Chocolate Dipped Potato Chips

Chocolate Covered Potato Chips Recipe

These are going to be our dessert. I love these, they're the perfect amount of sweet and salty. Again, they're potato chips (ridges!) dipped in chocolate, it's simple. Unless you're not good at melting chocolate down. I use the microwave a few seconds at a time and stirring between until smooth.

This should be awesome. What do you guys think about the menu? I think it appears to be a lot of work and seems elegant but it's really quite easy and a quick meal. It also includes all the things we love. Believe me I had to think for a long time on what to serve before I settled on pork... we eat a lot of sea food and I considered using tilapia in place of the pork but opted for the cheaper of the two.

Valentine's Day

Like my mother, I decorate for everything. I don't know why I do it, I just do. This includes Valentine's Day. I normally don't get into Valentine's Day but this year I'm going to make some decorations for it, might as well. I don't have any any more- therefore, I need some. This is the way I feel about holiday decorations.

Yarn Wrapped Letters:

Pinned Image

I love yarn wrapped letters, and these letters from My Sister's Suitcase are really cute and perfect for Valentine's Day! However, I'm all about saving money and I would change this slightly by using cardboard letters. To get the thickness with cardboard all you need to do is cut out the same shape repeatedly, stack them together, and glue. No one is going to be able to tell, the cardboard will be covered in yarn. If you really want to be sure the cardboard is completely covered, paint it in a corresponding color. At My Sister's Suitcase she also used cardboard, but she used 3D cardboard letters. I don't know that our craft store here sells these, but I'd much rather make mine, I'm too much of a penny pincher. There's also another trick she used that I'd definitely have to agree with. On the ends of the letters that you're unable to wrap you're probably going to have to glue the yarn down. In any case you might want to do that every couple of inches on the flat sides as well to ensure stability in your project. The link will take you straight to her project if you need more of a visual. 


Aren't these cute little heart ornaments from The Creative Place adorable?! I am absolutely in love with these. The link will again take you to a full tutorial. I love these as door hangers and will probably hang them on every door in my house. I'm also seriously considering putting a few drops of essential oil inside, probably lavender.

Pinned Image
These decorative bottles are actually left over sparkling cider bottles from G*Rated. All they did was take a hot glue gun and "write" the words on the bottles, then paint them. The tops are wrapped with twine. These are fun, easy, and cheap which everyone knows I love. I'll definitely be adding these to my Valentine's Deco box.


i (heart) u blocks

I love these I love you blocks from I Candy Handmade, they're easily handmade and go well with other V-Day decorations. The sign behind them says "I love us". I'm definitely going to do these as well. They're also pretty durable and will last a long time, making them perfect for my V-Day Deco box. Wood blocks are pretty easily found/ made and I've definitely got the skills and paint to make them!


Pinned Image


These felt arrows from Carolyn's Homework can be made with cheap felt and twigs even with very little crafting skill. If you're going to use hot glue with felt, be careful. Depending on the thickness of the felt it may or may not do one of two things (or sometimes both). It will seep through the felt and burn your fingers and/or leave a flat kind of ugly spot on the outside so be careful with these!


Pinned Image
This envelope from The Crafting Chicks, was love at first sight for me. I love it so much. However, I don't currently have stairs to hang it on and I am bent on the little heart door hangers above. So, my solution for what to do with this envelope, once made, is to hang it in the middle of my Valentine's Door Wreath featured below. With just a little tweaking on the colors it will be perfect and so cute. I love this. Again, click the link for a full tutorial. I love these guys. Did I mention how cheap felt is and how easy it is to work with? I think it's going to add the perfect "kick" to my wreath.


Wow, I love argyle and this wreath from Mine for the Making is definitely for me. I'm going to have to make this, without a doubt. I still like a little more fullness to my wreaths, if that makes any sense and that's why I'm going to add the felt envelope from above. Again, when using yarn to wrap something, stop and add a little glue every couple inches, or rows, to add stability. I don't know how the boys in the house are going to feel about all these hearts! :)


Tissue Paper Candle Holders:  
Pinned Image

I'm not sure who to give credit to for the tissue paper candle holders, but it's basically just tissue paper and mod podge (the link will take you to the recipe) over a glass jar with a votive inside. I suggest using battery operated tea lights to minimize fire hazard :)        

            Countdown To Kisses Board:
 
Pinned Image
I really do like this board from Infarrantly Creative, the numbers are actually Hershey's kisses. However, this board is actually a bit harder to make than the previous projects, by far. We currently don't have an electric drill so I'm going to have to find another way to do this, I'm just not sure how yet. I'm sure I'll be able to do it though, no problem. I'll definitely let you guys know when I'm done and the entire project is completed- I'll include a step by step guide as well for everyone.


I've also seen some adorable garland's and I like them all but I haven't seen one yet that I felt was really my style so I'm going to put a hold on that one and wait to see what I can come up with on my own. I'll most likely be using paint chips and pom pom's but I'll let you guys know what I decide on!

UPDATE: All I've managed to complete so far on this is the painted bottles, will be posting pictures soon!

Friday, January 11, 2013

Bubbles?! BUBBLES!


bubbles
What kid seriously doesn't love bubbles? My kids love them that's for sure and it's such a fun and easy way to keep them occupied while mommy does mommy things! I love bubbles too. When I was a kid my Nanna would make bubbles for my cousins and me. We thought it was the most amazing thing. It wasn't until I got older and had kids of my own that I realized how easily bored we were and how hard it must have been to cope with hellions like us. Bubbles (and homemade ninja turtle masks) were Nanna's go to recipe for peace on earth! I now use the same things to distract my kids and get a little quiet time. Much like the pillow/blanket fort, however, bubbles have evolved again. You can get bubbles that are colored, bubbles that glow, regular bubbles, bubbles that are hard to pop and even bubbles with flavor. I just want to pause here and let you all know that I don't think I would ever even try flavored bubbles. I stopped trying flavored stuff that wasn't supposed to be flavored after the edible paper. That's gross by the way. Ok, back on track- as you know I try not to pay for anything that I can make at home so at one point last summer I looked up all of these recipes and now I'm going to share them with you!

Regular Bubbles
8 T dish soap
1 Quart water

Bouncing or Un-poppable Bubbles
1 cup water
2 tablespoons light karo syrup or 2 tablespoons glycerin
4 tablespoons dishwashing liquid Mix together and have fun!
The glycerin and kayro help to make a thick solution that works better than just soap and water.

Glow in the dark Bubbles
1 cup water
2 tablespoons light karo syrup or 2 tablespoons glycerin
4 tablespoons dishwashing liquid 1glow stick
snap or cut the glow stick and add the contents to the basic bubble solution. This will last only as long as the night stick holds it's glow.

Colored Bubbles
3 cups dish detergent
3 cups water
2 cups glycerin
several drops of food coloring or washable paint
just mix
As far the flavored bubbles go, I can't find a good recipe so I'm going to make one myself. Keep reading and after I figure it out you guys will be the first to know!
1. If bubbles pop easily or solution does not work well, add more water.
2. Dawn and Joy seem to be the best choices for bubbles. It is the antigrease agent.
3. Bubbles work best on an over cast day.
4. Bubbles love moisture so right after a rain also works well.
5. To catch a bubble just get your hand wet.
6. Glycerin or Kayro is added to the mix to make the bubbles more durable. The more you add, the stronger they'll be!
As far as bubble storage I saw a ridiculously cute idea on Pinterest. You just store your bubble solution in a drink container with spout for easy access! That would be great for storage while in use by the kiddos but for long term storage I would use empy plastic containers like milk jugs and juice containers.
Pinned Image


And have you seen the different ways to blow bubbles?! Jeez, the old school bubble wand has gone to the dogs!

The Bubble Pool:
Just fill a kiddy pool with bubble solution, have someone stand in the middle and have others lifta  hula hoop from the bottom over the person!


The Bubble Snake:
The way I understand this is that it's bubbles in a bottle with the end cut off and a sock secured to the end. Here is a link for the full project.


The Classic Bubble Wand:
Here is a link to a project where you can make your own. Here is a project where you can make super bubble wands for gigantic bubbles. Bubble wands and accessories come in all shapes, designs, colors and sizes. I've seen bubble pipes shaped like old tobacco pipes, tubes, something that I think was supposed to be a kazoo. If you can remember to do it, go to your local Walmart or dollar stores right about the time summer is going and fall is coming in and you'll find masses of bubble wands in all different shapes and sizes, even bubble guns, on sale for 50-75% off. Always shop for next season!

Tuesday, January 8, 2013

Super Awesome Most Amazing Cinnamon Rolls EVER

Hey guys, just letting everyone know that Wednesday and Thursday are my weekend days. I'm going to try to post on those days as well but I'm going to be really busy. Last night I moved all of Brandon's remaining roommate's stuff into the den as he wants it to now be his room. I spent a few hours getting every thing moved and taken care of. I suspect that's what I'll be doing the next couple of days, moving things around so that I can get every thing else finalized. It's going to be busy, but I'll try to keep everyone updated. For this post though, I decided to introduce you guys to something amazing- my mom's cinnamon roll recipe. I will go ahead and tell you that it does involve some work, but it's worth it. I've been spoiled on these cinnamon rolls and really can't eat the canned kind anymore, I think they taste like cardboard and aluminum foil. Here they are!


Mom's Cinnamon Rolls:

Sourdough Cinnamon Rolls
1 Recipe Sourdough bread dough
1/2 cup butter or margarine softened (I use butter)
1/2 cup firmly packed brown sugar
1 T. Cinnamon
1/2 cup raisins (I omit these)
3 Cups sifted powdered sugar
1 1/2 tsp vanilla
5 - 6 T. milk
  • Divide dough in half. Roll each portion into a 12 x 10 rectangle. Spread each rectangle with 1/4 cup softened butter to within 1/2 inch of edge. Sprinkle each with 1/4 cup brown sugar, 1 1/2 tsp cinnamon and 1/4 cup raisins (if desired).
  • Roll dough, jellyroll fashion, starting with long side and press firmly to eliminate air pockets. Pinch seams to seal. Cut into 12 1" slices, place cut side down in 2 greased 13 x 9 x 2 baking pans.
  • Cover, let rise in a warm place 1 hour or until doubled
  • Bake 350 degrees 20 minutes or until golden
  • Combine powdered sugar, vanilla and milk. Drizzle over rolls.
Yield 2 dozen rolls.
Enjoy warm!

Can refrigerate, just let rise before baking. Can place in aluminum baking pan, cover with plastic wrap and share as a gift or buy a nice baking dish, place rolls in dish with instructions on baking and give as gift for recipient to keep the dish!

So, the sourdough starter I posted last night is needed to make this bread. And this bread dough is needed to make the cinnamon rolls, follow the steps through to dividing in half. It takes a little time, but it is so worth it! Makes good sandwiches and makes good roll substitute for any meal! Happy Baking! These loaves can also be wrapped and given to friends as gifts this upcoming holiday season! :)

  • 6 cups bread flour
  • 1/2 cup vegetable oil
  • 1/3 cup sugar
  • 1 cup sourdough starter
  • 1 pkg active dry yeast
  • 1 1/2 cups warm water (120 - 130 degrees)
  • 1 TBSP salt
-- Combine first 4 ingredients in a large bowl. Gradually stir in oil and remaining ingredients.

-- Turn dough out onto a floured surface; knead lightly 4 - 5 times. Place in a well bowl, turn to grease top. Cover and let rise 2 hours or until doubled.

-- For bread, punch down, divide in half, shape each portion into a loaf, place in lightly greased loaf pans, brush tops with 2 tbsp melted butter, cover and let rise one hour or until doubled.

-- Bake at 350 degrees for 25 minutes or until loaves sound hollow when tapped. Remove from pans immediately and cool on wire racks.


Sourdough Starter
1 pkg dry yeast 3/4 cup sugar
1 1/2 cups warm water 3 T. instant potato flakes

Mix dry yeast with 1/2 cup of the warm water. Combine sugar, remaining 1 cup warm water, and potato flakes. Stir and add yeast mixture. Stir. Loosely cover with plastic wrap with two or three air holes punched in it. Let stand all day. Refrigerate. On day 3, take out and bring to room temperature. Feed with feeder below.

Sourdough Feeder
1 cup warm water
3/4 cup sugar 3 T. instant potato flakes

Mix feeder ingredients. Add to starter. Allow to stand out of refrigerator all day. Should start to bubble. At the end of the day (or 12 hours) remove 1 cup starter to use in making bread. Return remainder to refrigerator. After 3-5 days feed again. Remove one cup starter to give away or make bread, return remainder to refrigerator and repeat cycle. Can be stored in a canning jar, glass bowl or plastic bowl!

I usually feed at night, then when the 12 hours are up, it is daytime hours and I make my bread. :)


See? I told you guys there was some extensive work to these rolls! Trust me though, they're really worth the work. That bread is awesome too. Check out the rest of the blog for more recipes. It's got a lot of  great stuff!

Edible Kid Science

I decided to do another post on science projects for kids, but this time I wanted to do something really fun. How about science projects and experiments that you can eat? Food is a great way for kids of all ages to learn. They love it. So, I did some research and came up with a couple of edible science project to do with my kiddos and decided to share them with you!
How to make rock candy:
  • 2 cups water
  • 4 cups granulated sugar
  • 1/2-1 tsp flavoring extract or oil (optional)
  • food coloring (optional)
  • glass jar
  • skewer or thread (see below)

  • wet your skewer or thread and roll it in granulated sugar, set it to the side
    bring water to a boil over medium heat in a medium sized sauce pan and start adding sugar one cup at a time, stirring to dissolve. Continue this till all the sugar is dissolved. When the syrup is smooth you remove it from the heat. If you're going to add food coloring or flavor now is the time to do it. Allow the mixture to cool for around ten minutes before carefully adding to a large mouth jar. Place your skewer in the center of the jar, held up using clothespins. Like so:

    rock candy

    The skewer must be as close to the center as possible and not on the bottom or this will not work. If you don't see a change within 24 hours boil again and add another cup of sugar. If you do see crystals starting to form then you're doing good. Allow the rock candy to grow until it's reached the size you want. Be aware that this could take up to a week.

    A great topic of conversation for the rock candy project is to discuss how stalactites and stalagmites are made in caves as it is a very similar process, just not as tasty!

    Invisible Ink:
    Write a message on a piece of  paper with lemon juice, using a paintbrush or stick. Allow paper to dry. Take your hidden message and hold it close to a light bulb to warm it up. The chemicals in the lemon juice will turn brown when heated, making your message appear. It's pretty awesome, we did this as kids a lot.

    A great topic of discussion for this project is to discuss with your child how different chemicals and different materials change color and composition (think melting) with heat.

    Make Butter:
    This is a great project and very tasty. You don't need much to make your own butter at all, it's a very simple project. I think that most people have not tried this because the idea of it is daunting. It's really not hard at all though!
    Here's what you'll need:
    heavy whipping cream (not ultra pasteurized)
    regular salt (not iodized)
    cinnamon and honey (optional)
    a way to mix it!

    If you shop near me, or are here from my facebook and know me, Walmart sells the type of cream you need. It's in a smaller container that's purple and gold sold near the other creams and the weird notmilks beside the milk. Get that.
    There are lots of ways to mix the cream into butter, a hand mixer works but a stand mixer is best as it could take a while.

    Now, if you don't feel comfortable letting your kid even think about using a mixer (and I don't) then all you need is a Tupperware container big enough to hold all the cream, by half. So if you pour all the cream in it, it would only be half full. Then, place a marble or two in the cream and put on an air tight lid. Hand over to your kid and have them start shaking.

    The process of making butter will look the same no matter how you do it. First, the cream will foam up and thicken becoming thicker and thicker. This thick fluffy mass would be whipped cream if you added sugar at this point. However, we're not making whipped cream this time, we're making butter.

    The fun starts now, the whipped cream will start to break down, becoming watery at this point. It will eventually start too look kind of like watery buttermilk. At the "buttermilk" stage it's time to stop the mixing. There will be little white chunks floating in the whitish water, that's your butter. Go ahead and either run some ice cold water in the sink or have a large bowl of ice cold water nearby. Scoop up as many as the little chunks as you can find, using your hands or a small hole strainer (like mesh). These little curds will stick together and, in your cold water massage the ball (it will feel like butter) over and over.

    Why you have to massage the butter, you'll notice, is to get all the water out. If need be empty the bowl and refill it with more cold water, continuing to do this until the water is clear or no more milky water comes out of the butter. If you leave it there it won't taste as good and will cause the butter to spoil quickly.

    That's it, you're done! You now have butter. Add your salt (just a pinch no more than a 1/4 tsp) and if you'd like add cinnamon and honey to taste. I promise you'll love it.

    What science topic I would cover in this is what materials turn to what with what process like how cream turns to butter, sugar to candy etc. I would even cover how dirt turns to mud. My kids love mud so we would have to discuss this and this project can really take the other two discussions to another level.

    Want a easy bread recipe to eat your butter on? Here ya go!

    7-Up Rolls:

    Ingredients:
    1. 2 c. Bisquick
    2. 1/2 c. sour cream
    3. 1/2 c. 7-Up
    4. 1/4 c. melted butter
    Directions:
    Preheat oven to 450. Mix the first three ingredients together, form balls and put onto baking sheet. Don't over mix. Brush the tops with melted butter and bake until browned.

    That's all I've got for this post, I don't want to keep making them super long, but I'll be sure to update when I come across more ideas for you guys, if you try them please come back and comment, let me know how they worked for you!

    Sunday, December 30, 2012

    New Years Eve Part 4: Alchohol

    Now, I really don't believe every party should have alcohol. I'm also a form supporter of the idea that you don't have to be intoxicated to have a good time. However, I do enjoy a little drink every now and then. That's very, very rarely mind you- it's hard for me to be kid free and I don't ever drink around my kids. Not even in the slightest. It seems that a lot of people do drink in some form at New Year's Eve celebrations. I thought I would go over some of the recipes here for your tamer drinks, nothing too hard or anything with too high of an alcohol content.

    The Jello Mold:


    This I got from the Jelly Shot Test Kitchen.  They basically layer alcohol infused jello in a bundt pan, one layer at a time and chill in the fridge. Now, I've done jello layers before and let me make sure you take note of this. Take your time with these! Let each layer solidify before adding the next one or it just won't be as pretty as this one!
    Here's the basic recipe for Jello shots:
    • 3 oz Jell-O or other gelatin (any flavor)
    • 6 oz water
    • 6 oz vodka (or other distilled spirit)
    1. Pour gelatin into a bowl.
    2. Add boiling water, stirring until the gelatin is dissolved.
    3. Stir in liquor. Make sure it's not too hot when you do this.
    4. Refrigerate until cool.
    5. Pour into shot glasses, molds, or a baking pan for a sheet of Jell-O to cut up once set. Tip: The small, plastic shot cups are perfect because the drinker can just squeeze the shot out.
    6. Refrigerate until the liquid sets. (At least 2 hours, but overnight refrigeration is recommended)
    7. Serve cold.
    *****Now, the above recipe is a tad strong on the alcohol content, you can adjust it with more or less****

    Drunken Gummy Bears:


    Did you know that gummy bears will soak up alcohol? No? Well now you do. So do gummy worms but I somehow find these less appealing. They also swell in size, as portrayed in the above picture. Drunken gummy bears are also a lot easier to make than jello shots. For this project, you'll need a glass bowl, with a lid if you have one. Fill the bowl halfway with gummy bears and then pour vodka over the top of the gummy bears, just barely covering them. You don't want to use too much vodka or they will disintegrate. Due to their size, gummy bears can only hold so much alcohol. Let them sit in the fridge over night. When you pull them out the next day you'll be able to see how much they soaked up. Drain the left overs and drink or do whatever you'd like with it.

    Champagne:

    Champagne tends to be a classic at New Years parties, as does wine. Both can be picked up at any store that sells liquor and spirits. Just stop by and ask the attendant for any suggestions on what to buy. Don't be afraid to ask, it's their job- they will know what to do.

    Beer:

    Beer is pretty common at parties these days and it comes in all shapes and forms. You can get all kinds of different beers with different flavors. Beer tends not to be that strong of an alcohol as long as you don't consume too many. Beer is also a really cheap alternative when compared to hard liquor and almost everyone that drinks will have a beer. Some people won't drink beer but odds are the same store you purchase the beer at will also have some form of wine cooler or other alcohol like the flavored Smirnoff's and the Jack Daniel's hometown punch.


    As always, drink in moderation. Do not drink and drive. Do not serve alcohol to minors and please don't serve the jello shots or drunken gummy bears around children- it's an accident waiting to happen and way too appealing to our younger generations.

    Friday, December 21, 2012

    You Don't Have to Buy that!


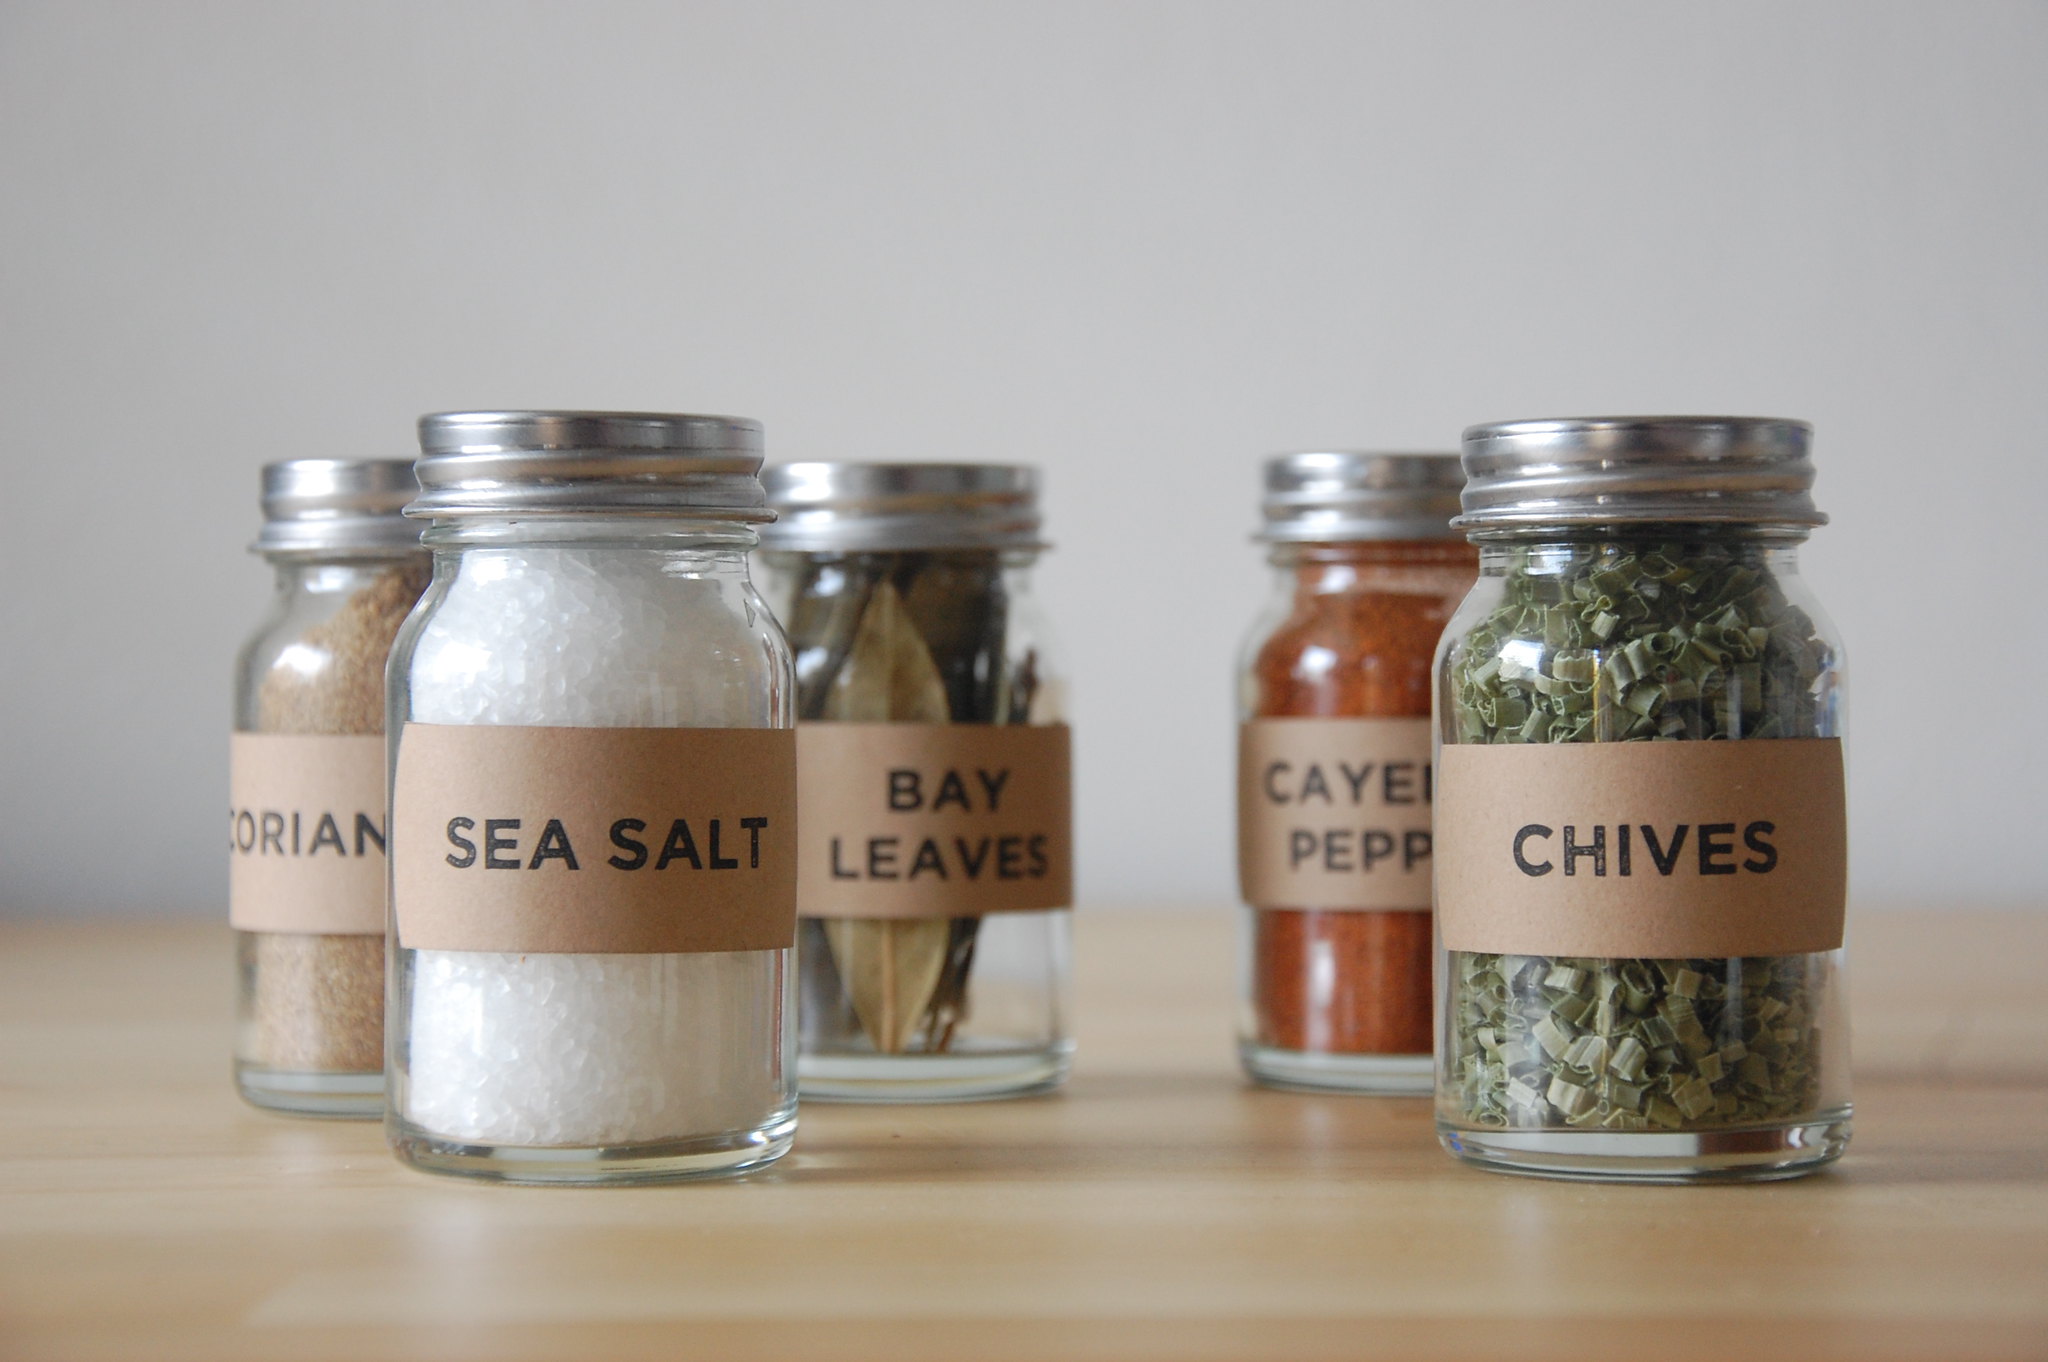
    OK, so my posts about spa recipes and my post about homemade household cleaners seemed to be pretty popular. I guess that it's actually saving money that's pretty popular! So I thought I would make it a trilogy! Today I'm going to give you guys some recipes for things you never realized you were spending so much money on! If you don't know already, homemade is always better. Even the jars above are homemade- DIY all the way! The link to them is at the bottom of this post!


    Homemade Nesquik Recipe
    2/3 C Sugar
    1/3 C Cocoa
    Pinch of salt

    Combine the three ingredients and store in a sealed container.

    Homemade Bisquick Recipe
    3 1/4 cups unsifted all-purpose flour
    1/2 cup sugar
    1 cup nonfat dry milk powder
    1/2 cup cornstarch
    1 tablespoon baking powder
    1 teaspoon baking soda
    1 1/2 teaspoons salt

    mix and store in a sealed container

    Eagle Brand Condensed Milk
    3/4 cup powdered milk
    3/4 cup sugar
    1/2 cup hot water
    Blend until smooth.

    This recipe equals one can of store bought condensed milk.

    Homemade Brownie Mix
    1¼ cups all-purpose flour
    1 teaspoon baking powder
    1 teaspoon salt
    ⅔ cup unsweetened cocoa powder
    2 cups white sugar

    mix and store in an airtight container. When you're ready to use this, add 1 cup melted butter or margarine 3 eggs 1 tsp vanilla and bake at 350 degrees Fahrenheit till done.

    Homemade Muffin Mix
    2 cups flour
    1/4 cup sugar
    1 Tbsp. baking powder
    1/2 tsp. salt

    mix in air tight container.When you're ready to use this add any special additions (like blueberries, chocolate chips, nuts etc.) first then add 1 egg, beaten 1 cup milk and 1/4 cup oil.

    Seasoned Salt
    8 Tbsp. salt
    1/2 Tbsp. onion powder
    3 Tbsp. pepper
    1/2 Tbsp. garlic powder
    2 Tbsp. paprika

    Homemade Taco Seasoning same link
    6 tsp. chili powder
    3 tsp. onion powder
    4 1/2 tsp. cumin
    2 1/2 tsp. garlic powder
    5 tsp. paprika
    1/4 tsp. cayenne pepper
    1/4 tsp. oregano
    Mix all ingredients and store in an airtight container. One teaspoon of homemade taco seasoning equals 2 teaspoons of the store-bought seasoning.

    Italian Seasoning same link
    1/4 cup dried basil
    2 Tbsp. dried thyme
    2 Tbsp. dried marjoram
    2 Tbsp. dried rosemary
    2 Tbsp. dried oregano
    2 tsp. garlic powder
    2 Tbsp. dried coriander
    1 tsp. sugar
    Combine all the ingredients. Store in an airtight container in a cool dark place for up to 3 months.

    Homemade Cajun Seasoning
    1/2 cup paprika
    1/3 cup Himalayan Salt or sea salt
    1/4 cup Garlic Powder
    2 Tablespoons Black Pepper
    2 Tablespoons Onion Powder
    1 Tablespoon Cayenne Pepper (optional- won’t be spicy without this)
    2 Tablespoons Oregano leaf
    1 Tablespoon Thyme leaf
    To Make: Mix all ingredients in jar or food processor and store in an airtight container. Good on stir frys, eggs, casseroles, and poultry. Can add more or less Cayenne to get to your taste.

    Homemade Lemon Pepper Seasoning
    Zest of 3 lemons, about 1 -2 tbsp
    Crushed black pepper, 2-3 tbsp
    Sea Salt, 1 tbsp
    Preheat toaster oven to lowest setting.
    In a large bowl, combine lemon zest and black pepper.  Cover metal pan fitted for toaster oven with foil and spread mixture evenly in pan.  Allow to bake low and slow until zest is completely dried.  Mine took about 26-30 minutes.
    Transfer lemon-pepper mixture to a bowl.  Using the back of a spoon (or spice grinder if you have one), crush mixture until desired texture is achieved.  Mix in salt, 1 tsp at a time.  Continue to add salt until you have the right balance to fit your taste.

    Homemade Fajita Seasoning
    3 Tbsp. cornstarch
    2 Tbsp. chili powder
    1 Tbsp. salt
    1 Tbsp. paprika
    1 Tbsp. sugar
    2-1/2 tsp. crushed chicken bouillon cube
    1-1/2 tsp. onion powder
    1/2 tsp. garlic powder
    1/2 tsp cayenne pepper
    1/4 tsp. crushed red pepper flakes
    1/2 tsp. cumin

    mix and store this is about the quantity of 3 commercial packets.

    1 tbsp flour
    2 tbsp minced onion
    1 1/2 tsp chili powder
    1 tsp salt
    1/2 tsp crushed red pepper
    1/2 tsp minced garlic
    1/2 tsp sugar
    1/2 tsp ground cumin

    this recipe is enough for 1 pound of ground beef

    2 Tbsp dried parsley
    1 tsp dried dill
    1 tsp garlic powder
    1 tsp onion flakes
    1/2 tsp dried basil
    1/2 tsp pepper

    mix and store. When you're ready to use this whisk together 1 TBS of Mix , 1/3 Cup of Mayonnaise ( or 1/3 cup non fat Greek yogurt)  and 1/4 Cup of Milk. Add salt to taste.

    PS: You can make your own spice jars for the above spices. If you like the ones in the picture you can find out how to make them yourselves at Well it's Okay, another awesome blog!

    That's it for now, I hope you guys enjoy these! Always remember to label clearly and don't forget to label how much you need to scoop if you make more than a single batch and what to add to that! Label label label!

    Monday, December 17, 2012

    My Homemade Sushi Adventure

    Last night I decided to get brave and try to make my own sushi, California Rolls specifically. I'm not comfortable with using raw fish, even sushi grade as I'm not a professional. I've never even done this before!! I'm a trial and error kind of person. I've done quite a bit of study on how sushi is made- another one of my learning adventures- so I didn't use any tutorials here, I just winged it. I will, however, include links to some tutorial videos and websites for help if you wanna try to make some yourself! My iPhone got left in the car so I wasn't sure what all to get but here's what I ended up with.


    1 cucumber
    1 bottle of rice vinegar (TIP: check both the oriental section and the vinegar section for the best price)
    3 bags of crab snackers (small packs of imitation crab that were a dollar a piece and I only used 3)
    1 small avocado (haas)
    1 great value box of boil in bag rice (cooking any other kind intimidates me. I'm rice cooking handicapped)
    1 pkg of toasted seafood sheets
    1 Mountain Dew (more on this later)

    Step one:
    Begin to boil rice

    I used two bags for this particular project.


    Step two:
    Prepare filling ingredients. I basically just took my crab meat out (I only ended up using two of the three packages) in its still stuck together square form and cut thin slices length ways. Here's a tip on the avocado! Cut the thing in half and then smack the pit with the blade of your knife- then just twist and lift, it'll come right out! I also score my avocado inside the flesh and then peel it back. This process makes for easier cutting. As far as the cucumber I only used half and i just peeled that half, cut it in half lengthwise and cut thin strips. Doing this type of prep work always makes things easier.


    Step three:
    Pull out you bags of rice and let them begin to drain they should be about ready when you're done with your ingredients. Let the rice cool- I throw mine in the freezer because I'm lazy and impatient. There's no pic of this step because my freezer isn't pretty. Once the rice is cool, sprinkle on your vinegar. This is to taste so start with a little and go from there.


    Step four:
    This step is particular to me- drink some Mountain Dew and give yourself a pep talk- you can do this!! You're not scared of these things and who's really gonna make fun of you if it's not perfect? Do you have a professional sushi chef in your living room waiting to laugh? If you do why isn't he doing this? I'd throw his lazy rear end out!....sorry I'm rambling again.


    Step five:
    Lay your rice onto your seaweed. This is about trial and error. It should be a thin layer but covering the seaweed. I pushed out quite a bit of rice the first couple of times. You'll get the hang of it. I learned pretty quickly that it rolls easier if you leave a little bit (let's say almost an inch) uncovered. I didn't have a mat or anything I thought could be turned into a mat at that moment. If you would like one, for easier rolling here's how to make one: take a bamboo place mat and wrap it thoroughly in Saran Wrap. Done. If you don't have one, don't panic. Improvise    
                                                           and take your time

    Step six:
    Lay out your ingredients. This is the important part if you use the same seaweed I did. Those small sheets are intended for hand rolls. That's all we have at my Walmart and I don't like hand rolls. So, again, I improvised! Make sure you lay your ingredients horizontally across the width of the seaweed, not the length. I tried that and they came out like this:

    See? A falling apart mess. Still tasty though. So all my next rolls were horizontal. Much better! Also, make sure you roll these up tightly, starting at the end with the ingredients!


    Step seven:
    Slice your sushi! I got four pieces out of the sheets I used. They were about an inch thick really- average sized for the sushi I've eaten. Tip: put the seam on the bottom and use a sharper knife than I did!
    Place your sushi on a nearby platter or plate and when it's full (and mine certainly was!) place in the fridge to cool- make more while its cooling if you'd like!


                                                             The Finished Product


    That's it, that's all there was to it! I had fun and I've been strutting around the house since. On a side note I put hot pepper flakes in one of Brandon's as a prank. Mean maybe, but hilarious and he likes spicy things anyway. Woody (his roommate) liked them too!

    All in all this was a great adventure for me and I think they came out wonderfully. It definitely wasn't as hard as I thought and I can only improve from here!


    Sushi site that's a great help for beginners: make my sushi