Showing posts with label home prep. Show all posts

Monday, January 21, 2013

Gardening 101 Plants and Soil


Want beautiful soil like that? compost!


I love to grow things. I've never been sure if I have a green thumb or if I have only been good at it because of what my late father taught me. Dad came from a different style of living where gardening was a way of not only survival but life. It's just what they did. If I were to add it up I would say that my dad grew about five acres or more each year of different crops. We grew tomatoes of all kinds, silver queen, hickory king, peaches and cream, and several other types of corn. Along with that Dad grew sweet potatoes, red (new) potatoes, Kentucky runner green beans (they are very hardy), bell peppers, yellow squash, cucumbers, watermelon, cantaloupe, honeydew, and the list goes on but those were the regulars. Oh, and the strawberries. The strawberries were great. There's just something unappealing and tasteless about the grocery store strawberries. It's just too far from being the same thing.

If you're wanting to start your own garden my biggest piece of advice would be to study up on the specific plants you want to grow. For example, early girl tomatoes and Roma tomatoes are not the same kind and are often used for different purposes. We grew both and I've found that people just really preferred to can with romas. Early girls are amazing on sandwiches. The type of cages you would use are completely different as well. We grew a certain kind of tomato for a long time. I'm not sure of the exact breeds but we called them all German tomatoes. They were heirloom, of that much I'm sure. Most were a dark blush pink, some were purple, and some were yellow with pink stripes coming out. I believe these were called Mr. Stripey. These tomatoes are awesome. They're big, the flavor can't be beat and they produce more meat than flesh, being good for just about anything except maybe juicing. These German tomatoes however, were completely different from romas or early girls. They. Were. Huge. You know those little wire tee pee style tomato cages you can get at any hardware store? Yeah, forget those. These tomatoes will outgrow those wimpy little cages fast and snap them into pieces or bend them over completely. We tried every thing, but they were just too heavy. One day dad got fed up with them and went to the local hardware store and bought some square fencing. We spent all day rolling and cutting the fence into souped up tomato cages. We never had to buy another again. However if you have limited room this is not the solution for you, these cages are large and need a lot of storage space.

I suppose if you were wanting to start your own garden I could give you a few basic ideas. The first thing you would need are tools and good soil. The seeds or plants are no good if the soil is no good. You can order a soil test kit online or you could do it the old fashioned way. Dig up some dirt and put it in a mason jar (a little less than half full), fill with water and shake it up. Shake it really well. Then walk away and let it settle for a while. You want your dirt to be in three pretty close to even layers when it settles. The three different layers are sand, clay, and the topsoil which is a lot like compost. You can test to see if your soil is acidic or alkaline using this method:
  1. Scoop some soil into a container. Then, add a half-cup of vinegar. If the soil bubbles or fizzes, it's alkaline.
  2. If there's no reaction, scoop a fresh soil sample into a second container. Add a half-cup of water and mix. Then, add a half-cup of baking soda. If the soil bubbles or fizzes the soil is highly acidic.
  3. Amend your soil with wood ash or lime, if it's acidic. Amend your soil with sulfur or pine needles, if it's alkaline.
If you'd like a more professional and definite test contact your local agriculture department, ag extension office, or agriculture division of you nearest university, they will be able to assist you. I feel like this post has gone on long enough, I hope you guys enjoyed it!


Other Useful Links:

Pinned ImageFine Gardening- A post about using wood ash to improve the quality of your soil.
Pinned Image Traditional Fools- steps on building your soil to improve gardening success.
Pinned Image Scout's Stitches- stretching garden soil.
Pinned Image Plant Care Today- How to improve garden soil.

Saturday, January 5, 2013

Homemade Oxi Clean and Fabric Softener


The other day I posted my own recipe for the homemade laundry detergent. It's working great, by the way. That same night I got into a huge DIY phase where I had to make all kinds of stuff all at once. I made homemade fabric softener and homemade oxi clean. Both are working wonders. I based both the laundry detergent and fabric softener on other recipes I had seen. Most of the recipes vary from site to site, so I made my own based on the different reviews. The oxi clean I came up with all by myself. They've all worked so well.

Fabric Softener:
6 parts water
3 parts vinegar (I used rice)
2 parts conditioner (I used some VO5 I had on hand)

Mix (not shake) together and use a funnel to pour into a plastic/glass container. I used another left over laundry detergent bottle for this. Use a half a cup per load.


"Oxi-Clean":
2 c. washing powders
2 c. borax
1 1/2 TBS Dawn dishwashing liquid
2 tsp febreeze

I used a fork to mix with, whatever you use be sure to mix in every thing well. The dawn and febreeze will mix in very well. I use 1 TBS per load.

All Purpose Cleaner:
2 c. washing powders
2 c. borax
water

For this I just used a medium sauce pan and just filled it up with water. On medium heat stir until the borax and washing powders dissolve. Pour into container.

Bathroom Cleaner:
2 TBS Lysol Toilet bowl cleaner for hard water and rust/lime
water
empty spray bottle

Ok, so I totally cheated on this one. All I did was dillute this amazing toilet bowl cleaner. It's awesome. You guys have no idea, it works really well for the tub and kitchen sink. I also poured some of this stuff about an inch deep in a plastic cup and put our shower head in it. Then I poured some more (not much) in the inside of the shower head. Five minutes later, it was clean and had a beautiful stream- like brand new. I love this stuff. Try it. Go. Now.


That's all I've got for now. Please be aware that these cleaners I've made are not "sudsy" cleaners. When they start to work you're not going to see a whole bunch of soapy looking bubbles like you might be used to. That's ok. I'm not only making this to save money but to keep plastic out of the landfills. If you can, please reuse containers. Alot of containers only need to be washed out before they can be reused. WARNING: NEVER MIX BLEACH WITH AMMONIA IN ANY AMOUNT IT CREATES DEADLY FUMES
I save a lot of containers and reuse them, it's recycling. Repurpose things guys, it's not hard at all and it helps our enviroment, saves you money, and provides convenience. There's a lot  you can do with the empty laundry containers. A lot of things need to be put in air tight containers and sealed well, these are air tight and seal well. They would also be good for storing the benneficial "tea" from your compost, storing any thing, like let's say Miracle Grow, that comes in a box. There are a lot of art projects you can do with these at all. My two favorite would be making animal "heads" out of them for hanging on a kids wall and making little fairy houses out of them by cutting out a door and windows and then covering with rocks, marbles and moss. Here's a list of more stuff you can do with these bottles.
  1. Handy scoops can be cut out of them, like small trowels
  2. If you're diabetic this is a safe way to dispose of your used needles
  3. Ice salt shaker (store your ice salt for your driveways in these to conveniently shake it out.
  4. fill them with sand or water to make weights for weight training.
  5. storing small things like nails, screws, buttons, etc.
  6. sturdy templates for crafting.
  7. store old rags
  8. to store grocery bags for reuse
  9. hand washing station in the garden
  10. storage of any liquids
Always make sure you thoroughly wash these bottles out


Helpful Links:
15 Uses for Laundry Detergent Bottles
10 Uses for Laundry Detergent BottlesReusing Laundry Detergent Bottles
How to Re-use Laundry Detergent Bottles in the Garage
10 ways to Repurpose Laundry Detergent Bottles

Friday, January 4, 2013

Homemade laundry detergent

Tonight we ran out of laundry detergent and had to go get more. There's always laundry to be done in this house. However, there's always a need for money in this house too. So I decided to get the ingredients to make laundry detergent. It's definitely worth a try. Here's what I picked up. Just so you know, before you ask I picked up all of these things at Walmart in the laundry detergent aisle. Be aware though, I didn't get a picture of my washing powders but what is in the picture here is baking soda. You don't want baking soda you want washing powders. It's not the same thing. They're all next to each other.


Ingredients:
  1. a box of Arm and Hammer washing powders
  2. a bar of Fels-Naptha soap
  3. a box of 20 mule team borax


Directions/Recipe:
  1. grate up half of your bar of soap into a medium sized sauce pan
  2. add six cups of water and, on medium heat stir until melted.
  3. add two cups of washing powders
  4. add two cups of borax
  5. stir until dissolved
  6. In a large enough bucket (2 gallons or more) place 4 cups of hot water and stir in your soap mixture
  7. add another gallon plus six cups of hot water and stir
  8. allow to cool, will gel over night
  9. add to your empty containers
 NOTE: I added the mix into my containers while still warm. When mix starts to gel it will have little beads of solid in it. This will not be as thick of a gel as what you buy, it'll still be a little soupy and will need to be shaken before each use. I use about a 1/2 a cup per load.

WARNING: Brandon has some pretty nasty work pants, that are really really soiled every night he works. Anything that's exceedingly gross should be washed by itself or in a small load, and if you'd like use some of my laundry booster (homemade oxi-clean, recipe to come later)


Fabric softener recipe to come later, along with kitchen and bath cleaner and an all purpose cleaner


This picture really shows what the mixture looks like after it's melted and all the powders are dissolved.


I have found that my laundry detergent recipe works pretty darn well if I do say so myself, but here are some links to other recipes where other people have made their own, you'll see that they don't vary very much! Some will be dry and one is unscented!
Homemade Laundry Detergent @ Simply Designing
Homemade Laundry Detergent @ Great Oak Circle
Hypoallergenic Laundry Detergent @ Ehow
Homemade Laundry Detergent @ Happy Hooligans
Homemade Dry and Liquid Laundry Detergent @ Life at Cobble Hill Farm
Stain Removal 101 discussion about scent free laundry detergent


Storage Inspiration!

Homemade Laundry Detergent. Homemade Laundry DetergentHomemade Laundry DetergentHomemade laundry detergent - happy hooligansHomemade Laundry Detergent - Liquid and Powder Versions


Friday, December 21, 2012

You Don't Have to Buy that!


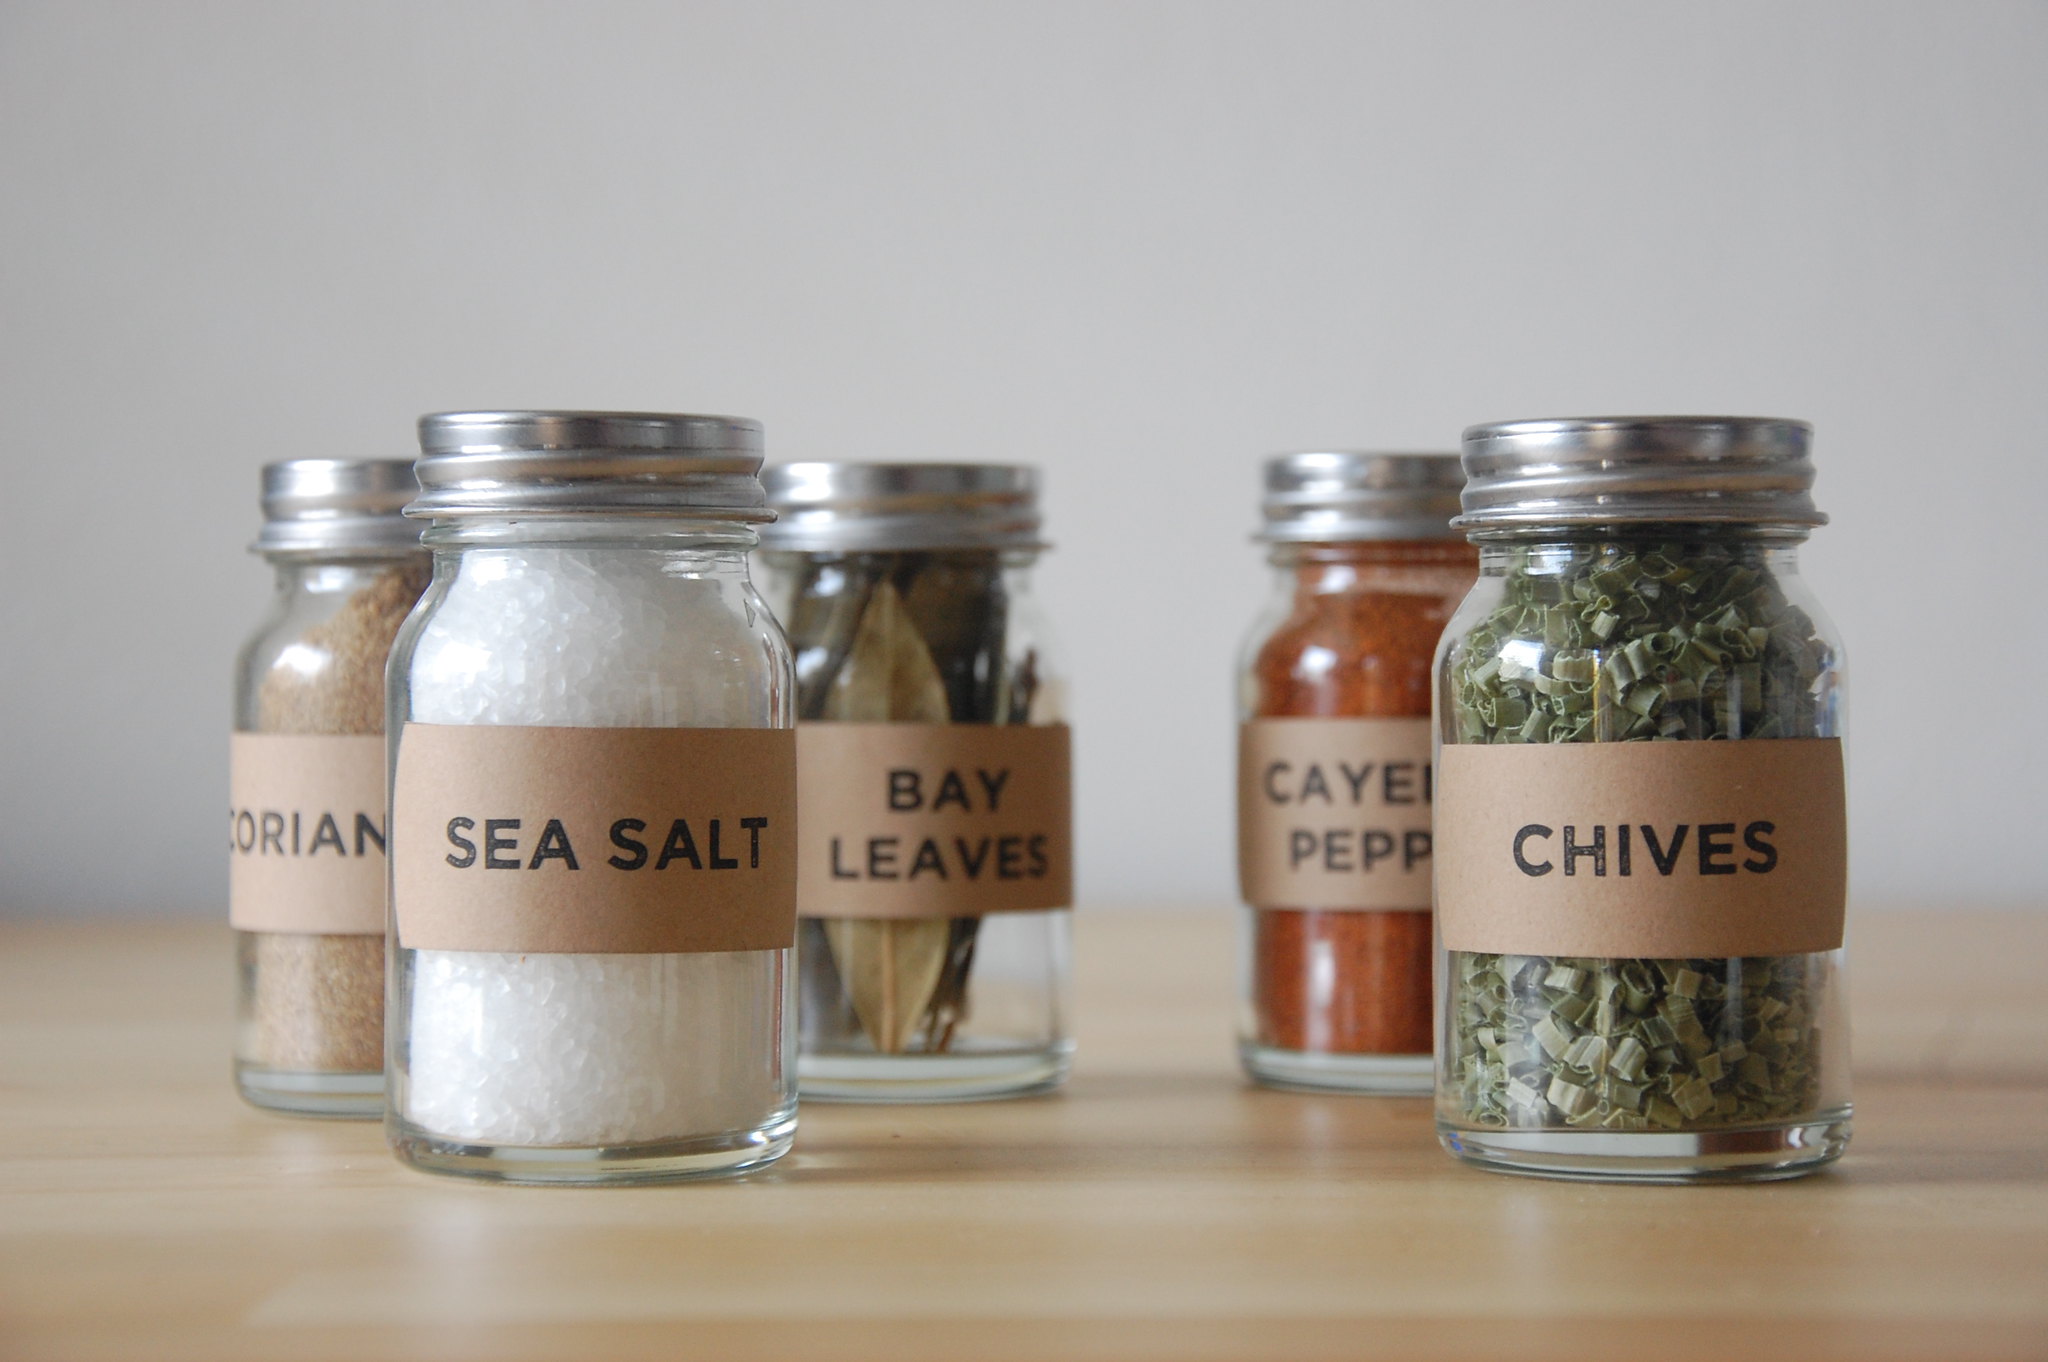
OK, so my posts about spa recipes and my post about homemade household cleaners seemed to be pretty popular. I guess that it's actually saving money that's pretty popular! So I thought I would make it a trilogy! Today I'm going to give you guys some recipes for things you never realized you were spending so much money on! If you don't know already, homemade is always better. Even the jars above are homemade- DIY all the way! The link to them is at the bottom of this post!


Homemade Nesquik Recipe
2/3 C Sugar
1/3 C Cocoa
Pinch of salt

Combine the three ingredients and store in a sealed container.

Homemade Bisquick Recipe
3 1/4 cups unsifted all-purpose flour
1/2 cup sugar
1 cup nonfat dry milk powder
1/2 cup cornstarch
1 tablespoon baking powder
1 teaspoon baking soda
1 1/2 teaspoons salt

mix and store in a sealed container

Eagle Brand Condensed Milk
3/4 cup powdered milk
3/4 cup sugar
1/2 cup hot water
Blend until smooth.

This recipe equals one can of store bought condensed milk.

Homemade Brownie Mix
1¼ cups all-purpose flour
1 teaspoon baking powder
1 teaspoon salt
⅔ cup unsweetened cocoa powder
2 cups white sugar

mix and store in an airtight container. When you're ready to use this, add 1 cup melted butter or margarine 3 eggs 1 tsp vanilla and bake at 350 degrees Fahrenheit till done.

Homemade Muffin Mix
2 cups flour
1/4 cup sugar
1 Tbsp. baking powder
1/2 tsp. salt

mix in air tight container.When you're ready to use this add any special additions (like blueberries, chocolate chips, nuts etc.) first then add 1 egg, beaten 1 cup milk and 1/4 cup oil.

Seasoned Salt
8 Tbsp. salt
1/2 Tbsp. onion powder
3 Tbsp. pepper
1/2 Tbsp. garlic powder
2 Tbsp. paprika

Homemade Taco Seasoning same link
6 tsp. chili powder
3 tsp. onion powder
4 1/2 tsp. cumin
2 1/2 tsp. garlic powder
5 tsp. paprika
1/4 tsp. cayenne pepper
1/4 tsp. oregano
Mix all ingredients and store in an airtight container. One teaspoon of homemade taco seasoning equals 2 teaspoons of the store-bought seasoning.

Italian Seasoning same link
1/4 cup dried basil
2 Tbsp. dried thyme
2 Tbsp. dried marjoram
2 Tbsp. dried rosemary
2 Tbsp. dried oregano
2 tsp. garlic powder
2 Tbsp. dried coriander
1 tsp. sugar
Combine all the ingredients. Store in an airtight container in a cool dark place for up to 3 months.

Homemade Cajun Seasoning
1/2 cup paprika
1/3 cup Himalayan Salt or sea salt
1/4 cup Garlic Powder
2 Tablespoons Black Pepper
2 Tablespoons Onion Powder
1 Tablespoon Cayenne Pepper (optional- won’t be spicy without this)
2 Tablespoons Oregano leaf
1 Tablespoon Thyme leaf
To Make: Mix all ingredients in jar or food processor and store in an airtight container. Good on stir frys, eggs, casseroles, and poultry. Can add more or less Cayenne to get to your taste.

Homemade Lemon Pepper Seasoning
Zest of 3 lemons, about 1 -2 tbsp
Crushed black pepper, 2-3 tbsp
Sea Salt, 1 tbsp
Preheat toaster oven to lowest setting.
In a large bowl, combine lemon zest and black pepper.  Cover metal pan fitted for toaster oven with foil and spread mixture evenly in pan.  Allow to bake low and slow until zest is completely dried.  Mine took about 26-30 minutes.
Transfer lemon-pepper mixture to a bowl.  Using the back of a spoon (or spice grinder if you have one), crush mixture until desired texture is achieved.  Mix in salt, 1 tsp at a time.  Continue to add salt until you have the right balance to fit your taste.

Homemade Fajita Seasoning
3 Tbsp. cornstarch
2 Tbsp. chili powder
1 Tbsp. salt
1 Tbsp. paprika
1 Tbsp. sugar
2-1/2 tsp. crushed chicken bouillon cube
1-1/2 tsp. onion powder
1/2 tsp. garlic powder
1/2 tsp cayenne pepper
1/4 tsp. crushed red pepper flakes
1/2 tsp. cumin

mix and store this is about the quantity of 3 commercial packets.

1 tbsp flour
2 tbsp minced onion
1 1/2 tsp chili powder
1 tsp salt
1/2 tsp crushed red pepper
1/2 tsp minced garlic
1/2 tsp sugar
1/2 tsp ground cumin

this recipe is enough for 1 pound of ground beef

2 Tbsp dried parsley
1 tsp dried dill
1 tsp garlic powder
1 tsp onion flakes
1/2 tsp dried basil
1/2 tsp pepper

mix and store. When you're ready to use this whisk together 1 TBS of Mix , 1/3 Cup of Mayonnaise ( or 1/3 cup non fat Greek yogurt)  and 1/4 Cup of Milk. Add salt to taste.

PS: You can make your own spice jars for the above spices. If you like the ones in the picture you can find out how to make them yourselves at Well it's Okay, another awesome blog!

That's it for now, I hope you guys enjoy these! Always remember to label clearly and don't forget to label how much you need to scoop if you make more than a single batch and what to add to that! Label label label!

Sunday, December 16, 2012

The Prepared Mommy Part 2

I've talked about Bug Out Bags and I've talked about First Aid Kits, but I haven't yet talked about preparing your home for a disaster. You may not need to bug out and leave home, you may be able to stay. What do you do in those situations? There are a lot of ways to prepare your home which can, obviously, hold a lot more than your basic BOB.

  • Maintenance! This is the most important thing you can do, long term, to assure the safety of your home. In a serious storm with high winds, no electricity, snow and worse it just won't do to have a leaky roof. If you don't own your own home, stay on top of your landlord about any repairs that need to be done!
  • Weatherizing your home. Obviously this keeps out the cold, the rain and possibly unwanted pests. Keep a roll of window plastic stored somewhere. Window plastic is cheap, can be put up easily and will help insulate your home.
  • Security! This is also very important. In hard times it's not terribly uncommon to have looters and a sudden surge in crime.
    • Reinforcement plates can be put on doors and come in all finishes to match your pre-existing hardware.
    • Deadbolts and latches also help to secure your doors, don't trust the chains- one swift kick could knock them out of the running.
    • Window coverings may be necessary. Hang blankets (over the window plastic!) at the very least so that no one can see in. A lot of criminals won't want to break in if they don't know what they're breaking into. There could be 40 body builders with guns in there, or rabid dogs- they don't know if they can't see. They also can't see how much of your stuff they want to steal. Blankets over your windows will also help keep in any internal heat.
    • Weapons. You never know what is going to happen. I'm not saying go out and buy so many guns that you look like Rambo, a baseball bat will do wonders in self protection. So will a crowbar, mace, and a tazer.
  • Food and water! I hope I don't have to explain this one! You have to have food to survive. MRE's have a long shelf life, and Walmart sells emergency food kits at reasonable prices. You can build up an emergency food stockpile all by yourself over time. Trust me, you do not want to go out last minute to the grocery store to stock up- every one else will be doing that too and the shelves will be slim pickings. Don't forget to have a hand operated can opener! A lot of foods have a good shelf life and nutritional value like:
    • peanut butter (creamy and chunky, or honey- for variety)
    • canned fish (like mackarel, tuna, salmon)
    • dried and canned beans
    • rice (beans and rice together make a whole protein btw)
    • dried and canned fruits
    • raisins
    • various canned soups and stews
    • dry milk
    • granola bars
    • canned juices
    • water water water- lots and lots and don't forget the water purification tablets as well.
    • instant coffee
    • candy and comfort foods (for the little ones as well!)
  • Then you have your foods that may require cooking. Be sure to have a gas or otherwise operated stove that does not depend on any outside paid resource - remember, you may not have any utilities! I suggest camping stoves (like these) for this.
    • Flour*
    • Sugar*
    • Salt*
    • Cooking oil
    • Pasta (don't forget the sauces!)
    • yeast (if you're inclined to make bread)
    • powdered eggs (yucky, but they'll do in an emergency)
  • A generator. You may want to consider purchasing one, they'll definitely come in handy and make life in an emergency a lot more luxurious. However, think carefully about where you put yours as looters will take these quickly.
  • Warmth, or some kind of heat source so that you're not done in from exposure. You could invest in a (or several) kerosene heaters (like these) or if you're not fond of the smell of kerosene (it sticks to everything and won't come out of some stuff) you can get several propane heaters (like these). Do not underestimate the dangers of exposure to the cold.
  • Blankets. Heaters or no heaters, you should have a lot of blankets to keep you warm and comfortable.
  • A potty. Have enough water stored up, or available, to flush your toilet. A bad smell is only going to make a hard situation harder. You may want to get a camping potty. Go to any camping retail store's website and check out the reviews first though- if it's not a good product, you'll find out fast.
  • Paper products. Paper towels, toilet paper, tissues, and paper to write on will come in handy and provide a little bit of familiarity and comfort.
  • Flashlights and batteries. Stock up.
  • Toys, books and games. In times like this it's handy to have something around to distract you. Try to avoid battery operated toys or games as you may need the batteries for something else. Board games and puzzles geared toward the ages of your family members. Simple toys are great in this situation like Barbie's, trucks, and pretend play items. Keep a ball to roll back and forth to each other. Don't forget pet toys!
  • Shelter. Well...kind of shelter. If you're in your own home you're already in shelter really but in colder situations you'll need try to gather in one room. Seal off the other doors by placing tightly rolled up towels at the bottom of the doors and maybe even sealing them off with painters tape (it comes off easily). Make sleeping mats in your room of choice close to your heater. Remember, the more rooms your heater has to heat the more fuel it uses. Staying in one room also increases your chances of remaining safe and being able to watch over the little ones. Also, make sure you situate your beds as far from the potty as possible.

Tuesday, December 11, 2012

The Prepared Mommy

All household's and cars should have an emergency first aid kit. I'm particularly fond of mine as it also goes with me if I ever need to grab my bug out bag (see previous post). Your own first aid kit should contain stuff that's targeted for you- especially when it comes to any prescribed meds. In mine I like to have this:

1. triangular bandages
2. rolled gauze
3. non-adhesive gauze patches
4. plastic tape
5. cloth tape
6. butterfly bandages
7. upholstery needle and thread (I have the plastic kind that resembles fishing line)
8. anti diarrhea meds
9. aspirin
10. green soap
11. hydrogen peroxide (I switch this out regularly with a new bottle)
12. sprain/ stretchy bandages
13. sanitary napkins/ pads (absorbent for large wounds)
14. QuikClot
15. thermometer
16. cotton swabs
17. tongue depressor
18. acetaminophen
19. sugar/glucose pills
20. small set of scissors
21. sling
22. moleskin
23. assorted band-aids and colored bandages
24. snake bite kit
25. space blanket
26. hand/ foot warmers
27. pain relieving spray (I use dermoplast)
28. aloe vera
29. anti fungal type creams
30. anti poison ivy spray
31. calamine lotion
32. tweezers
33. neosporin
34. instant cold packs
35. little ammonia sticks (smelling salts)
36. iodine
37. latex (or non) gloves
38. tube of zinc oxide
39. benadryl
40. bug bite/sting kit
41. suture clips
42. EDIT: I forgot to add, suckers, because every kid needs a lollipop after a boo boo
I keep all of this in a tiny tiny duffel, something like a makeup bag. I know it seems like a lot, but it's really not as almost all of these items are small and lightweight. The more pouches/ compartments on this type of bag, the better. You may also want to include a First Aid manual. It's also smart to keep each of these things in separate plastic bags to keep them safe from the elements. Of course, taking your basic first aid classes is always recommended. Learning how to properly bandage wounds and becoming CPR certified is always a plus and you never know when it may come in handy.
Again, any questions or comments, go ahead I'll respond!

EDIT: I just found a link you guys would definitely find useful for first aid kits and what another blogger keeps in hers Common Sense Homesteading go check it out and enjoy!!!

The Prepared Mommy Part 2