Showing posts with label fun things to do. Show all posts

Saturday, January 19, 2013

More Fun Kid Science

I really do love doing science projects with my kids, we keep it simple so that they can fully understand the process. They're always amazed with the things we do. I don't just do science projects with the kids either, though they are my favorite because to them, it's like magic. Really from a psychological point of view, Bubba tends to enjoy the science projects and chemical reactions a bit more than the girls do. To me, that's evidence in itself as to why boys do tend to do better than girls in Science class. It's just more understandable to them I suppose. Maybe it's just that they're more into blowing stuff up and making messes. Snakes and snails and puppy dog tails and all that. Several of my friends have really liked the other kid science projects I've posted and linked to so I thought I would do another one, here it is.


Bouncy Balls:
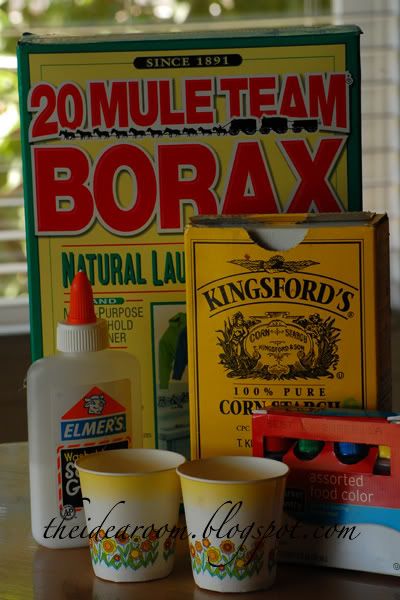
  • 1/2 tsp Borax (found in laundry section) You may have some left over if you made the laundry detergent.
  • 2 TBS warm water
  • 1 TBS corn starch
  • 1TBS glue (clear glue makes a see transparent ball and white glue makes an opaque ball)
  • 2 small mixing bowls or cups
  • a stirring stick (plastic spoon)
  • food coloring (optional)
mix together the warm water and borax till the borax dissolves. In your other mixing bowl/cup add the glue, 1 tsp of the borax/water solution you just made and the cornstarch. Wait 10-15 seconds before stirring. Rolls around in your hands once mixed until it forms a not so sticky ball. This will dry out after a couple of days but it's a fun project. You can add the food coloring with the borax/water mixture for a solid bouncy ball or wait till the last second after you've mixed everything to create a swirly effect like the ones you buy- just don't over stir the food coloring or it will completely blend and become solid.


Acid Based Reaction to Blow Up a Balloon:
  • baking soda
  • vinegar
  • small funnels
  • empty bottle like a soda or water bottle
Fill empty bottle(s) about 1/3 of the way full with vinegar. Use your funnel to fill your balloon about half way full with baking soda. Attach the lip of the balloon to the top of your bottle- be careful not to spill your baking soda yet. Have your child hold the balloon to the bottle and then, when you're ready, have your child lift up the balloon- dropping the baking soda into the vinegar. This creates an acid based reaction that creates carbon dioxide to fill the balloon. It's not helium and it's pretty much the same thing as blowing them up yourself.


Density Project:
  • 1/4 c. dish washing liquid
  • 1/4 c. vegetable oil
  • 1/4 c. vinegar
  • 1/4 c. karo syrup
  • 1/4 c. honey
  • 1/4 c. rubbing alcohol
Carefully pour these one at a time into a bottle, using a funnel. You want these to try to hit dead center without touching the sides. Each of these things will layer together. Seal your bottle with an air tight lid and shake it. Watch and see how long it takes each to separate, if they do.


Hot/Cold Balloon:

For this project you're learning how the air around us will expand and contract when exposed to hot and cold conditions. You could even use the balloons you blow up from the project above. Your tires do the same thing by the way, that's why it's important to know how to air up your tires.

First you'll need to measure your balloon at room temperature. A fabric measuring tape works best for this, which you can find in your sewing/fabric aisles- that's what they're normally used for. Mark down your measurements throughout the project.

Expose your balloon to heat first, a hair dryer will work perfectly for this, just point the blow dryer at the balloon for a few minutes, allowing it to heat up. Be careful with this, it may pop with the expansion. Quickly measure the balloon and mark down the measurement- it should have gotten larger.

Then, using the same balloon, pop it in the freezer for let's say 15 minutes. Take it out and quickly measure it again, it should be smaller. Then allow it to sit at room temperature for 30 minutes to an hour to make sure it's completely back to it's original temperature and measure again. Is it the same size as your first measurement? Discuss your findings with your child.

Tuesday, January 15, 2013

Update on the Girls' Bedroom

I've done some more to Livvy and Tobi's bedroom since the last post and I figured I'd stop by and show you guys. The trolls were bought at Goodwill, I paid four dollars total for all of them and all but one had on their original outfits. I couldn't resist them, they take me back to my childhood. I also spent five bucks on the cute princess poster at Walmart, I couldn't resist it because I got Bubba one too and it's only fair you know. The cursive "love" wall decal looks like it was made of metal but it's really just cardboard that I cut out and painted black and then painted over with a silver glaze. The shelf belonged to their Aunt Megan, Brandon's sister- she left it at the house when she and her husband moved out.


I felt like the yarn initials I showed off in another post weren't quite done, I felt like they were missing something and for a few bucks I got a baggie of little plastic rhinestones from Walmart that I glued on to "pretty them up"- the girls love when things sparkle!


So, what do you guys think? Got any other ideas for me? I think I'm gonna be finished till I can get more firniture moved in. Comment and follow!

More on Bubba's Room

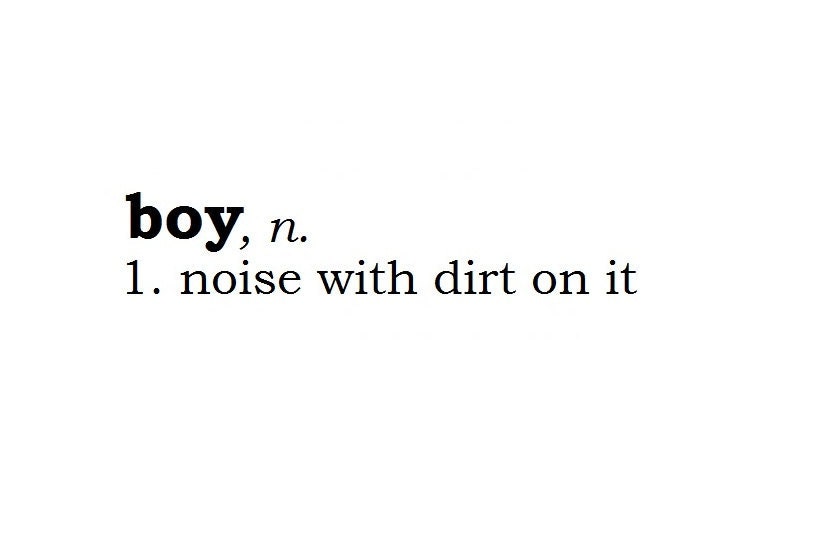
Just an update for that mean little boy and how I'm doing decorating his room on my slim budget! I framed the wall art I showed you in the previous post, doesn't it look so much better? The definitions are a little crooked but oh well.


I also bought him a 5$ poster from Walmart that has all the Marvel comic book characters on it, his favorite are The Incredible Hulk, Spiderman, and Iron Man. He hasn't been introduce to the Thing yet but I think he'll flip out over him too. I'm still loving the shark kite- I think it really rocks the room out.


I took some buttons and made a sign that said "Bubba" to hang above his dresser. Bubba's very colorful and eclectic so I made sure to make the sign just like him. All I did was take a light colored marker, write what I wanted, and then hot glued the buttons down.


This one (below) is proof that I just don't pin on Pinterest because I like the way it looks, I really do use the pins for inspiration or just to copy. I told everyone when I pinned the paper airplane picture that I was going to make it and I did! I love it and think it's adorable, I have it hanging over his bed. The boards I used for this and for the Bubba sign above are around 4$ a pack at Walmart, in the craft section. I've used them before and they're really sturdy. They'll be with the stretched canvases, which is kind of what they are, just not as thick- they're kind of thin actually.


This is a close up of the really long valance I got at Goodwill for a dollar or two. I was able to cut in half to perfectly fit over both windows. I like the sports theme and I have some more sports stuff put away somewhere... I think. I know I'm definitely going to get a nightstand and paint it up like a baseball which I mentioned, here. I also can't wait to make one of the lamps that was in the same post. Let me know what you guys think! Comment and follow.

Diversion Safe- A Tutorial

I don't know if you guys know what a diversion safe is but here's the basics. A diversion safe is any thing that appears to be one thing but is actually a safe to hide things- like money or other valuables you don't want stolen- in. You can purchase all sorts of diversion safes, from 10$-20$ and up. A diversion safe can be almost anything from cleaners to drinks and surge protectors to clocks to wall electrical outlets. I've seen diversion safes made to look like just about anything. The most common is usually a hollowed out book- these usually look pretty obvious and I think we've all seen the hollow rock for your spare door key. Those also look pretty obvious to thieves walking up to your house- so avoid those. Some diversion safes are even functional. The bottle of coke actually has real coke in the top part of the safe, cans of pringles actually have pringles in them, etc. I've even seen a bottled water diversion safe that appears to be just a bottle of water- it's probably the coolest thing I've seen....well, the safe made to look like a head of lettuce is pretty darned cool too. The idea behind a diversion safe is for it to appear like something no one would think to look for valuables in or steal. Who is really going to break into your house and steal your bathroom cleaner or a can of dog food? No one.


Aren't those neat? Just Google diversion safe and then hit images and you'll see what I mean. The most common things to be stolen by a burglar when entering your home are cash, electronic equipment, gold, silver, jewelry and guns. The easier and smaller to move the better. A burglar is also most likely to enter your home through the front door or other door and the first floor window. Don't think it can't happen to you. I live in a small tight knit quiet town in the south and even we have burglaries. The burglar is also going to be (most likely) in his mid to late teens, not a professional. The odds are definitely in your favor when speaking of the chances that he's going to recognize a diversion safe on sight. 

Burglars are also going to grab the easiest targets so leaving a jar of change in plain sight is a good way to get him to grab that and go, quickly. The average thief isn't going to spend long looking through your house for stuff so the best thing you can do is have an item (like a small jar of change) lying out in plain sight for easy grabs and hide anything of value like the above mentioned items. Remember, they're in and out quickly to try to avoid getting caught.

I wanted a diversion safe to protect my savings and jewelry from thieves but I don't have ten of fifteen dollars that I can just throw down on something that I could very easily make. So, I decided to make one myself. Here's the finished project, can you tell which one is fake? Nope, I didn't think so!


The first thing I did was remove the label and lid off of a jar of Alfredo after I was finished cooking with it. Then I washed it out very well and dried it. Be careful removing your label so that it goes back on easily. Once dried I put the first coat of paint on, which was kind of streaky, and very obviously paint. I wasn't discouraged though. After the first coat dried I put on another and came up with this:


It was starting to look awesome. I then took some tacky glue and glued my label back on. Once that was dried I screwed back on my lid and placed it in the cabinet to get a good look at it. It doesn't appear to be empty at all- it appears to be a jar of Alfredo, and I love it. The best part is that I didn't really pay anything for it.


What do you guys think? It even fooled Brandon who saw me making it more than once. This technique could be used to make just about any type of diversion safe, as long as you're careful to match the color. A pink or orange jar of alfredo is going to stand out- and as far as my capabilities go (for now) I'm not sure how to make an operating diversion safe like the can of coke.

More Diversion Safes:

Pinned ImagePinned ImageStreetwise Locking  Diversion Book Safe with Key Lock - Buy at www.tobesafeandsound.com   $23.95Parmesan Cheese Shaker Diversion SafeDiversion Safe - Flower Pot - False Bottom   $44.95  Add some flowers to this flower pot and it makes a pretty and practical gift    www.tobesafeandsound.comCan Diversion Safe - Beer - Buy at www.tobesafeandsound.com $13.56

Sunday, January 13, 2013

Bubba's Room


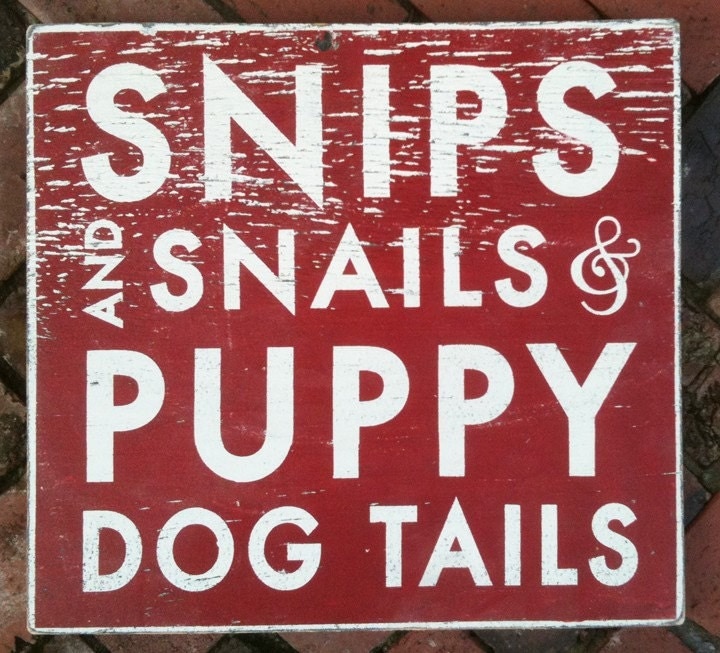
I've been working hard to get the rooms together and make them look nice. So far I've done a little on the playroom, Bubba's room, and Livvy and Tobi's room. This post will be for what I've done for Bubba's room so far. This first picture is of some drawings I did for him, I will eventually frame them and they'll definitely look better. The words that make up the baseball are "Let the field be joyful and all that's in it, which I got from Pinterest of course. It came from here (etsy). The next one says "Snips & snails and puppy dog tails, that's what little boys are made of"- which is very true of my Bubba. The third picture I found here (Trading Phrases- a place you can buy phrases and sayings like this in vinyl decals for your wall). The last picture is obviously the batman symbol. Behind the symbol is the names of so many characters from Batman it's ridiculous. There were characters on the list I'd found that I'd never even heard of.


I seriously scored at Goodwill the other day. I spent quite a bit in all honesty but I came home with some great stuff. One of the things I found was a really long valance, pictured below. When I found it at Goodwill I wasn't sure that it would work, it was only one valance then, but for a dollar it was hard to pass up and I was seriously hoping it was long enough to cut down the center and fit over one window. As you can see, it was the perfect size. I also found the Spongebob blanket while I was there. The shark in the corner is actually a kite hanging from the ceiling, it was in the back of Brandon's closet- still no idea where it came from but it's pretty large and fits there well. I originally wanted to get a dragon kite to do this with, but a shark will do just as well. I told Bubba that there weren't any monsters in his room when we had that discussion. I showed him the monster repellent that I mentioned here and I also told him that monsters were afraid of sharks. That turned out to be quite a funny conversation mainly because he couldn't understand why monsters would think that the shark was real. Oh, the irony was hilarious. I'll definitely post more as I go, I just wanted to show off what I've done so far :)


UPDATE: I finished the majority of what I'm going to do for Bubba's room for now and you can see the finished projects here on a newer blog post, go check them out!


My Inspiration (and some for you!)


Tobi and Livvy's Room-


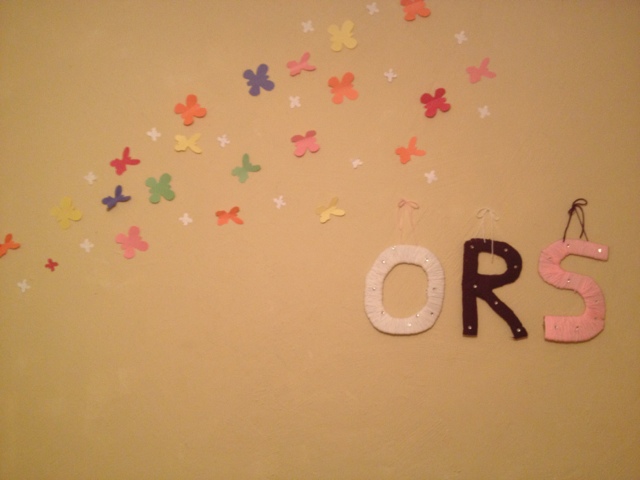
The first thing I did to the girl's room was to cut out a bunch of paper butterflies from construction paper. To make my template so that they would be even all I did was fold a piece of construction paper in half and then, from the creased corner and out I drew one half of the butterfly so that when I cut it out (still folded) and opened it it would be symmetrical. I used three styles all together, I don't know if you can tell. The tiny white butterflies are all the same and the colors differ between two styles- a thin elegant looking butterfly and a big full butterfly. Then, all I did was use tape to attach them to the wall.


My girls both have the same initials. I did not do this on purpose but it's turned out to be pretty convenient for me. I decided I wanted to hang some yarn wrapped letters in those initials ORS. I also decided to use cardboard. Because it's free. The yarn was left over from other projects and I used the three colors that the girls loved the best; a very light pink, purple (which you'll recognize from the throw I made for Brandon), and white. First I grabbed an empty diaper box and broke it down, making it a flat piece of cardboard, then I cut out my letters- freehand, like so:

That's little Olivia's hand trying to grab the S
Then, after the kids went to bed, I set to wrapping the yarn around the letters, which took a lot longer than I originally thought- I won't be doing that again in the near future. When I created the bows to hang them from I tried to alternate the colors so that the hangers weren't the same color as the letter they were attached to. So what do you guys think? Follow and comment please!

Snickers trying to get in on the action!
UPDATE- I've done more to the girls' bedroom, if you want to see it, it can be found in a newer post here

My Inspiration, and some for you!


Monday, January 7, 2013

Keeping the Kids Busy

The house we're moving into has a fenced in back yard that's actually pretty large. It will still be too cold for a while though to go outside. I like finding different activities we can do inside; the kind you can do when it's too cold, or raining. It keeps the kids busy and allows me to do whatever it is I need to get done. With the new move it's gonna take a lot of work to get every thing in the shape I want it in, with the bedrooms mainly. We still haven't been able to get in touch with the landlord about the toilet in the first bathroom or the kitchen sink being stopped up. These are things I'm going to have to fix completely myself if I can't reach him. I won't sit and wait and we'll talk about paying me back or taking it off the rent afterwards. Anyway, these type of activities are going to come in handy BIG TIME while I'm trying to accomplish all this. They're also cheap- which you guys know I love.

Smashing Balls:

1 C. water
1 C. Flour
food coloring

mix together, the mixture should be kind of thick and add whatever colors you'd like. Cover the cotton balls and bake at 300 degrees for around 45 minutes. They may have some annoying flat edges, if you don't like these you can snip them off with some scissors. TIP: line your baking sheet with aluminum foil for an easy clean up. When they're done and kind of hard hand them over to the kiddos with a kid hammer or rubber mallet and let them go to town. They can also stomp them to bits. Some people say there's no real educational value here but I can find it. It's scientific, explaining how the chemical composition of the gooey mixture changes with heat and becomes hard. There's also the question of density which is why the cotton balls aren't always colored all the way through with this mixture where they would be with water and food coloring. There's also the subject of fine motor skills here, let them use tweezers to pull the cotton balls out of a bowl.These are ALSO great therapy for aggression issues. Seriously though, it's a game. It's just fun. Get over yourself. I used to throw rocks at the side of a barn. Mom didn't question the educational purpose behind that and I can assure you that I turned out just fine. Oh, and go follow the blog I linked in the title, she's awesome.


Masking Tape Race Track:

Basically for this activity you just need a floor and some masking tape. Which, if I'm not mistaken can be bought in lots of different colors. Painters tape is also a good option and, in all honesty, is pretty much the same thing. Here's the pin I saw this on originally:


I can't seem to figure out who to give credit to for this so if you know, please let me know. It's a wonderful idea, it really is, masking tape is cheap, it pulls up easily and can provide hours of fun, not to mention a different track each time. Upon googling this I found even more similar ideas (yet never the original) that really were awesome.

Here  (at Maddycakes Muse) is a picture I found that was about a race car/ race track themed birthday party. This is made out of black plastic table cloth and masking tape:
I have a friend who's son is race car crazy and she's gonna love this

Isn't that great? Go show her some love too, she did this party for a wonderful reason and there are several other ideas on that particular post. She seems to be a very good hearted person.

This (from Motherly Loving) is also a great idea, using the same concept and is also for a little boys birthday. Being from Corvette City, I loved the car in the driveway :)


Honestly, I went crazy with ideas with masking tape after seeing all this. Other things you could do would be hopscotch, tic tac toe and any game you could play using chalk on the sidewalk or driveway. It's really more versatile than I realized until today.

Discovery Bottles:

Discovery bottles are geared specifically toward learning. The way I look at it, the more you jump start your child's mind into thinking the more they learn, it's just like reading really. These really focus on sight, sound and smell. They make your child turn and twist or shake the bottle, making a different reaction each time and jump starting their little minds. Here's my favorite but this blogger has so many on her site, I believe I'll create every single one.

It's just some pipe cleaners in a glass jar with a magnet to make them move. It's simple but it takes me back to the little magnet shaving faces where you could add hair to the blank face on a board- does anyone else remember these? I loved them. Seriously though, click that link- go show her some love too, these are amazing. Magnets can be bought here, horseshoe 6.25/12 and will be useful for other projects as well.

Balloon Ping Pong:
Bouncing a small ball around the house can always turn into trouble. I don't know about your kids but mine would most certainly break something. So, the solution is, turning the ball into a balloon. It's hard to break much with a simple balloon. Tobers, Bubba and Livvy are all obsessed with balloons. They're a big deal at my house. They're also really cheap. If you're kids are as in love with them as mine are go check out Oriental Trading where you can get them (and so much more stuff) cheaply. The ones I linked to are 144 for 5$. Basically balloon ping pong is your basic ping pong game using popsicle sticks (500 large ones for 7.25 at OT) glued or stapled to paper plates as the paddles and the balloon as the ball. Lots of fun for the kiddos.


More Great Links:
SavingStar- 10 activities for kids I absolutely love this, and it's got 10 more links to 10 more places for great ideas, check out the ocean in a bottle. That makes me so happy and wouldn't that be a great idea to use keepsakes from a beach trip?
Oriental Trading they have just so much stuff for really cheap, go check it out. I can't say enough about this website. They have stuff for everything from decorations for any party to soap and candle making to paints, crayons, and markers to costumes to anything. It's really great. It's also a great place to get soap dye for those homemade bathtub crayons
Monday, December 31, 2012

The Fort, a Staple of Every Childhood

THE FORT
Everyone has built a fort at one time in their life. Whether that fort was made of blankets and chairs, the cushions off of grandma's sofa, snow or a cardboard box, everyone has built one. If they say they haven't, I would call them a liar. Forts can distract kids for a long time, that's for sure. I can cut some "windows" in a box and let the kids just draw on it with some crayons. They'll play with that box until it's almost completely broken down and I have to throw it away. Even then, I have to fight them off all the way to the trash can. I remember placing my Nanna's chairs not far from each other and draping sheets over the chair backs. That was my fort. A lot of the time my cousins and I would pile up cushions as floors and extra insulation. Forts are a great feeling for a kid, you can pretend they're anything. A fort can be a castle, a house, a tent in the deep woods, a submarine at the bottom of the ocean... anything, all you need is imagination. Children have no shortage of imagination, that's for sure.

Sure, you could go and spend the money to buy the cute little playhouses that are sometimes hard to put up and always take up space. Usually a child outgrows those pretty quickly, or loses interest. I just don't think they're worth the money. A fort can be made out of any thing, but lately I have noticed that the basic every day fort has evolved slightly. I've seen some really great ideas that we never bothered with as children. Some of us may have thought about it but most of us never really followed through. I love the different options people have thought up, most of them space saving, easy to hide and easy to put up. I've decided to share them here with you guys.

1. The Tablecloth Fort:


Aren't these so cute? The sewing skills required for this are minimal depending on how detailed you want to be. Their construction would be exceedingly simple and you could use any type of material that you like. Canvas drop cloths can be purchased for next to nothing at any hardware store, and can be dyed in your washing machine with Rit Dye. You could purchase your own fabric from a fabric store or even use old sheets! The doors in 1 and 2 are held open or closed by little ties and in 3 the creator has implemented a zipper; velcro would also work wonderfully. I especially like the detail in the third picture, the plastic on the windows is a wonderful touch. Bubba would love the cammo fort as well. The best part about this type of fort is that it can be easily folded up and put away. Remember this doesn't have to be perfect, so get to sewing!


2. The Tension Rod Fort:
These little forts are also a great idea and can be easily put away! I think whoever came up with this was a genius. All you need for this type of fort are some tension rods and cloth. You could drape the fabric over the tension rods (curtain rods) but I feel that it would easily slide off this way. I think that creating this by attaching the rod via pocket like a curtain would be the best way and very simple. You could also use curtain hooks to attach the rods, also much like a curtain. In this fort the little door is held up by velcro but when you drop it down it doubles as a welcome mat. How adorable is that? The tension rod fort can also be folded and put away or just hung up somewhere for storage.


3. The Cardboard Fort:

Cardboard is a great resource for making things for kids. The cardboard fort isn't usually as easy to put away but can also be completely free standing with no issue. You can piece together cardboard forts or just cut up a large box. I can't count how many times my friends, family and myself have spent quite a bit of money on some high rated fantastic toy and the children have had more fun with the box! The great thing about cardboard forts are that they can be as detailed or as simple as you'd like. You can go from this,
             to this....


or this....

 Yeahhhh... take one more look at that cardboard castle. Just look at that. I stared at it for at least five minutes. When looking at that fort, I feel that I have been out done in my creativity department... this picture is what has determined me to build the greatest cardboard fort ever. This idea has been so popular recently that you can even buy pre-made pre-cut cardboard houses that only need a little paint or coloring and some kids. I, however, am not going to pay over 20$ for any box. Never. I prefer the DIY get the boxes from the grocery store for free kind of playhouse/ fort.

4. The Window Shades Fort:


I love this idea because there is no real work in putting it away, it's always there, just out of sight. This concept plays off of the table cloth fort with just a little difference. This uses window shades. Unfortunately, this is the only picture I could find where someone had done this. The idea apparently came from Country Living. It's as easy as placing roller window shades beneath your table and drawing on them. I'm not sure if cutting windows or doors into a roller shade would weaken the structure but it would be worth a shot! Then, when the kids are finished with it a quick tug would pull the shade right back up- out of sight and out of mind :D


Links for more Fort Inspiration:


More Images for inspiration!