I really do love doing science projects with my kids, we keep it simple so that they can fully understand the process. They're always amazed with the things we do. I don't just do science projects with the kids either, though they are my favorite because to them, it's like magic. Really from a psychological point of view, Bubba tends to enjoy the science projects and chemical reactions a bit more than the girls do. To me, that's evidence in itself as to why boys do tend to do better than girls in Science class. It's just more understandable to them I suppose. Maybe it's just that they're more into blowing stuff up and making messes. Snakes and snails and puppy dog tails and all that. Several of my friends have really liked the other kid science projects I've posted and linked to so I thought I would do another one, here it is.
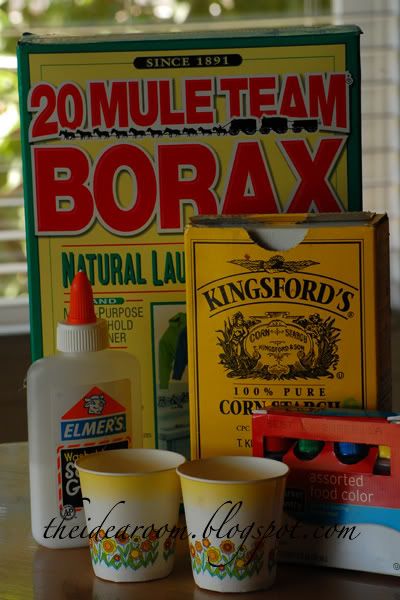
Bouncy Balls:
- 1/2 tsp Borax (found in laundry section) You may have some left over if you made the laundry detergent.
- 2 TBS warm water
- 1 TBS corn starch
- 1TBS glue (clear glue makes a see transparent ball and white glue makes an opaque ball)
- 2 small mixing bowls or cups
- a stirring stick (plastic spoon)
- food coloring (optional)
mix together the warm water and borax till the borax dissolves. In your other mixing bowl/cup add the glue, 1 tsp of the borax/water solution you just made and the cornstarch. Wait 10-15 seconds before stirring. Rolls around in your hands once mixed until it forms a not so sticky ball. This will dry out after a couple of days but it's a fun project. You can add the food coloring with the borax/water mixture for a solid bouncy ball
or wait till the last second after you've mixed everything to create a swirly effect like the ones you buy- just don't over stir the food coloring or it will completely blend and become solid.
 Acid Based Reaction to Blow Up a Balloon:
- baking soda
- vinegar
- small funnels
- empty bottle like a soda or water bottle
Fill empty bottle(s) about 1/3 of the way full with vinegar. Use your funnel to fill your balloon about half way full with baking soda. Attach the lip of the balloon to the top of your bottle- be careful not to spill your baking soda yet. Have your child hold the balloon to the bottle and then, when you're ready, have your child lift up the balloon- dropping the baking soda into the vinegar. This creates an acid based reaction that creates carbon dioxide to fill the balloon. It's
not helium and it's pretty much the same thing as blowing them up yourself.
 Density Project:
- 1/4 c. dish washing liquid
- 1/4 c. vegetable oil
- 1/4 c. vinegar
- 1/4 c. karo syrup
- 1/4 c. honey
- 1/4 c. rubbing alcohol
Carefully pour these one at a time into a bottle, using a funnel. You want these to try to hit dead center without touching the sides. Each of these things will layer together. Seal your bottle with an air tight lid and shake it. Watch and see how long it takes each to separate, if they do.
Hot/Cold Balloon:
For this project you're learning how the air around us will expand and contract when exposed to hot and cold conditions. You could even use the balloons you blow up from the project above. Your tires do the same thing by the way, that's why it's important to know how to air up your tires.
First you'll need to measure your balloon at room temperature. A fabric measuring tape works best for this, which you can find in your sewing/fabric aisles- that's what they're normally used for. Mark down your measurements throughout the project.
Expose your balloon to heat first, a hair dryer will work perfectly for this, just point the blow dryer at the balloon for a few minutes, allowing it to heat up. Be careful with this, it may pop with the expansion. Quickly measure the balloon and mark down the measurement- it should have gotten larger.
Then, using the same balloon, pop it in the freezer for let's say 15 minutes. Take it out and quickly measure it again, it should be smaller. Then allow it to sit at room temperature for 30 minutes to an hour to make sure it's completely back to it's original temperature and measure again. Is it the same size as your first measurement? Discuss your findings with your child.

Great ideas Sis! You did some of these as a child!
ReplyDelete