Monday, December 31, 2012

The Fort, a Staple of Every Childhood

THE FORT
Everyone has built a fort at one time in their life. Whether that fort was made of blankets and chairs, the cushions off of grandma's sofa, snow or a cardboard box, everyone has built one. If they say they haven't, I would call them a liar. Forts can distract kids for a long time, that's for sure. I can cut some "windows" in a box and let the kids just draw on it with some crayons. They'll play with that box until it's almost completely broken down and I have to throw it away. Even then, I have to fight them off all the way to the trash can. I remember placing my Nanna's chairs not far from each other and draping sheets over the chair backs. That was my fort. A lot of the time my cousins and I would pile up cushions as floors and extra insulation. Forts are a great feeling for a kid, you can pretend they're anything. A fort can be a castle, a house, a tent in the deep woods, a submarine at the bottom of the ocean... anything, all you need is imagination. Children have no shortage of imagination, that's for sure.

Sure, you could go and spend the money to buy the cute little playhouses that are sometimes hard to put up and always take up space. Usually a child outgrows those pretty quickly, or loses interest. I just don't think they're worth the money. A fort can be made out of any thing, but lately I have noticed that the basic every day fort has evolved slightly. I've seen some really great ideas that we never bothered with as children. Some of us may have thought about it but most of us never really followed through. I love the different options people have thought up, most of them space saving, easy to hide and easy to put up. I've decided to share them here with you guys.

1. The Tablecloth Fort:


Aren't these so cute? The sewing skills required for this are minimal depending on how detailed you want to be. Their construction would be exceedingly simple and you could use any type of material that you like. Canvas drop cloths can be purchased for next to nothing at any hardware store, and can be dyed in your washing machine with Rit Dye. You could purchase your own fabric from a fabric store or even use old sheets! The doors in 1 and 2 are held open or closed by little ties and in 3 the creator has implemented a zipper; velcro would also work wonderfully. I especially like the detail in the third picture, the plastic on the windows is a wonderful touch. Bubba would love the cammo fort as well. The best part about this type of fort is that it can be easily folded up and put away. Remember this doesn't have to be perfect, so get to sewing!


2. The Tension Rod Fort:
These little forts are also a great idea and can be easily put away! I think whoever came up with this was a genius. All you need for this type of fort are some tension rods and cloth. You could drape the fabric over the tension rods (curtain rods) but I feel that it would easily slide off this way. I think that creating this by attaching the rod via pocket like a curtain would be the best way and very simple. You could also use curtain hooks to attach the rods, also much like a curtain. In this fort the little door is held up by velcro but when you drop it down it doubles as a welcome mat. How adorable is that? The tension rod fort can also be folded and put away or just hung up somewhere for storage.


3. The Cardboard Fort:

Cardboard is a great resource for making things for kids. The cardboard fort isn't usually as easy to put away but can also be completely free standing with no issue. You can piece together cardboard forts or just cut up a large box. I can't count how many times my friends, family and myself have spent quite a bit of money on some high rated fantastic toy and the children have had more fun with the box! The great thing about cardboard forts are that they can be as detailed or as simple as you'd like. You can go from this,
             to this....


or this....

 Yeahhhh... take one more look at that cardboard castle. Just look at that. I stared at it for at least five minutes. When looking at that fort, I feel that I have been out done in my creativity department... this picture is what has determined me to build the greatest cardboard fort ever. This idea has been so popular recently that you can even buy pre-made pre-cut cardboard houses that only need a little paint or coloring and some kids. I, however, am not going to pay over 20$ for any box. Never. I prefer the DIY get the boxes from the grocery store for free kind of playhouse/ fort.

4. The Window Shades Fort:


I love this idea because there is no real work in putting it away, it's always there, just out of sight. This concept plays off of the table cloth fort with just a little difference. This uses window shades. Unfortunately, this is the only picture I could find where someone had done this. The idea apparently came from Country Living. It's as easy as placing roller window shades beneath your table and drawing on them. I'm not sure if cutting windows or doors into a roller shade would weaken the structure but it would be worth a shot! Then, when the kids are finished with it a quick tug would pull the shade right back up- out of sight and out of mind :D


Links for more Fort Inspiration:


More Images for inspiration!

The Toddler Spy


Years ago, when I was pretty young a movie came out called Harriet the Spy. This movie was awesome and inspired me to pretend to be a spy for a while after that. I can't wait for my kids to get interested in being little spies. Bubba already really thinks he is, sneaking around and trying to see what everyone else is doing! He's always got that mischievous little grin too. They do like movies like The Great Mouse Detective, anything where Daffy Duck plays a detective, Inspector Gadget, Scooby Doo and the Pink Panther. I think that making a spy kit for them will be really interesting. Even if they don't use it for spying it could also double as a bug kit for the up close and personal inspection of bugs. Bubba loves bugs.


Here's what I would put in the spy kit:
  • a magnifying glass to "look for clues" (also good for looking at bugs)
  • a pair of plastic tweezers for picking up evidence (also good for picking up bugs)
  • a fake cell phone to call for help (I've got nothing for the bugs on this one! :))
  • flashlight for finding criminals and suspects in the dark (or for seeing bugs under stuff)
  • a cheap camera to take pictures of the criminals and crime scenes (also for taking pictures of bugs)
  • a notepad for writing down clues (or drawing the bugs they find)
  • a pair of gloves for inspecting the crime scene or not leaving finger prints (and for touching super nasty bugs)
  • binoculars to investigate from a distance (and search for bugs in trees and other high places)
  • a pair of costume glasses. You know the kind with the nose and mustache.
That's really all I would include in mine for my kids till they get a little older. When Nick (my brother) and I were kids we had a device for listening in to conversations in the next room. I'd put that in one for older kids for sure. I would also switch out the fake cell phone for cheap walkie talkies. I would also add something like a yak bak or talkboy (remember those?!). Right now the kids will most likely only use this for looking at bugs but later on I could make them a great spy kit for next to nothing! I also found a pin that was a cute game they could play now while pretending to be spies. All you need is some red or green yarn and some paint safe tape like the blue painters tape.

                                             Pinned Image

Isn't that great? It's just like the lasers from the movies! It's also pretty good exercise for the kids. I can't seem to find the original poster for that, sorry. If you know who to give credit to, just let me know!

Sunday, December 30, 2012

New Years Eve Part 4: Alchohol

Now, I really don't believe every party should have alcohol. I'm also a form supporter of the idea that you don't have to be intoxicated to have a good time. However, I do enjoy a little drink every now and then. That's very, very rarely mind you- it's hard for me to be kid free and I don't ever drink around my kids. Not even in the slightest. It seems that a lot of people do drink in some form at New Year's Eve celebrations. I thought I would go over some of the recipes here for your tamer drinks, nothing too hard or anything with too high of an alcohol content.

The Jello Mold:


This I got from the Jelly Shot Test Kitchen.  They basically layer alcohol infused jello in a bundt pan, one layer at a time and chill in the fridge. Now, I've done jello layers before and let me make sure you take note of this. Take your time with these! Let each layer solidify before adding the next one or it just won't be as pretty as this one!
Here's the basic recipe for Jello shots:
  • 3 oz Jell-O or other gelatin (any flavor)
  • 6 oz water
  • 6 oz vodka (or other distilled spirit)
  1. Pour gelatin into a bowl.
  2. Add boiling water, stirring until the gelatin is dissolved.
  3. Stir in liquor. Make sure it's not too hot when you do this.
  4. Refrigerate until cool.
  5. Pour into shot glasses, molds, or a baking pan for a sheet of Jell-O to cut up once set. Tip: The small, plastic shot cups are perfect because the drinker can just squeeze the shot out.
  6. Refrigerate until the liquid sets. (At least 2 hours, but overnight refrigeration is recommended)
  7. Serve cold.
*****Now, the above recipe is a tad strong on the alcohol content, you can adjust it with more or less****

Drunken Gummy Bears:


Did you know that gummy bears will soak up alcohol? No? Well now you do. So do gummy worms but I somehow find these less appealing. They also swell in size, as portrayed in the above picture. Drunken gummy bears are also a lot easier to make than jello shots. For this project, you'll need a glass bowl, with a lid if you have one. Fill the bowl halfway with gummy bears and then pour vodka over the top of the gummy bears, just barely covering them. You don't want to use too much vodka or they will disintegrate. Due to their size, gummy bears can only hold so much alcohol. Let them sit in the fridge over night. When you pull them out the next day you'll be able to see how much they soaked up. Drain the left overs and drink or do whatever you'd like with it.

Champagne:

Champagne tends to be a classic at New Years parties, as does wine. Both can be picked up at any store that sells liquor and spirits. Just stop by and ask the attendant for any suggestions on what to buy. Don't be afraid to ask, it's their job- they will know what to do.

Beer:

Beer is pretty common at parties these days and it comes in all shapes and forms. You can get all kinds of different beers with different flavors. Beer tends not to be that strong of an alcohol as long as you don't consume too many. Beer is also a really cheap alternative when compared to hard liquor and almost everyone that drinks will have a beer. Some people won't drink beer but odds are the same store you purchase the beer at will also have some form of wine cooler or other alcohol like the flavored Smirnoff's and the Jack Daniel's hometown punch.


As always, drink in moderation. Do not drink and drive. Do not serve alcohol to minors and please don't serve the jello shots or drunken gummy bears around children- it's an accident waiting to happen and way too appealing to our younger generations.

Saturday, December 29, 2012

Moving!

With the van broken down I have been staying with Brandon and I've only been getting to see the kids on my days off. I'm not liking that, at all. So we have been working on getting the van fixed which is a lengthy process with no money and I've been using his car. The house is a large one and one of his room mates is moving out. So, the kids and I are going to move in. The girls will share a room of course. The utility/laundry room appears to have once been a small to medium sized bedroom. We're going to move the washer and dryer to their original spot in the kitchen pantry (assuming the fixtures still work properly- ***fingers crossed***) and transforming that room into a bedroom for Bubba. Getting day care worked out for our hours has been crazy. There doesn't seem to be one single daycare that's open the hours I need it to be. I'm working on a temporary solution for now. It's just been so hectic. I've also been working on "rehabbing" the house.

There was nasty looking hard water stains and lime scale in the toilet of the main bathroom. I already took care of that. I hit it with all the name brand highly recommended products that you see on television and I scrubbed and scrubbed. It just wouldn't come off. One of Brandon's room mate's girlfriend came over and she scrubbed. Still nothing. Then I saw the one product I hadn't tried yet. Here it is:

I normally don't care what product I use, as a lot get the job done. I don't have brand loyalty with most things, but with this I do. I swear to you all I did was pour this stuff in like normal toilet bowl cleaner and walk away. Five minutes later...that's right five minutes... and all I had to do was a quick swish or two of the regular toilet brush and bam. It was clean. Sparkly. All the stains were gone. It was amazing. You know how they show you things in commercials where the user of nameless product manages to clean a hoarders type house with no effort in the span of the 2 minute commercial and it's suddenly a mansion? This stuff is like that. It's amazing. I only wish I had taken before and after pictures. Tonight I'm going to go knock out some soap scum with it. I'll let you know how that works. One of the reviewers on walmart.com said he even used it to unclog a drain! It does smell funny though... like mentos. Or wintergreen skoal. Or the love child of those two.... it dissipates quickly though.

We've also begun the process of building a small "home gym" area that is going to be amazing. I see us getting fit fast as we all tend to pick at each other and end up creating a lot of motivation with an "I'll show you" attitude. Tonight I'm going to pick up a fabric measuring tape to do measurements before we start. My Brandon and I even have a bet going on already to see who will meet the goal first. It should be interesting. I'll be posting my measurements here to let you guys know of our progresses. If the gym room continues as it is, I'd like for half of it to be a sort of play room for the kids so that they can play while we work out. Woody (Brandon's roomie that's staying) is voting for mirrors on the wall... a little self motivation, if you will. That and all the men in that house think they're God's gift to women ha ha. I am seriously considering purchasing a few of the dollar store full length mirrors to place along one wall. Cheap and effective :) I still haven't figured out what's going on with the stupid treadmill and why it won't run, but I'm still looking into it. 

I've made absolutely no progress on the clogged sink. I've tried every product known to man and at this point I think it's something to do with the vent in the roof. So, as much as I really don't want to, I think I'm going to have to get up there with the auger and clean it out. I'll be attaching some sort of mesh to it while I'm up there as well so this stops happening. I'd have Brandon do it but he's not exactly stable (an old injury) or safe. He'd end up seriously hurt, or worse. I on the other hand, have the balance of a cat and have spent quite a bit of time on a roof anyway. I also know what I'm looking for ha ha. I get irritated with people who think the man should do every thing like that. My father sure didn't believe that, he made me do just as much as he would have made a man. Geez, if it were the case that women had to depend on men to do any serious or semi serious fix, women would become extinct if our Bug Out Bags were ever needed!

Cheap and Easy Kid Science!

Being "thrifty" means a lot to me. Neither Brandon or I are making lots of money. We do a little better than minimum wage but we're not making enough to afford many luxuries. If I could, I would go to my local Walmart and purchase every single one of those DIY craft kits and science kits for my kids. Unfortunately, even though they are *cheap* they're just not feasible. I could spend that money on more important things that we really truly need. So, when I have the time, I scour the web for cheaper ways to create a good learning experience with more than just construction paper and glue. Not that I'm knocking construction paper and glue. Those two things combined have given me a little mommy time on more than one occasion.

Learning is a big deal in my house, and I love finding new ways to teach all three kids new things. At the toddler age I feel that science is the best. You can create a lot of interesting reactions that can keep their attention for hours. The important part of teaching these reactions to kids is discussing how it happened and why. In any case, if you have a toddler, they are going to want to know so try to have the correct answers waiting for them. Try to stray away from big words, and use smaller more understandable words to explain what the big words mean. I still believe in mentioning certain words like malleable and brittle for example- those are huge words to a child. I want my kids to have them in their vocabulary. They don't have to use them, just have a general understanding. I did.

Dinosaur Eggs:

These are so so much fun. Go to your local dollar store or Walmart and purchase a bag of tiny plastic dinosaurs. Then you're going to need:
  • 1 1/4 c. dirt
  • 1 1/4 c. flour
  • 3/4 c. salt
  • 1/2 c. sand
  • water
Add water slowly to your dry ingredients until it forms a stiff dough like consistency. While it's still wet form balls of the mix around the little dinosaurs, completely covering them. These should resemble rocks. Then just set them in the sun to dry and harden. You now have fossils. Bury these in sand or loose dirt and give your child a shovel and a paint brush or even a plastic sieve. Allow them to dig through to find their fossils and then have them use the paint brush and something like a screwdriver or stick to dig the dinosaurs out of their fossils. Here is a great website to help you out in explaining fossilization to your kids.

Plant Science:

This lesson is very popular with children and very easy to do though it does take a while to work. You'll need several things:
  • cotton balls
  • dirt
  • rocks (like small gravel)
  • seeds (like lima beans)
  • styrofoam cups or plastic bottles (cut an empty 20 oz. in half, I feel that these are the best because they're clear and allow for a better view of roots)
  • paper towels
  • water
ok so take your containers and line them up. You will put just dirt in one, just gravel in another, just cotton balls in another and just paper towels in the last one. Now, for your cotton balls and paper towels, wet these down before moving on, you'll want the container to be almost full when damp, leaving about an inch of space at the top. Then "plant" a lima bean in each container, about one inch deep. You'll have to shift your gravel to do this without hurting the seed. Remember that you're not putting dirt in all of these containers, just the one. Once every container has a seed planted place them in the sun and wait. After about a week (that's roughly how long it takes for a lima to sprout) check them every day with your child. Make note of which seed is growing the best. Your child may be very surprised that the seed doesn't need dirt to grow, talk about what plants need to survive and how each growing material is different.

The Naked Egg:

I remember doing this as a child, it was very very fascinating. This experience explains how acids work. All you will need is vinegar (our safe acid of choice), a container with a lid and some eggs. You could do this experiment with just one egg but I can't guarantee you that it will survive. Place your eggs in your container, making sure that they don't touch. Cover your eggs with vinegar and place the lid on your container. Bubbles will almost immediately form on the shell of the egg, this is the acid beginning to eat the shell and be sure to point out this reaction to your child. Then place the container in your fridge over night. After 24 hours pull the eggs out very carefully, rinse with water and cover again with vinegar. Note any changes in the shell with your child, and again note any bubbles. Place back in the fridge for another 24 hours. At this point the shell should be completely dissolved leaving only a rubbery membrane and the yolk- a naked egg.

Germ Farm:

warning: this experiment may just turn you into a germaphobe. It's gross. So, so gross. You are going to realize just how dirty every thing is.

I did this project in high school science but I see absolutely no reason to not do this with your child. This lesson is all about germs and how even though you can't see them, it doesn't mean they're not there. With a little bit of food and the right conditions however, you will see them with this. You will need:
  • several cotton swabs
  • flavor-less gelatin (bought easily at any grocery store)
  • small containers with lids (dollar stores sell small tupperware like containers for really cheap)
  • masking tape
  • marker
Now, make the gelatin according to the box directions and let it set. It's basically flavorless Jell-O. Now, take your cotton swabs and start swabbing different places. Only use one cotton swab for each place, do not reuse. You could swab:
  • different door handles in the house
  • the toilet
  • the bathroom sink
  • the gear shift in your car
  • the interior door handles of your car
  • the floor
  • a pets food bowl
  • a bed rail
  • keyboard
  • mouse
  • your own hands
The list goes on, you can swab anything. Now, take one of the cotton swabs and rub it lightly across your gelatin. This transfers the germs from your swab to the container. Place the lid on loosely and use the masking tape like a label to let you know which area you swabbed is in the container. Don't skip this step you're, at the very least, going to want to know what you need to spray with disinfectant. Throw the swabs away. Place the containers somewhere dark and room temprature. Under the sink or in a cabinet would be perfect. After a few days take out each container and check it. Eventually you will see things starting to grow. The bacteria and micro-organisms will feed off of the gelatin and grow like crazy. There will be all kinds of different forms of fungi and mold and in all different colors. It's morbidly fascinating. 

Volcano Explosion:

This is a lot of fun and you probably already have most, if not all of what you need already in your home. Here is what you're going to need:
  • kool-aid
  • baking soda
  • vinegar
  • glitter
  • a small vase like a bud vase
  • a baking sheet
Ok, so first take a small bowl or plastic bag and put in enough baking soda to fill the bulb of the vase 3/4 of the way full. Then add your kool-aid packet and glitter. Mix these really well and pour into your vase. Set the vase in the middle of your baking sheet and have your child pour in the vinegar, let's say a 1/2 c. and stand back. Mixing vinegar and baking soda in any application will cause a chemical reaction- making a lot of fizz and bubbles. The vase forms pressure causing the bubbles to rise to the top and pour over (this is what the baking sheet is for- easy clean up) and the glitter and kool-aid just make it pretty.


That's all I'm going to do for this post as it has gone on long enough, enjoy the experiments and comment if you'd like to let me know what happens with your child!


New Years Eve Party Part 3: the Games!

No party is complete without some fun! There are lots of fun games you could play for New Years Eve, but I usually don't see them circulating around. So I found some ideas after a little research and I'm letting you know about the best of them.

Resolution:

The more people participating in this game the better. Basically everyone at the party takes a strip of paper and writes down the funniest/craziest/strangest New Year resolution they can think of. Fold up the piece of paper and put it in a hat, bowl, or whatever you have laying around. Then you take the hat, mix up all the resolutions, and go around pulling one back out for everyone. Then each player gets to open up the resolution and read it out loud to the group. The player can also try to guess which other player came up with that particular resolution. Some resolution ideas can include:
  • I will think of some better excuses to call into work
  • I will do less laundry and use more deodorant.
  • I will try to conserve more water by taking less baths.
  • I will not tell the same story at every get together.
  • I will stop talking on my cell phone while using the bathroom.
You see how fun this could get, don't you? There could definitely be a lot of laughs with this one. Especially when grandma gets the laundry one and has to read it out loud :)

Charades of the Past:

For this game you will separate your group into smaller groups of twos and threes. People could also play this by themselves, depending on the event. Have a bag/basket/bowl ready with several events from the previous year and have each team/person draw and event. You could have a large paper drawing pad and marker set aside to use as well. Then, it's just like playing charades. Each team/person must convey the event for the previous year without saying a word. Make sure you use events that were big enough everyone or at least the majority would be able to figure it out. You could take it a step further if you wanted and hand out a prize to the team/person who guesses the most events.

True or False:

Write down each persons name at the party and beside each one of their names write down several "facts" try to make all the facts strange but have the strangest fact be the truth and the others all be false. For example, my mother hates cheese. I think this is weird. I have a friend who won't eat anything on his plate if even one thing has touched mustard. I have another friend who no one would ever guess has a tattoo. Have each guest write down a T next to the fact they think is the real one. Then, when everyone has voted sit down and go over the paper letting them know which facts were actually true. This could get really fun as long as you keep all the "facts" nice and don't tell any thing they don't want everyone else knowing.

Ping Pong Shake:

This game is a blast! All you need are some ping pong balls, a Kleenex box (empty) and some rubber bands or string. Poke a hole in roughly the same places on each square end of your Kleenex box and thread through your string or rubber bands and tape it down securely to the inside. Now, put several (3 or 4) ping pong balls in the Kleenex box and tie around a persons waist with the box in the back. The bottom of the Kleenex box should be against their clothing, the opening facing out. The box should rest on their butt. Make sure it's tied securely. Now the person wearing the box must shake their hips and butt and try to get all of the ping pong balls out. Take turns going around each player and time to see who can get all the balls out the fastest. This is guaranteed a laugh!

Thursday, December 27, 2012

A New Member of the Family!

Guess who got a new puppy for Christmas? That's right! We did, she was free. She's part coonhound part boxer and part beagle I do believe. She's very sweet and her name is Snickers or Snickerdoodle. We chose that name because she reminded Brandon's friend of a snickerdoodle cookie. She's the sweetest puppy, just barely weened from her mother. It's also been quite a long time so it really took a little trial and error to figure out what she would eat.
 
We're estimating that Snickers will grow to be a middle sized dog, around 45 to 50 pounds. Brandon has convinced himself that one day she'll be a great hunting dog. I'm convinced she just likes to cuddle and with my birthday coming up she's been a great stress relief. Check her out guys! In this picture she and Bubba have passed out from a long day of play. Let me know what you think about our new addition!


Sunday, December 23, 2012

Already Ready for Spring

I don't know about you guys but I am so ready for winter to be gone. I'm still excited about Christmas but this cold weather can just go away. For some reason today I've been thinking a lot about warmer weather and gardening. I have yet to decide whether or not I want to move in with Brandon but there is definitely some appeal in the large yard and space for a garden. I inherited a great love for homegrown fruits and veggies and the money I save doing it is also astounding. I'm really big into composting too. It's amazing for the plants and healthy for the soil as well. Plants can leach the soil of it's nutrients making it harder to grow the same thing in the same spot year after year without some kind of assistance. Fertilizers are also good for this but compost is essentially free.

If you're interested in composting the first thing you will need is a place to compost. Some people make bins out of rain barrels, some people use plastic tubs and some people make large bins out of wooden shipping pallets. Compost also needs to be moved around (turned) to agitate it, allowing oxygen in and in warmer months it needs to be sprayed down with water every once in a while. Both turning the compost and wetting it speed up the process of decay which is what you're looking for. So keep in mind that you're going to need to do these things when deciding where you want to compost and when. Don't worry though, contrary to popular belief; compost does not stink. There are rules to what you can compost and what you can't- following this will you keep you stink free.

Here are a list of just some of the things that can be composted:

  • paper (paper towels, newspaper, toilet paper etc.) shred paper or lay it out in layers
  • cardboard (old boxes, tubes, pizza boxes etc.) for larger boxes tear them up for a faster process
  • peelings and rinds (the peeling/skin off of anything is great for compost)
  • egg shells
  • coffee grounds (don't forget the filters)
  • hair (like off your hairbrush or from pet)
  • vacuum dirt (empty the canister in the pile!)
  • tea bags
  • grass clippings
  • leaves
  • stale bread crackers, beer, pretzels and cereal
  • plain pasta
  • cheese
  • old pieces of cloth cut into small pieces
  • ashes
  • Animal manure from herbivores and poultry
  • ^their bedding
  • saw dust and wood shavings
  • hay and straw
  • Flour (mix this and breads/cheeses well to avoid attracting rodents)
Create your compost pile with your lighter items on the bottom, spray down with a water hose and walk away. Continuously add more items and turn the compost once or twice a month using a pitchfork or shovel to turn the compost over and over. You won't want to turn it too much as it builds up a sort of heat beneath it that speeds up the process.

To really stretch out your compost when it's finished mix it in with potting soil or garden soil and pour into planting beds. If you use raised garden beds it's a good idea to lay down a layer of newspaper and then straw or leaves before adding your compost/soil mixture to get really good drainage.

So, there are some tips if you're interested. It's never a bad time to start composting and gardening. It helps save money for gardeners and helps the environment.

Is the New Year Here Yet? Part 2 for this Holiday!

I couldn't leave you guys with just one post about a New Years Eve party! These types of parties can be fun and a great way to spend time with friends. We covered decorations and food in the last post, but there are still so many possibilities. What about noise makers? Oriental Trading  sells lots of New Years party supplies including party poppers 10$ for a dozen, assorted noise makers at 19$ for 50, and the paper blowouts 8$ for 72 and the list goes on and on and on. You can also make these at home if you'd like a New Years type craft to do with your kids.

Here's one type of noise maker you can make yourself and have a lot of fun doing it!

Here's what you'll need:
  • a small bag of noisemakers. OT sells them as "whizzers" and you get 72 for 6.25!
  • double sided tape or elmers glue
  • colorful paper (maybe some left over wrapping paper from Christmas?)
  • streamers or pieces of ribon (left over tinsel would work awesome)
  • scissors
Directions:
  • First you'll want to roll your paper into cone shapes. I honestly couldn't think of a way to describe this but it would look something like a party hat with an open end. Here's a template that I got from here and she got it from Martha. We're not going to fold this though, hers is used for a different project. I like this one because of the scalloped edges. It just adds something to it for me :)

  • Be careful when rolling your cones as you want the small end to be large enough to fit your whizzers into, tightly.
  • Now that you have the perfect size attach your whizzers to the smaller end with glue or tape
  • Fold your sides (the flat ones) around to meet each other, again making sure that the paper wraps snugly around the whizzers, and glue or tape the seam down so that you have your basic shape.
  • After letting your noisemakers dry take your streamers, ribbon or whatever you'd like and glue or tape them around the circumfrence of the larger end of your noise maker. The streamers/ribbon/whatever should be hanging out of them and then just blow into the end with the whizzer and you're done!
They should end up looking something like this:


The same concept can be applied to party hats, they're just a paper cone only the tinsel would be applied to the smaller end of the hat. Stretchy elastic can be tied onto the larger ends with slack (through holes made with a basic hole punch) to hold onto peoples heads. Both of these projects are also great for birthday parties!


Happy New Year!

I feel that I really missed out on my chance to get out all my Christmas decor and craft ideas so, I have decided I'm really going to go all out with New Years. Not everone celebrates New Years but some people do and it's really a great idea. I think that some people don't like to celebrate it because they don't drink and don't want to. That's ok, it's your party, you don't have to serve something you're not going to consume. These are the rules with being a host(ess) in my opinion: Do what you want. It's your venue, your money, your work, your everything so do what you want. If they don't like it, they can find the way out just as quickly as they found the way in, right? Who really gets offended by what's served or not served at a party anyway? If you do... you need to see a therapist about your control issues. Rambling again? Ok...moving on...

Most people want to decorate for their New Years Eve party, but they don't always have a lot of money or any inspiration. I've found that New Years is on my list of parties that not very many people come up with creative ideas for. I have searched and searched however and have found a few.

Decorations:

First of all let me say stop it to the people using gold, green and purple. Just stop it, now. Those are Mardi Gras traditional colors. Most people tend to decorate in gold and silver, black and white, or any mixture. There are several popular themes that I've seen- mainly clocks and numbers. Here are some templates for clock faces or you can copy an image from Google images (search: clock face template and copy and paste the one you want). You can also group dollar store (or thrift store!!!!) clocks as centerpieces and use them as gifts at the end of the party. Baloons and streamers are also a popular decoration as they're cheap and very versatile. Sparklers can be bought online here and used in a lot of places with decorations. Really cheap decorations can also be purchased at www.orientaltrading.com .
 New Year


Foods:

There are lots of foods you can use to celebrate that still have a New Years Eve kind of theme. Fortune cookies are very popular for this particular celebration and can be bought cheaply at Wal-Mart. You can dress these up by dipping them in almond bark and then candy if you'd like. I've also seen clock cakes, which are just your basic cake with a clock face iced on the top. Cookies can be decorated the same way. If you are serving alcohol you might want to keep the food to a minimum, serving just appetizers which are highly appropriate in this type of social gathering anyway. Dollar stores sell packets of several champagne glasses for dirt cheap and these can be filled with anything. If you're using metalics fill them with Hershey's kisses. Use a sharpie or permanant marker to draw numbers on the outside of the glasses, like the ball drop countdown. Coincidentally, cupcakes look amazing on top of candies and fit well in those glasses- especially with an added spark from sparklers in the cupcakes. As far as drinks go you can serve anything you'd like. If you want to give the look of serving alcohol you can use sparkling juices. Fill a galvanized tub with ice and stick in several bottles of sparkling juices and ciders.


Lucky Food:

If you really want to have fun with your food you can go all out and serve traditional "lucky foods"
  • Ring shaped cakes are on the list as they represent how the year has come full circle. Donuts would work well here.
  • Dumplings- the asian kind. They represent the currency china used to use and represent hope for a good fiscal year.
  • Fish- In China, a whole steamed fish symbolizes a long and healthy life and oysters and prawns are lucky, too. In Poland, one serves pickled herring at midnight; in Italy, dried salt cod stars in a variety of holiday dishes; and in Germany, you simply can't celebrate the day without noshing on carp, which often appears in a stew. Germans take it one step further, though — many tuck a few carp scales into their wallets afterward to keep from running out of money in the following year.
  • Grapes are popular in Spain. You're apparently supposed to pop one in your mouth with each chime for luck.
  • I saved my favorite for last black eyed peas and collard greens. I'm from the south and dishes like Hoppin' John are popular. There are also ways to make Hoppin' John with the greens in a crock pot.
So take a second thought about throwing a New Years party. I hope I was able to give you some inspiration and have a great day!

Saturday, December 22, 2012

6 More Pinterest Pins That Don't Work

Hmmm, I hate it when I go to click a Pin to find out it doesn't work or is just spam. Here are some more that I have had problems with.

1. The "lotion" bars from "my yellow umbrella". When I click these Pinterest tells me it's blocking the link due to spam or inappropriate content that could harm my computer. Ugh!

2. The Pet Odor Remover Recipe.The picture is of a spray bottle with green liquid in it. The link does take you to a safe site and the maker of the recipe- you just have to buy the recipe. I'd rather not, I was under the impression it was like many of the other blog type sites that have free recipes.

3. the glue top on an acrylic paint bottle. Theorettically this could work but it's going to be runny and kind of drippy as it will come out thicker than most people would like.

4. The peppermint candy trays. I was over at Pinstrosity reading about this one. It seems that you have to watch the candies very very closely as they soon melt out too far and look terrible after not seeming like they were going to melt at all.

5. Anything that involves hot glue or spray paint on styrofoam is going to mess up. It just doesn't work well at all. By "doesn't work well" I mean that the majority of the time you're going to end up with melted styrofoam.

6. Double sided tape on candles with glitter. Avoid candles and glitter unless you tend to cover your candle. Glitter wants to stick all over the wax and is a real pain to get right.

Friday, December 21, 2012

A Creative Snowman


Building a snowman can be lots of fun! I love to see people get creative and I love getting creative myself. Here are some ideas for a snowman.

I really like "Snowman Kits". The one in the picture to the left can be built. The link will take you to the blog of the creator who made these at a social get to-gether. This is a great idea for a snow themed party as well. I have yet to get to do this but the basic idea is to make all the pieces you'll need for your snowman with sculpey clay, insert dowel rods and bake. This is a great idea though I would really like to sit down and make several kits for my family so that we can mix and match! Here's a recipe for homemade sculpey clay (should have known I'd find one!):
  • 2 cups cornstarch
  • 2 cups baking soda
  • 1 1/4 cups cold water
  • Combine cornstarch and baking soda in a saucepan over medium heat.
  • Stir in cold water, slowly. The mixture should be smooth.
  • Knead the mixture when it is warm or cooled. Add food color or dye at this stage if desired. Work the color into all parts of the clay for an all-over color or partially for a two-toned design. The clay is now ready to be shaped and then baked in the oven.
  •  Or, here's another recipe that- while a little more difficult- appears to have better reviews:

  • 1. Combine in a Teflon-coated pot:
    • 1 cup polyvinyl acetate glue such as Elmer's Glue-All
    • 1 cup cornstarch
    • 2 tablespoons Vaseline oil (not jelly) - if unavailable where you live, substitute baby oil or pharmaceutical grade mineral oil
    • 1 tablespoon lemon juice.
  • 2. Cook on low heat stirring constantly for 10 minutes or until dough forms and begins to come away from the sides. If you have a gas stove, you may need to use a heat diffuser under the pot to avoid burning the dough.
  • 3. Remove from heat and allow to cool until you can handle it.
  • 4. Knead into a smooth clay consistency.
  • 5. Store in a cool, dark place as noted in tips above.
  • 6. Tempura powder or acrylic paints may be used for coloring the dough.


  • This also warns to expect shrinkage of around 30% so make these a little bigger than you'd like them to be. When dry and cooled be sure to use a clear varnish to add extra protection from the elements. Felt could also be used with hot glue to attach to the dowels though I'm honestly not sure which would last longer. Not feeling creative? You can buy snowman kits online.

    Here are some more ideas for the snowman parts that could also be glued to dowels for more kit ideas!

    Snowman eyes can be made out of:
    • Felt
    • large craft store buttons
    • rocks painted however you'd like
    • clay
    • coal
    • nuts
    Snowman noses can be made out of:
    • fake carrots from the craft store
    • clay carrots
    • a painted cone shaped block
    • painted rocks
    • coal
    • large buttons
    • nuts
    Snowman mouths can be made out of:
    • felt
    • clay
    • painted rocks
    • coal
    • nuts
    Snowman arms can be made out of:
    • brooms
    • branches
    • shovels
    • snow
    • spatulas
    • Don't forget the mittens!
    Store these in a pretty box with different scarves and hats- scarves can be made by simply using a long piece of felt and both hats and scarves can be bought really cheaply at thrift stores and yard sales. You could use a mop head or icicles for hair if you wanted. You can even (very carefully) make your snowman upside down! Once I saw a picture of a snowman made around a bicycle so that it looked like it was riding the bike.

    The ideas are endless, have fun and take pictures so that you can remember the good times!

    Snow Activities for Children

    It doesn't look like we're going to get to see snow this year. It sort of flurried the other day but it was one of those snows where you had to be in it and paying attention to notice. I was really looking forward to snow. The older the kids get the more I want to get them out in it, doing activities. I've got lots of ideas for snow activities and I thought I'd share them here with you.

    Snow Painting:
    Fill small squirt bottles (think like the condiment bottles in restaraunts) with water and food coloring or small amounts of paint and shake. Go outside and squirt in the snow to make pretty patterns.

    Snow Ornaments:
    These aren't actually made of snow. Fill baloons with water and food coloring and freeze. When they're fully frozen cut/tear the balloon off and take outside to decorate the yard.

    The Snow Fort:
    Everyone has their own method to do this. I like two methods. The hard way being to pack the snow into block or brick type shapes and stack them, if you're strong enough you can make huge bricks by packing the snow into a cooler and then flipping to lay out the block. Or the easy way, continuing to pile and pack snow until you have walls, cover in something flat and then pile more snow on top of that. You could also paint the snow with a spray bottle and "snow paint".

    Snowball Fight:
    Everyone loves a snowball fight! It's even better when you have forts to hide in and pelt each other. Playing capture the flag is also an awesome game to play in the forts using snowballs as ammo.

    Build a Snowman:
    This is another classic! You could go anywhere with this, even snow sculptures depending on your creativity. Basically a snowman is two or three balls of packed snow stacked on top of each other, the top one being the head and the largest being on the bottom. You can  use any thing to decorate your snowman. I'll make a post about that.

    Snow Angels:
    To make a snow angel you lay flat in the snow with your arms and legs laying out and then you move them back and forth, much like a jumping jack. When you stand your imprint in the snow will resemble an angel.

    Sledding:
    Sleds can range from free to cheap to there-is-no-way-I'm-paying that much at a lot of stores. Free options are laying around your home already. My brother and I have used pool floaties, trash can lids and pieces of cardboard.

    Shake a Tree:
    Laugh all you want, but this is fun. Stand under a small tree (deciduous trees work best), grab the trunk or a limb, and shake it as hard as you can.

    Snow Cream:
    This is my all time favorite thing to do, snow cream is delicious! Here's the recipe.
    1 gallon snow

    You Don't Have to Buy that!


    OK, so my posts about spa recipes and my post about homemade household cleaners seemed to be pretty popular. I guess that it's actually saving money that's pretty popular! So I thought I would make it a trilogy! Today I'm going to give you guys some recipes for things you never realized you were spending so much money on! If you don't know already, homemade is always better. Even the jars above are homemade- DIY all the way! The link to them is at the bottom of this post!


    Homemade Nesquik Recipe
    2/3 C Sugar
    1/3 C Cocoa
    Pinch of salt

    Combine the three ingredients and store in a sealed container.

    Homemade Bisquick Recipe
    3 1/4 cups unsifted all-purpose flour
    1/2 cup sugar
    1 cup nonfat dry milk powder
    1/2 cup cornstarch
    1 tablespoon baking powder
    1 teaspoon baking soda
    1 1/2 teaspoons salt

    mix and store in a sealed container

    Eagle Brand Condensed Milk
    3/4 cup powdered milk
    3/4 cup sugar
    1/2 cup hot water
    Blend until smooth.

    This recipe equals one can of store bought condensed milk.

    Homemade Brownie Mix
    1¼ cups all-purpose flour
    1 teaspoon baking powder
    1 teaspoon salt
    ⅔ cup unsweetened cocoa powder
    2 cups white sugar

    mix and store in an airtight container. When you're ready to use this, add 1 cup melted butter or margarine 3 eggs 1 tsp vanilla and bake at 350 degrees Fahrenheit till done.

    Homemade Muffin Mix
    2 cups flour
    1/4 cup sugar
    1 Tbsp. baking powder
    1/2 tsp. salt

    mix in air tight container.When you're ready to use this add any special additions (like blueberries, chocolate chips, nuts etc.) first then add 1 egg, beaten 1 cup milk and 1/4 cup oil.

    Seasoned Salt
    8 Tbsp. salt
    1/2 Tbsp. onion powder
    3 Tbsp. pepper
    1/2 Tbsp. garlic powder
    2 Tbsp. paprika

    Homemade Taco Seasoning same link
    6 tsp. chili powder
    3 tsp. onion powder
    4 1/2 tsp. cumin
    2 1/2 tsp. garlic powder
    5 tsp. paprika
    1/4 tsp. cayenne pepper
    1/4 tsp. oregano
    Mix all ingredients and store in an airtight container. One teaspoon of homemade taco seasoning equals 2 teaspoons of the store-bought seasoning.

    Italian Seasoning same link
    1/4 cup dried basil
    2 Tbsp. dried thyme
    2 Tbsp. dried marjoram
    2 Tbsp. dried rosemary
    2 Tbsp. dried oregano
    2 tsp. garlic powder
    2 Tbsp. dried coriander
    1 tsp. sugar
    Combine all the ingredients. Store in an airtight container in a cool dark place for up to 3 months.

    Homemade Cajun Seasoning
    1/2 cup paprika
    1/3 cup Himalayan Salt or sea salt
    1/4 cup Garlic Powder
    2 Tablespoons Black Pepper
    2 Tablespoons Onion Powder
    1 Tablespoon Cayenne Pepper (optional- won’t be spicy without this)
    2 Tablespoons Oregano leaf
    1 Tablespoon Thyme leaf
    To Make: Mix all ingredients in jar or food processor and store in an airtight container. Good on stir frys, eggs, casseroles, and poultry. Can add more or less Cayenne to get to your taste.

    Homemade Lemon Pepper Seasoning
    Zest of 3 lemons, about 1 -2 tbsp
    Crushed black pepper, 2-3 tbsp
    Sea Salt, 1 tbsp
    Preheat toaster oven to lowest setting.
    In a large bowl, combine lemon zest and black pepper.  Cover metal pan fitted for toaster oven with foil and spread mixture evenly in pan.  Allow to bake low and slow until zest is completely dried.  Mine took about 26-30 minutes.
    Transfer lemon-pepper mixture to a bowl.  Using the back of a spoon (or spice grinder if you have one), crush mixture until desired texture is achieved.  Mix in salt, 1 tsp at a time.  Continue to add salt until you have the right balance to fit your taste.

    Homemade Fajita Seasoning
    3 Tbsp. cornstarch
    2 Tbsp. chili powder
    1 Tbsp. salt
    1 Tbsp. paprika
    1 Tbsp. sugar
    2-1/2 tsp. crushed chicken bouillon cube
    1-1/2 tsp. onion powder
    1/2 tsp. garlic powder
    1/2 tsp cayenne pepper
    1/4 tsp. crushed red pepper flakes
    1/2 tsp. cumin

    mix and store this is about the quantity of 3 commercial packets.

    1 tbsp flour
    2 tbsp minced onion
    1 1/2 tsp chili powder
    1 tsp salt
    1/2 tsp crushed red pepper
    1/2 tsp minced garlic
    1/2 tsp sugar
    1/2 tsp ground cumin

    this recipe is enough for 1 pound of ground beef

    2 Tbsp dried parsley
    1 tsp dried dill
    1 tsp garlic powder
    1 tsp onion flakes
    1/2 tsp dried basil
    1/2 tsp pepper

    mix and store. When you're ready to use this whisk together 1 TBS of Mix , 1/3 Cup of Mayonnaise ( or 1/3 cup non fat Greek yogurt)  and 1/4 Cup of Milk. Add salt to taste.

    PS: You can make your own spice jars for the above spices. If you like the ones in the picture you can find out how to make them yourselves at Well it's Okay, another awesome blog!

    That's it for now, I hope you guys enjoy these! Always remember to label clearly and don't forget to label how much you need to scoop if you make more than a single batch and what to add to that! Label label label!

    More Pictures! I Saved Alot of Money Too!

    Sorry it took so long to post! I've had a rough couple of days- still trying to get the van fixed and the kids found their Christmas presents! Still not sure what I'm going to tell them about that.
    Something else I've been busy doing is getting the Christmas pictures done for this year. I used garland, Christmas tins, and a small Christmas tree for props. For my backgrounds I used a red quilt and an old tablecloth. I do have a few more tips.
    Tips:
    • Use good lighting, it really makes a difference. If you can get good lighting, use that instead of the flash. A flash tends to crest shadows you don't want.

    • If you're subject is children be prepared to take a lot of pictures. As quickly as possible. Children are hard to get pictures of as they hardly ever stop moving and they don't understand what's going on.

    • Use a distraction. A bell, a rubber duck and a favorite stuffed animal all are good. It will help get the kids or any subject by giving them something to look at. It's also good to get small children's attention.

    • Try to use symetrics. Tallest in the middle or even largest to smallest. The tallest child should be in the back.

    • With full body photos of adults try not to just let them face you- it looks like a mug shot. The slightest turn will make a difference there.

    • Don't let the bottoms of shoes be visible in the pictures. Trust me on this one.

    • Try not to get much bare wall in your pictures. This is the biggest problem I see- people get too far away before snapping the pictures.

    • Experiment. You'll get the hang of it. You'll be able to tell what you like and don't like. Pictures are all about the people they're for. What do you like? I can't stress this enough with the editing software either- just experiment around and figure out what does what. Don't save your changes and always use pictures you don't like- blurry ones or eyes closed- to practice on.

    Monday, December 17, 2012

    Make My Spa! Homemade Recipes!


    The type of recipes I'm going to showcase in this post will be your basics soaps, lotion bars, etc. meant for use on humans in the shower or bath. I'm all about being frugal and the ability to make your own products of this type can really save you a lot of money in the long run!


    Eye Makeup Remover

    1 c. water
    1 1/2 TBS tear free baby shampoo
    1/8 tsp baby oil

    mix and shake before each use.

    Pore Cleaning Strips

  • 1 Tablespoon Unflavored Gelatin
  • 1 1/2- 2 Tablespoons Milk {any kind}

  • Measure 1 Tablespoon of unflavored gelatin into a disposable container Add 1-2 Tablespoons of milk into the gelatin
    Mix it up, and be quick about it, until you get a chunky consistency.  Add more milk if you’re uncomfortable with the amount of chunk.
    Microwave the gelatin for about 10-15 seconds.  It will get creamier in the microwave.  Stir that around and start applying it immediately to your face.  This stuff hardens fast so you’ve got to act fast.

    Shaving Lotion

    1 c. conditioner
    1 c. shampoo
    5 TBS lotion
    5 TBS baby oil
    mix and let sit an hour before using

    Lip Gloss

    1 teaspoon paraffin wax
    4 teaspoons coconut oil
    4 teaspoons petroleum jelly
    4 white or pink (or whatever color you like) candy melts
    1/2 teaspoon oil-based candy flavoring

    Grate the wax into a ziploc freezer bag. Add the coconut oil, petroleum jelly, candy melts and the flavoring. Place the bag in a bowl of very hot water and allow the ingredients to melt together. Massage the bag a bit to mix the ingredients together. Snip a corner from the bag and squeeze the ingredients into small containers. Pop your lip gloss containers into the fridge to cool completely.

    Bath Fizzies
  • Baking soda
  • Cornstarch
  • Citric acid
  • Spritzer bottles
  • Food coloring
  • Glass bowl
  • Essential oil
  • Baking molds


  • 1. Sift 1 3/4 cup baking soda, 1 cup citric acid, and 2 cups cornstarch through a sieve to remove chunks. To make different tints, fill small spritzer bottles with water and add about 6 drops of food coloring to each. 
    2. Pour 1 cup of powdered mixture into a glass bowl. Lightly spritz, stirring after each spritz, until powder is desired color. Add water slowly, so mixture does not fizz. If mixing two tints, alternate colors as you spritz. Check the consistency of powder with your fingers; when it can be tightly packed or shaped, stop spritzing (this may take a little while). 
    3. Select an essential oil. Add 5 drops if it's one of the stronger scents (peppermint, lavender), 6 if it's a weaker one (lemon, grapefruit). Mix well. Firmly pack mixture into small baking molds. We used 1/4 cup for each fizzy, which is good for one bath. Allow mixture to set for 2 hours, then pop out carefully. Repeat with different tints for remaining powder.


    Sun Block
    • A double boiler or saucepan with a metal bowl slightly larger that will sit on top
    • A wire whisk
    • A receptacle to hold your sunblock like this one
    • A Kitchen Scale if you want to be precise
    • Gloves and a mask
    • 3 oz. Coconut Oil
    • 1 oz. Beeswax
      (for waterproofing properties)
    • 1 oz. Cocoa Butter (100% cocoa butter can be found in the ethnic beauty section of the grocery store)
    • 2 oz. Almond Oil
    • 1.5 oz. Aloe Vera Gel or about 4 large aloe leaves
    • 1.5 oz zinc oxide powder
    1. If you have an aloe vera plant, you can make your own aloe vera gel by scraping the innards of a few leaves. Just run the very tip of your knife along the length of the aloe leaf being careful to only cut one side, don’t cut all the way through. Separate the leaf with your fingers so it will lie flat. Holding the dull side of the knife against the leaf, starting in the middle, pull the leaf under the knife blade, scraping off the gel. Turn it around to get the other side. If you purchase aloe vera gel, you can skip this step.
    2. Fill your saucepan or double boiler pot with about an inch of water and start it heating on the stovetop. Meanwhile, measure the oils into the metal bowl or top part of the boiler, along with the beeswax and cocoa butter.
    3. When the water starts to boil, turn the temperature to med-low and put the bowl on top. This way the steam from the pot underneath will slowly raise the temperature of the bowl and melt the oils and wax.
    4. When the oils and wax are completely melted, remove the bowl from the heat and quickly whisk in the aloe gel and the zinc oxide powder (are you wearing your mask?). Continue to whisk until the mixture cools and thickens.
    5. Let the sunscreen cool completely before transferring it to your chosen receptacle. A piping bag or zip top bag with the corner cut off helps with this process. Using the chart below, this will result in a sunscreen with an SPF of about 12-19. As the summer progresses, I will make it with less zinc oxide and apply it more sparingly, so I can absorb some more of that oh, so important,  Vitamin D.

    Toothpaste
    1/4 cup baking soda
    1/4 cup vegetable glycerin
    1 Tbsp castile liquid soap
    A few drops peppermint, anise, wintergreen essential oil, optional
    dash of stevia or  xylitol

    combine and store does not need to be refigerated and just a dab will do.

    Crockpot Soap
    I'll let you click the link on this one. It's easy, don't panic, but a lengthy discription.

    Shampoo
    • 1 cup distilled or spring water
    • 2 tbsp. dried herbs or ¼ cup fresh herbs
    • ⅓ cup liquid castile soap
    • ¼ tsp. vegetable oil
    • 25 drops essential oil
    • 1 tbsp. additive of choice, optional
    Directions:
    1. Bring the water to a rolling boil in a glass saucepan. Remove the pan from the heat, add the herbs, cover and allow the mixture to steep for 15 to 20 minutes.
    2. Strain the herbs from the liquid and discard the plant material in the compost pile or garbage bin. Allow the liquid to cool completely.
    3. Stir the liquid castile soap into the cooled liquid, then add the vegetable oil, essential oil and additives, if using. Transfer the shampoo to a plastic bottle with a flip-top lid.
    4. Store the shampoo in the shower and shake well before each use. Keep in mind that this shampoo works gently and will not produce much lather. However, it will leave your hair clean, shiny and healthy.  
    ***the link has more info on what types of herbs to use if you're unsure as to what you like.

    1 part vegetable shortening
    1 part vegetable oil
    1 part beeswax
    Melt the shortening and beeswax a double boiler or a little pan in a bigger pan of simmering water. Stir in the vegetable oil. Pour into cups/molds and let cool. Pop out of “mold” and it’s ready to use. The beeswax will fragrance the bars with a nice, light honey smell, or you can stir in a little essential oil before you pour it into the molds.

    Anti-Frizz Hair Serum

    4 ounces Camellia Oil
    1/2 ounce Castor Oil
    1/2 ounce Unrefined Avocado Oil
    25 drops Essential oils for scent

    Choose a natural, organic essential oil according to the healing properties desired. Use myrrh or peppermint for dry hair, lavender or rose oil for fine hair to normal hair, or add lemon or chamomile for golden highlights. Avoid using synthetic oils.
    Combine all ingredients in a DARK GLASS bottle (sunlight is damaging to all oil types). Shake well before each use. Apply a small amount to damp hair before blowdrying or apply a very small amount to dry hair for smoothing and shine.

    Hair Clarifier
    • 2 tablespoons shampoo (either homemade or store bought)
    • 1 tablespoon baking soda
    While you're in the shower, bring along the box of baking soda with you.

    Measure out approximately 1 tablespoon of baking soda and add it to twice as much shampoo in your palm.
    Use the shampoo as you would normallypads of your fingertips to give your scalp a thorough massage.
    Rinse very well with cool water, and then condition as normal.
    The baking soda should help remove build-up, naturally!

    • 1/2 cup coconut oil
    • 1/2 cup shea butter, cocoa butter or mango butter (or a mix of all three equal to 1 part)
    • 1/2 cup + 1 tsp  beeswax
    • optional: Vitamin E oil to preserve. I added 1 tsp vitamin E oil for  this recipe)
    • 3 tablespoons baking soda (Omit this if you have sensitive skin and just use extra arrowroot)
    • 1/2 cup organic arrowroot powder
    • 2-3 capsules of high quality probiotics that don’t need to be refrigerated
    • optional: Essential oils of choice – I used about 20 drops of lavender essential oil
    Combine coconut oil, shea (or other) butter, and beeswax in a quart size glass mason jar with a lid instead and place this in a small saucepan of water until melted. This will save your bowl and you can just designate this jar for these type of projects and not even need to wash it out…
    bring water to a boil
    Stir ingredients constantly until they are melted and smooth
    Remove from heat and add the vitamin E oil, baking soda, arrowroot powder, probiotics, and essential oils. Make sure the mixture is not hot to the touch (warm is ok) so that the heat doesn’t kill the probiotics.
    Gently stir by hand until all ingredients are incorporated.
    If you will be making these into bars, pour into muffin tins or other molds while still liquid. If you will be putting into an old deodorant container to use like stick deodorant, let the mixture harden for about 15-20 minutes at room temperature to harden and when it is about the consistency of peanut butter, use a spoon to scoop into the deodorant tube and pack down to fill. Then, leave the cap off overnight to completely harden before using.

    Dry Shampoo
    cornstarch, cornmeal, baking soda or ground oats.
    essential oil of choice (optional- for smell only)

    Feel free to mix if you'd like but the list is intended to pick one of these. Put in a shaker and sprinkle onto hair. Use your fingers to scrub in and run down the length of your hair. Then with a fine-bristled brush, briskly brush the powder out of your hair. ******this link shows before and after pics of the use, by the author. Rave reviews are in the comments!


    If you want to purchase bottles online instead of reusing old ones here and here are websites that sell all kinds.


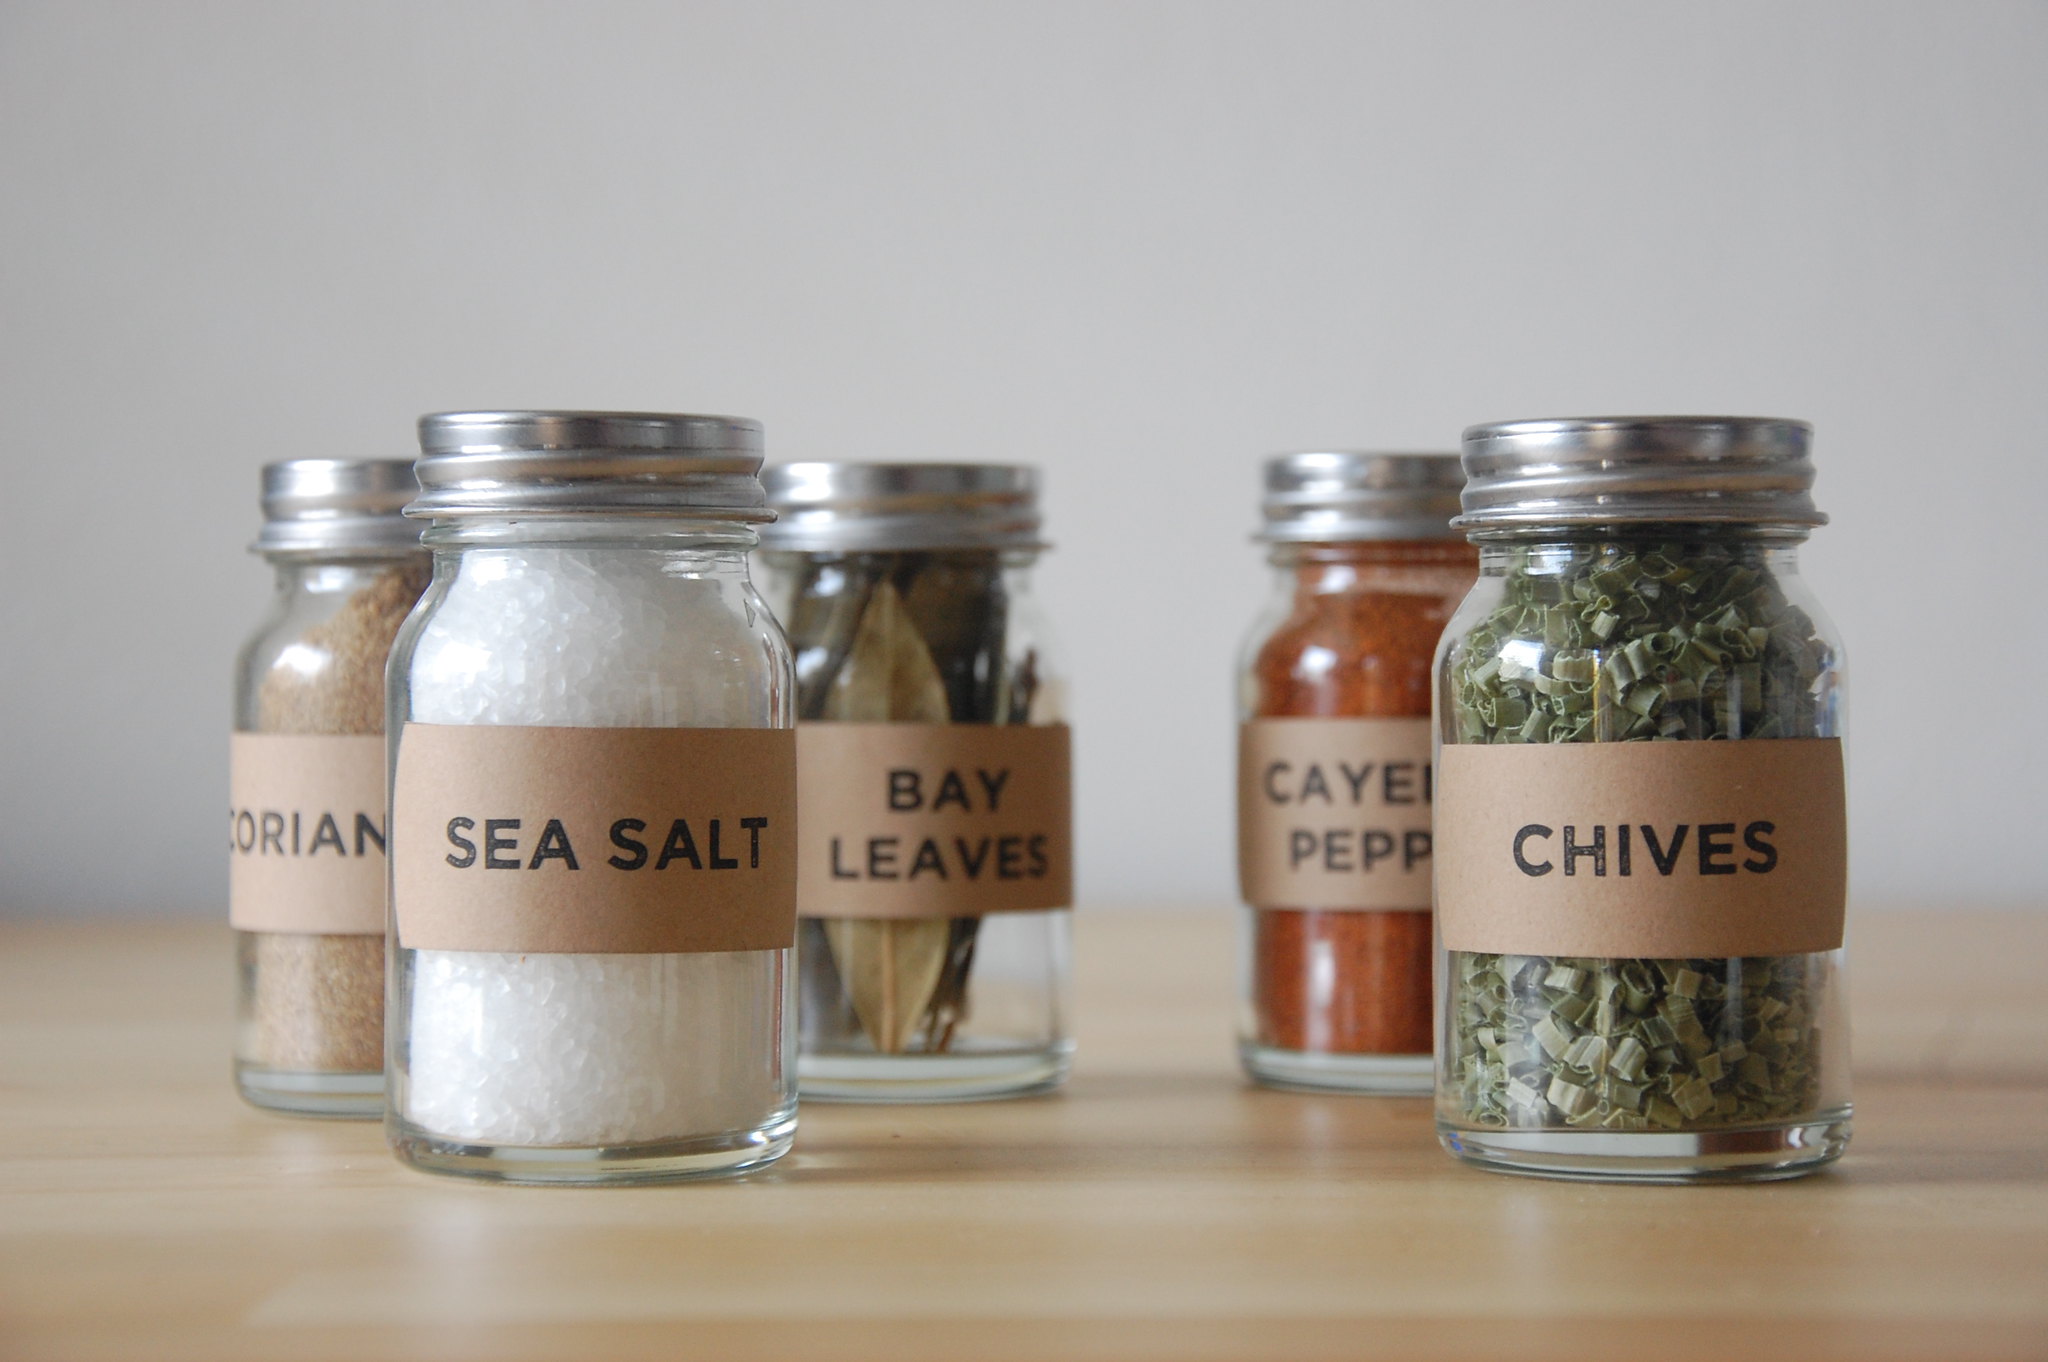
    WARNING: always clearly label these and keep them out of reach of children!


    Again, all my recipe titles double as links to the original poster's sites and blogs. Get over there and show some love!